Author: discovery7090

  • The Oxygen Sensor: The Tiny Part Quietly Draining Your Fuel Budget

    The Oxygen Sensor: The Tiny Part Quietly Draining Your Fuel Budget

    Every week I get at least one customer standing next to their car with a printed sheet from the auto parts store’s free code scan, squinting at the words “O2 Sensor Circuit Malfunction” like it’s written in another language. Most drivers have never heard of this part until it fails, and by the time it does, they’ve usually already been burning extra fuel for weeks or months without realizing it. It’s one of the least glamorous components in your engine bay, but I’d argue it’s one of the most quietly expensive ones to ignore, because unlike a squealing brake or a rattling heat shield, a failing oxygen sensor doesn’t announce itself loudly. It just slowly bleeds money out of your wallet every time you fill up.

    What an Oxygen Sensor Actually Does Under the Hood

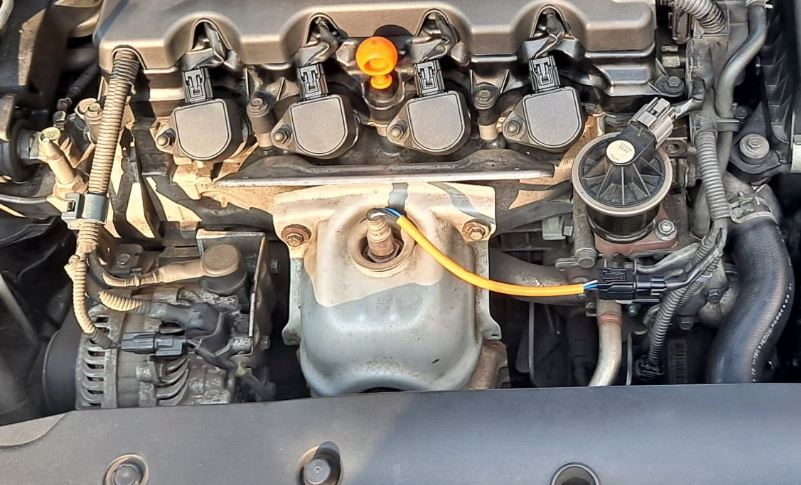
    Your engine’s computer, officially called the ECU (Engine Control Unit, essentially the car’s onboard brain that constantly adjusts engine settings in real time), needs to know exactly how much unburned oxygen is left in your exhaust after combustion happens. That’s the oxygen sensor’s entire job. It’s a small, spark-plug-sized component threaded directly into your exhaust pipe, usually with one positioned before the catalytic converter and another after it on most vehicles built in the last two decades. The upstream sensor measures the raw exhaust coming straight out of the engine and reports back so the ECU can fine-tune the air-fuel mixture in real time, hundreds of times per minute. The downstream sensor, positioned after the catalytic converter, monitors how efficiently that converter is doing its job of cleaning up emissions.

    When I hoist a car up on the lift and pull an old oxygen sensor for inspection, the visual difference between a healthy one and a failing one is honestly pretty dramatic once you know what you’re looking at. A healthy sensor tip has a light grayish-tan coating. A failing one is often caked in either a thick black sooty buildup, which tells me the engine has been running rich for a while, or a white, chalky, almost crusty deposit, which is a classic sign of coolant or oil contamination leaking into the combustion chamber and coating the sensor tip. Many drivers overlook this, but from a mechanic’s perspective, the real critical point is that the sensor itself doesn’t usually fail instantly—it degrades gradually, and its response time slows down years before it throws an outright fault code. A slow sensor is arguably worse than a dead one because the car keeps running, keeps passing basic checks, and keeps quietly wasting fuel without ever triggering a warning light until things get considerably worse.

    The Fuel Economy Drain Nobody Notices Until the Tank Runs Out Faster

    Here’s where this part becomes a genuine financial issue rather than just a technical curiosity. When your upstream oxygen sensor starts responding slowly or reporting inaccurate readings, the ECU can’t fine-tune your air-fuel ratio properly. In most failure cases, the sensor reports a falsely lean signal (meaning it’s telling the computer there’s more unburned oxygen present than there actually is), and the ECU compensates by dumping in extra fuel to correct for a problem that isn’t really there. That’s a rich-running condition caused entirely by bad sensor data, and it can quietly cost you anywhere from ten to twenty percent of your fuel economy without a single dashboard warning light coming on, especially in the early stages of sensor degradation before it’s bad enough to trigger a code.

    Just last week, a client brought in a Toyota Camry that had gone from averaging around 32 miles per gallon on the highway down to what she estimated was closer to 26, but she had no check engine light and assumed it was just “getting older” or maybe her driving habits had changed. When I ran live data with my scan tool while the engine was running, I watched the upstream oxygen sensor’s voltage signal switch sluggishly, taking nearly two full seconds to swing between rich and lean readings when a healthy sensor on that engine should be cycling multiple times per second. That sluggish switching pattern is something you genuinely cannot see with a basic code reader — you need live data streaming to catch it, which is exactly why so many of these problems go undiagnosed at quick-scan chain stores that just pull codes and hand you a printout. We replaced both upstream sensors for right around $180 in parts plus labor, and she called me two weeks later just to tell me her fuel economy was back where it used to be.

    What would you do if you noticed your car needing gas visits more frequently than it used to, but nothing else seemed obviously wrong? Most drivers chalk it up to gas prices or a change in their commute. In my experience, it’s vital to actually pay attention to your miles-per-tank trend over a couple of months, because a gradual, unexplained drop is one of the earliest and most reliable warning signs of oxygen sensor degradation, often showing up well before any warning light does.

    Why a Failing O2 Sensor Eventually Threatens Your Catalytic Converter Too

    This is the escalation risk that turns a $90 sensor replacement into a $1,500 repair bill, and it’s the part I stress hardest to customers who try to put this off. When the upstream sensor keeps feeding bad data and the ECU keeps overcompensating with extra fuel, that unburned excess fuel eventually makes its way downstream into the catalytic converter, the same emissions component I mentioned briefly in an earlier column, which uses precious metals to chemically treat exhaust gases. Catalytic converters are built to handle properly combusted exhaust, not raw gasoline. Repeated exposure to that unburned fuel causes the converter’s internal honeycomb structure to overheat and eventually break down internally, sometimes to the point where you can literally hear loose ceramic fragments rattling inside the converter when you rev the engine.

    Back when I was an apprentice mechanic, one of the biggest trial-and-error mistakes I made was replacing a catalytic converter on an older Honda Civic without addressing the upstream oxygen sensor that had actually caused the converter failure in the first place. Within about four months, the customer was back with reduced power and the exact same symptoms, and the brand-new converter I’d installed was already contaminated because the root cause was never fixed. My shop manager at the time made it very clear that from then on, any converter replacement had to come with a full upstream sensor inspection first, and that policy has saved plenty of comeback repairs over the years. The lesson is simple: an oxygen sensor is cheap insurance for a converter that absolutely is not cheap.

    [O2 Sensor & Related Component Cost Comparison]

    ComponentTypical LifespanApprox. Repair CostConsequence of Delay
    Oxygen Sensor (each)60,000–100,000 miles$80–$250 (parts + labor)Reduced fuel economy, rough idle
    Catalytic Converter100,000+ miles (if not damaged)$1,200–$2,500Loss of power, failed emissions test
    Spark Plugs (related strain)Varies by type$80–$250Compounds misfire and rich-running symptoms
    Air Filter (contributing factor)15,000–30,000 miles$20–$50Can mimic or worsen O2 sensor symptoms

    Reading the Warning Signs Before the Check Engine Light Comes On

    A functioning check engine light system is genuinely one of the more delayed warning tools on your dashboard, because codes for oxygen sensor circuits often require the fault to be present consistently across multiple drive cycles before the light actually illuminates. That means you’re frequently driving around with a degrading sensor for weeks before the computer officially flags it. The earlier signs are more subjective, but once you know what to watch for, they’re pretty recognizable. A rougher idle than usual, especially a slight surging feeling where the RPMs seem to hunt up and down at a stoplight, is one of the more common early symptoms. A faint sulfur or rotten-egg smell from the exhaust, particularly noticeable at idle in an enclosed space like a garage, often points to a rich condition overloading the catalytic converter’s ability to process fuel. And as mentioned, a gradual, unexplained decline in fuel economy over a couple of months without any change in your driving habits is one of the most reliable indicators available to you as a driver, long before a code gets triggered.

    [Mechanic’s Essential O2 Sensor Checklist]

    What to CheckHow to Check ItWhat It May Indicate
    Fuel economy trendTrack miles-per-tank over 2–3 fill-upsGradual drop suggests sensor degradation
    Idle smoothnessFeel for surging or hunting RPMs at a stopPossible inaccurate air-fuel data
    Exhaust smellNotice sulfur/rotten-egg odor at idleRich condition overloading converter
    Check engine light + codesFree scan at most auto parts storesCodes starting with P013X–P015X relate to O2 sensors
    Live sensor data (shop visit)Ask your mechanic to check sensor switching speedSluggish switching means aging sensor even without a code

    My honest professional take on oxygen sensors is that they’re one of the best examples of preventative maintenance actually paying for itself. Replacing a worn sensor for under $200 in most cases is a fraction of what you’ll spend chasing worse fuel economy for a year or dealing with a contaminated catalytic converter down the line. If your fuel economy has quietly crept downward, if your idle feels a little rougher than it used to, or if you’re simply approaching the 80,000 to 100,000-mile range without ever having these sensors checked, don’t wait for a check engine light to make the decision for you. Ask your mechanic to pull live sensor data during your next oil change, not just a basic code scan, because that’s the only way to catch this problem while it’s still a cheap fix rather than an expensive lesson.

  • Getting a Louder Muffler? Here’s Why You Can’t Afford to Ignore It

    Getting a Louder Muffler? Here’s Why You Can’t Afford to Ignore It

    Somewhere around the third week of a car getting noticeably louder, I start seeing the same customer walk through my bay doors with the same sheepish look on their face. “It just kind of happened gradually,” they’ll say, “and honestly it sounds kind of cool now.” I get it—there’s something almost satisfying about a car with a little more growl to it. But here’s the uncomfortable truth I have to deliver almost every single time: that “cool” sound is very rarely an upgrade. It’s decay. And depending on where that decay is happening in your exhaust system, you could be looking at anything from a minor annoyance to a genuine carbon monoxide risk sitting a few feet from your passenger cabin.

    Why Your Muffler Gets Louder Over Time (It’s Not Just “Wear and Tear”)

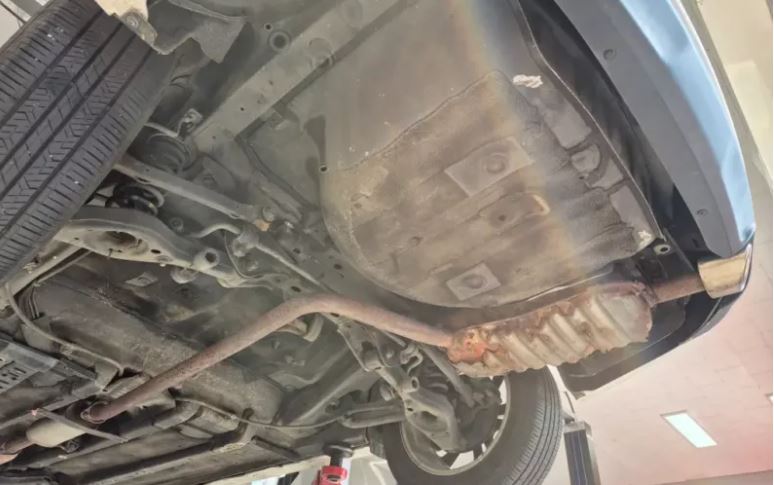
    To understand why a muffler gets loud, you have to understand what it’s actually doing when it’s working correctly. Your exhaust system channels hot, high-pressure gases away from the engine through a series of pipes, and the muffler’s job is to use internal baffles and chambers (essentially a maze of metal walls and sometimes packed fiberglass material) to cancel out sound waves before they exit the tailpipe. When I cut open a dead muffler on the bench, what I usually find is either a rusted-through outer shell with a hole punched clean through the metal, or baffles that have physically rattled loose and broken apart from the inside, turning what should be a controlled sound chamber into basically an empty tin can.

    Rust is the number one killer, and here’s the detail most drivers don’t think about—your muffler doesn’t just rust from road salt and moisture hitting it from underneath. It actually rots from the inside out just as often, sometimes more aggressively. Every time your engine runs, combustion produces water vapor as a byproduct, and that moisture condenses inside the muffler, especially if you’re someone who does a lot of short trips where the exhaust never gets hot enough for long enough to fully evaporate that condensation. Over years of short commutes, that trapped moisture eats away at the metal from the inside, and by the time you can see rust on the outside, the inside is often significantly worse. When I hoist a car up on the lift and give an old muffler a firm tap with a wrench, a healthy one gives a solid, dull thud. A rotted one gives this hollow, crumbly rattle, and honestly, sometimes rust flakes just fall out of the seams right there on the lift.

    Many drivers overlook this, but from a mechanic’s perspective, the real critical point is that the loudness itself is only a symptom—the actual failure is a breach in a pressurized, sealed system that was never supposed to have gaps in it. And that breach is exactly what makes this more than a noise complaint.

    The Real Danger: Carbon Monoxide, Not Just Decibels

    This is the part of the conversation where I stop being casual and get very direct with customers, because a loud muffler is genuinely a safety issue, not just an inconvenience. Your exhaust system is designed as a fully sealed path that carries combustion gases, including carbon monoxide, away from the engine and out past the rear of the vehicle. When there’s a hole, crack, or separated joint anywhere along that path, exhaust gas can escape before it reaches the tailpipe. Depending on your vehicle’s undercarriage design and where exactly that leak is located, those gases can potentially find their way into the cabin through the floorboards, the trunk seal, or the ventilation system, especially at highway speeds when air pressure changes around the vehicle create a slight vacuum effect that can pull outside air—and exhaust—into the cabin.

    Just last week, a client brought in a Hyundai Elantra with exactly this issue. She mentioned almost as an afterthought that she’d been getting mild headaches on her commute and just assumed it was stress from work. When I got the car on the lift, I found a completely separated joint right where the mid-pipe met the muffler, with a gap you could fit two fingers through. That’s not a small leak—that’s exhaust gas venting almost directly underneath the passenger floor pan. I told her flat out that she needed to stop driving that car with the windows up until it was fixed, and I moved her to the front of the queue that day. Carbon monoxide poisoning is genuinely one of the more insidious dangers in vehicle maintenance because you can’t see it, you often can’t smell it in low concentrations, and the early symptoms—headache, drowsiness, mild nausea—get written off as being tired or stressed. What would you do if you started noticing recurring headaches specifically during your commute and nowhere else in your day? That pattern is exactly the kind of thing that should send you straight to a shop for an exhaust inspection, not an aspirin bottle.

    Diagnosing the Location: Front Pipe, Mid-Pipe, or Muffler Itself

    Not every loud exhaust problem is the muffler specifically, and this is where a lot of well-meaning DIYers waste money by replacing the wrong part. When I’m diagnosing a noise complaint, I listen for where the tone changes as I move a mechanic’s stethoscope or even just my ear along the length of the exhaust with the engine running and the car safely supported. A leak right off the exhaust manifold (the metal component bolted directly to the engine that collects exhaust from each cylinder) produces a sharp, tinny, almost popping sound that’s loudest right under the hood or right at the firewall. A leak further back, at a flex pipe or mid-pipe joint, tends to sound more like a steady drone that gets louder under acceleration and quiets slightly at idle. And a fully rotted muffler produces that classic deep, rumbling roar that’s fairly consistent regardless of throttle position, because the sound-cancelling chambers themselves have failed rather than there being one discrete hole.

    Back when I was an apprentice mechanic, one of the biggest trial-and-error mistakes I made was quoting a customer for a full muffler replacement based on sound alone, without actually getting the car in the air first. Turned out the muffler was fine—it was a cracked flex pipe just ahead of it, a much cheaper fix. My mentor caught it before we ordered parts, but it taught me that you diagnose with your eyes and hands, not just your ears from outside the car. That lesson has saved plenty of my customers unnecessary expense over the years, because a full exhaust system replacement and a single flex pipe repair can be a $600 difference.

    Cost Reality Check: What a Fair Repair Quote Actually Looks Like

    This is where I see a lot of drivers get taken advantage of, particularly at chain shops that push whole-system replacements when a targeted repair would do the job. If the muffler itself is rotted through, replacing just the muffler with a quality aftermarket unit typically runs $150 to $350 in parts depending on your vehicle, plus one to two hours of labor. If it’s isolated to a joint or a small section of pipe, a patch weld or a partial pipe section replacement can sometimes be done for under $200 total, and it’s a completely legitimate repair when the rest of the system is still structurally sound. Where I get skeptical is when a shop insists on replacing the entire exhaust system, from manifold to tailpipe, when only the rear section has failed. Sometimes that’s genuinely necessary—if the pipes are all similarly aged and rusted, doing it piecemeal means you’re back in the shop again in eight months for the next section. But it’s worth asking directly: “Is the rest of my exhaust system structurally sound, or are we replacing all of it preventatively?” A shop that can’t give you a clear, specific answer to that question is one I’d get a second opinion from.

    [Exhaust Noise Diagnosis & Repair Cost Comparison]

    Symptom / SoundLikely LocationTypical Repair CostUrgency Level
    Sharp, popping tick near the engineExhaust manifold gasket/leak$120–$300Moderate–High
    Steady drone, worsens on accelerationMid-pipe or flex pipe joint$150–$400High
    Deep rumble, consistent at all speedsMuffler rotted internally$200–$500High
    Rattling metallic noise over bumpsLoose heat shield (thin metal cover protecting nearby components from exhaust heat)$50–$150Low–Moderate
    Full system deeply corroded throughoutEntire exhaust system$600–$1,200+High

    What You Should Actually Do This Week

    If your car has gotten noticeably louder over the past several weeks, don’t wait for it to get dramatically worse before addressing it, and don’t assume it’s purely cosmetic. In my experience, it’s vital to get the vehicle physically inspected on a lift rather than trying to diagnose exhaust issues from the driver’s seat, because sound alone can be genuinely misleading even to people who’ve been doing this a long time. If you’re mechanically inclined, you can do a basic visual check yourself—park on level ground, let the car cool completely, and slide underneath with a flashlight looking for reddish-brown flaking rust, visible daylight through any section of pipe, or black soot staining around joints, which indicates gas is actively escaping at that seam.

    [Mechanic’s Essential Exhaust Checklist]

    What to CheckHow to Check ItWarning Sign
    Visible rust or holesFlashlight inspection under a cooled vehicleReddish flaking or visible daylight through pipe
    Joint connectionsLook for soot staining around pipe seamsBlack sooty residue means active gas leak
    Cabin symptomsNote headaches, drowsiness, or nausea during drivesPossible cabin exhaust intrusion
    Sound timingNote if noise changes with acceleration vs. idleHelps pinpoint leak location before shop visit
    Heat shield rattleListen for metallic buzzing over bumps at low speedOften a cheap fix, but ignored can worsen

    Whatever you do, don’t drive around for months telling yourself it’s just an aesthetic issue you’ll get to eventually. A loud exhaust is your car directly telling you that a sealed, pressurized system has failed somewhere, and until you get underneath it and see exactly where, you genuinely don’t know whether you’re dealing with a $150 fix or a legitimate health hazard sitting inches from where you and your passengers are breathing. Get it on a lift this week, ask for specifics on exactly where the failure is, and don’t accept a full-system quote without a clear explanation of why anything less won’t do the job.

  • Why You Should Replace Spark Plugs Before They Cost You a New Engine

    Why You Should Replace Spark Plugs Before They Cost You a New Engine

    There’s a specific kind of hesitation on a customer’s face when I tell them their spark plugs are overdue. It’s not the same reaction as hearing “you need new brakes” or “your tires are bald.” Spark plugs feel invisible—they’re buried in the engine, they don’t squeal at you in traffic, and most drivers have no idea they even exist until something goes badly wrong. I’ve had guys in their sixties who’ve owned a dozen cars in their lifetime tell me, “Wait, spark plugs need to be changed?” And that’s exactly the knowledge gap I want to close today, because ignoring this one $150 service has sent more engines to an early grave than almost anything else I see on the lift.

    What a Spark Plug Actually Does (And Why Wear Matters More Than You Think)

    A spark plug’s job sounds simple: it takes electrical voltage from the ignition coil and fires a spark across a small gap to ignite the air-fuel mixture inside the cylinder. That controlled explosion is what pushes the piston down and ultimately turns your wheels. Every single power stroke in your engine depends on that spark firing cleanly and at the right moment.

    Here’s what most people don’t realize—that spark gap isn’t static. Every time it fires, it erodes a microscopic amount of metal off the electrode tip. On a brand-new plug, that gap might be a crisp 0.044 inches with sharp, well-defined edges. When I pull a plug that’s been in service for 80,000 miles, especially on the original factory plugs, I’m often looking at an electrode that’s rounded off like a pencil that’s been sharpened a hundred times and never gotten thinner—except it has, just unevenly, and the edges have gone soft and mushroom-shaped. That rounded, worn tip requires significantly more voltage to jump the same gap, and when I hook a worn plug up to a spark tester on my bench, you can visibly see the spark struggling—it’s weaker, sometimes yellowish-orange instead of a crisp blue, and it occasionally skips a beat entirely.

    Many drivers overlook this, but from a mechanic’s perspective, the real critical point is that a weak spark doesn’t just reduce power—it creates a cascading failure across systems you’d never associate with a spark plug. When ignition becomes inconsistent, your engine’s computer starts running the mixture richer to compensate, which means unburned fuel starts washing down the cylinder walls. That excess fuel dilutes your engine oil over time, degrading its lubricating properties. I’ve pulled dipsticks on cars with badly neglected plugs and the oil smelled distinctly like raw gasoline—that’s not something a filter change fixes.

    The Ignition Coil Domino Effect Nobody Warns You About

    This is the part of the conversation that really gets people’s attention, because it directly hits their wallet. When I hoist a car up on the lift and pull a spark plug that’s worn down with an excessive gap, the ignition coil sitting on top of it has to work overtime to push voltage across that wider gap. Think of it like trying to jump a wider gap with a garden hose versus a fire hose—the coil is straining every single firing cycle to force that spark across.

    Over time, this constant electrical strain generates excess heat inside the coil and breaks down the internal windings. I can’t tell you how many times I’ve diagnosed a “random misfire” code, replaced what the customer assumed was just “a bad coil,” and then found the root cause sitting right underneath it—a spark plug that should’ve been swapped 30,000 miles earlier. Just last week, a client brought in a Hyundai Sonata with a check engine light and a rough idle. The scan tool showed misfire codes on cylinders two and four. A less thorough shop might’ve just thrown two new coils at it and called it a day. When I pulled the plugs, the electrodes were worn down to almost nothing, caked in a light tan deposit that told me the engine was running lean intermittently. I replaced all four plugs for about $80 in parts, and the misfire codes never came back—no coil replacement needed. Had that customer waited another six months, I have zero doubt at least one of those coils would’ve cooked itself, turning an $80 fix into a $400 one.

    Back when I was an apprentice mechanic, one of the biggest trial-and-error mistakes I made was assuming a coil failure was always a coil problem in isolation. I replaced a coil on an old Toyota Camry, sent the customer on their way, and had them back in the shop three weeks later with the exact same code on a different cylinder. My mentor at the time just looked at me, pulled the spark plugs himself, and said, “You treated the symptom, not the disease.” That lesson stuck with me for the rest of my career—you always inspect the plug before you condemn the coil.

    What Happens When You Push It Too Far: Catalytic Converter Damage

    Now here’s where it gets genuinely expensive, and this is the scenario that keeps me up worrying about customers who skip maintenance intervals. When spark plugs are severely worn or start misfiring outright, unburned fuel doesn’t just dilute your oil—it gets pushed straight into your exhaust system. Your catalytic converter (the component that filters harmful emissions using a honeycomb structure coated in precious metals like platinum and palladium) isn’t designed to handle raw, unburned fuel. When that fuel hits the converter’s extreme operating heat, it can literally melt the internal honeycomb structure.

    What would you do if your car suddenly started running rough, losing power on hills, and rattling faintly from underneath? Most drivers assume it’s a transmission problem or something exotic. In reality, I’d put money on a melted catalytic converter caused by prolonged misfiring—and a catalytic converter replacement on most modern vehicles runs anywhere from $1,200 to $2,500 depending on whether it’s an aftermarket or OEM part, plus labor. Compare that to a spark plug service that, on most four-cylinder engines, takes me under an hour and costs the customer well under $200 including labor. That’s not a marginal savings—that’s the difference between routine maintenance and a repair bill that makes people question whether to just get rid of the car.

    Iridium vs. Copper vs. Platinum: Why the Type of Plug Changes Your Whole Maintenance Schedule

    This is a detail that trips up even experienced DIYers. Not all spark plugs are created equal, and the material of the electrode tip directly determines how long it’ll last before it needs replacing. Copper plugs are the softest and cheapest, and they wear the fastest—I rarely see them in anything built in the last fifteen years except certain high-performance or turbocharged applications where the manufacturer actually wants more frequent replacement for consistent performance. Platinum and iridium plugs use a much harder, more heat-resistant metal at the tip, which resists erosion far longer and is standard equipment in the vast majority of daily drivers on the road today.

    [Spark Plug Type & Replacement Interval Comparison]

    Plug TypeTypical LifespanApprox. Cost (Parts, Per Plug)Best Suited For
    Copper20,000–30,000 miles$2–$5Older vehicles, high-performance/racing applications
    Platinum60,000–80,000 miles$6–$12Most standard daily-driver sedans and SUVs
    Iridium80,000–100,000+ miles$10–$20Modern direct-injection and turbocharged engines
    Double Platinum60,000–80,000 miles$8–$15Wasted-spark ignition systems (dual electrode contact)

    The trap I see constantly is customers assuming their car “never needs plugs” because a shop quoted them a 100,000-mile interval once, years ago, and they never revisit it. In my experience, it’s vital to actually check your specific vehicle’s manufacturer service schedule rather than relying on a blanket rule of thumb, because plug life also depends heavily on driving conditions. A car that does mostly short trips, frequent stop-and-go city driving, or towing puts far more thermal and electrical stress on plugs than one that cruises the highway daily. I’ve pulled “100,000-mile” iridium plugs out of delivery vehicles at 65,000 miles that were already showing significant wear because of how much idling and load cycling they endured.

    The Diagnostic Signs You Can Catch Before It Gets Expensive

    You don’t need a scan tool to catch early spark plug wear if you know what to listen and feel for. A rough idle that you can feel through the seat of your pants—a subtle vibration that wasn’t there a year ago—is often the first sign. Hesitation when you press the accelerator, especially under load like merging onto a highway, is another classic symptom of a weakening spark struggling to keep up with fuel demand. And if you’ve noticed your fuel economy creeping down by two or three miles per gallon without any other explanation, worn plugs are frequently the quiet culprit, since a poor burn means the engine computer compensates with extra fuel to maintain power.

    [Mechanic’s Essential Spark Plug Checklist]

    What to CheckHow to Check ItWhat It Means If Abnormal
    Idle smoothnessFeel for vibration at a stoplight in Park/NeutralPossible early misfire from worn electrode
    Acceleration responseNote hesitation or “flat spot” when pressing gasWeak spark under load, common with worn plugs
    Fuel economy trendTrack mpg over 2–3 fill-upsGradual drop signals inefficient combustion
    Check engine lightHave codes read at any auto parts store (usually free)Misfire codes (P0300–P0304 range) point to ignition
    Plug appearance (if DIY)Pull one plug, inspect tip color and gapTan/gray is healthy; black, wet, or rounded tips signal trouble

    If you’re comfortable popping the hood and you’ve got a basic ratchet set, pulling a single spark plug to visually inspect it takes maybe ten minutes on most engines and costs you nothing. A healthy plug should have a light tan or grayish color on the electrode with a well-defined gap. If you see heavy black sooty deposits, that often points to a rich-running condition or oil fouling. If it’s wet with fuel, you’re looking at a misfire in progress. This kind of visual check is something I genuinely encourage customers to try themselves before paying a shop just to look at it.

    My final word on this is simple: spark plugs are one of the cheapest insurance policies your engine will ever offer you, and putting off a $150 service to avoid the inconvenience is, in my professional opinion, one of the most financially backwards decisions a driver can make. Pull up your owner’s manual tonight, check your plug replacement interval against your current mileage, and if you’re within 10,000 miles of that number or experiencing any of the symptoms above, get it scheduled this week—not next season, not “when it starts acting up.” By the time it starts acting up, you may already be paying for a coil, a catalytic converter, or both.

  • That Whistling Sound at 70 MPH Isn’t “Just How Cars Sound” — Your Window Rubber Is Talking to You

    That Whistling Sound at 70 MPH Isn’t “Just How Cars Sound” — Your Window Rubber Is Talking to You

    I get this complaint constantly, and it always comes with a slightly embarrassed tone, like the customer thinks they’re imagining it. “It’s probably nothing, but there’s this whistling noise near my window on the highway.” Nine times out of ten, it’s not nothing, and it’s not your imagination. Wind noise that shows up or worsens over time is one of the most diagnosable, fixable issues in the entire car, yet it’s also one of the most commonly misdiagnosed by drivers who assume it’s a mystery they’ll just have to live with. Before you consider it a quirk of your car’s age, or worse, before you let a shop talk you into an expensive door module or window regulator replacement, there’s one part you need to inspect first. Your window rubber, specifically the weatherstripping around the door frame and glass, is the source of the overwhelming majority of highway wind noise complaints I see on the lift.

    Understanding What Weatherstripping Actually Does

    The rubber seal running around your door frame and window isn’t just there to look finished. It’s an aerodynamic and acoustic barrier, engineered to maintain a specific compression against the glass and door frame at all times, sealing out both water and air at highway speeds where pressure differentials become significant. There are actually multiple separate seals working together here: the outer belt molding (the rubber trim strip running along the bottom edge of the window that wipes the glass clean as it rises and falls), the door-to-body seal (the large rubber gasket glued around the perimeter of the door itself), and the window-to-frame seal along the top edge of the glass where it meets the roofline.

    When I hoist a car up and start diagnosing a wind noise complaint, I don’t start with fancy tools. I start with my hands. A healthy weatherstrip has a certain springy, slightly tacky texture, similar to a fresh pencil eraser. You press it, and it rebounds immediately. A degraded one feels stiff, sometimes almost glassy or brittle to the touch, and it often has a dull, chalky appearance instead of that slight sheen healthy rubber has. Many drivers overlook this, but from a mechanic’s perspective, the real critical point is that rubber doesn’t fail suddenly. It fails progressively over years of UV exposure and temperature cycling, which means the noise you’re hearing now started as a barely perceptible hiss months or even years ago, and you’ve simply gotten used to gradual escalation without noticing the baseline shift.

    Just last week, a client brought in a Hyundai Elantra with this exact issue. She described a faint whistling near the driver’s side mirror area that had “always been there a little bit” but had gotten noticeably louder over the past few months. When I ran my hand along the door seal with the window down, I could feel a section about four inches long where the rubber had lost nearly all its compression, flattened out almost like it had been pressed under something heavy for years. That flattened section wasn’t sealing against the door frame anymore, and at 65 to 70 miles per hour, that tiny gap was enough to create a very specific, high-pitched whistle. We’re talking about a gap you could barely see with the naked eye, maybe a millimeter or two, but wind noise is incredibly sensitive to gap size because you’re dealing with turbulent airflow finding the path of least resistance.

    The Diagnostic Test You Can Do In Your Driveway Right Now

    Here’s something I walk almost every customer through because it costs nothing and takes under ten minutes. Take a standard piece of paper, a dollar bill works too, and close it in the door so about half of it is sticking out, with the door shut normally on the other half. Now pull the paper out slowly. If the seal is healthy, you should feel consistent resistance the entire way, like you’re pulling it through a firm but even grip. If you feel a spot where the paper suddenly slides free with little to no resistance, that’s your leak point, and that’s almost certainly where your wind noise is originating.

    What would you do if you tested this and found a spot with almost zero resistance halfway up the door? A lot of drivers panic and assume the whole door seal needs replacing, which can run $80 to $200 per door depending on the vehicle and whether you’re using OEM or aftermarket parts. In my experience, it’s vital to test multiple points around the entire door perimeter, top, bottom, front edge, and rear edge, before assuming you need a full seal replacement. Sometimes the issue isn’t the rubber’s condition at all, it’s alignment. If the door itself has sagged slightly on its hinges, which happens naturally over years from the sheer weight of the door swinging open and closed thousands of times, the seal might be perfectly healthy but simply not making contact evenly anymore because the door isn’t sitting where it used to.

    I want to walk you through the difference because the fix and cost are completely different depending on which one you’re dealing with.

    [Mechanic’s Wind Noise Diagnostic Checklist]

    Test ResultLikely CauseRealistic FixEstimated Cost
    Paper test shows consistent resistance everywhereNot the seal — check mirror or antennaAerodynamic source elsewhereDiagnostic only
    Paper test shows one weak spot, rubber feels brittle/chalkyDegraded weatherstripReplace affected seal section$80–$200
    Paper test shows weak spot, rubber feels soft and springyDoor misalignment or sagging hingeDoor alignment adjustment$60–$150 (labor)
    Whistling changes pitch when you press on the door while driving (passenger assist)Seal compression issueSeal replacement or shimming$80–$250
    Noise present only with windows fully up, disappears when crackedBelt molding or top seal issueBelt molding replacement$40–$120 per side
    Noise appears only above 60mph and sounds like airflow, not whistlingMirror or A-pillar aerodynamicsUsually not seal-relatedVaries

    That last row is important, because I don’t want you tearing apart a perfectly good door seal chasing a noise that’s actually coming from your side mirror housing or a loose A-pillar trim panel. A true weatherstrip whistle has a very particular pitch quality, thin, consistent, almost like blowing across the top of a bottle, and it typically responds to hand pressure on the door while a passenger drives, meaning it gets quieter or changes tone the moment you press firmly on the door panel from inside.

    Belt Molding and the Overlooked Top Seal

    There’s a specific zone I want to highlight separately because it fools even experienced drivers: the top window seal, sometimes called the header seal, running along the roofline where the top edge of your glass meets the car body when the window is fully up. This piece takes a beating differently than the door perimeter seal because it’s exposed to direct sun for years if you park outside, and it also experiences repeated flexing every single time you roll your window up and down, since the glass itself pushes against it on the way up.

    Back when I was an apprentice mechanic, one of the biggest trial-and-error mistakes I made was replacing an entire door’s weatherstripping on a customer’s vehicle because I assumed the whole seal had failed, when the actual problem was isolated entirely to about six inches of belt molding near the mirror. I spent an entire afternoon and a good chunk of the customer’s money on a repair that a $35 belt molding section would have solved in under an hour. That mistake taught me to always isolate the noise to the smallest possible section before quoting a full seal replacement, and it’s a lesson I still apply on every wind noise diagnosis today. If a shop quotes you for full door weatherstripping without doing a proper paper test at multiple points first, that’s worth questioning, because a targeted repair is almost always available and almost always cheaper.

    The belt molding itself, that thin strip that both seals against the glass and wipes it clean as it travels, dries out and curls at the edges over time. When it curls even slightly, it creates a tiny channel for air to funnel through directly at ear level for most drivers, which is exactly why this particular failure point produces such a noticeably sharp, annoying whistle compared to noise from lower on the door.

    Preventing the Problem Before It Starts

    Here’s where I’ll give you the maintenance habit that genuinely extends the life of every rubber seal on your car, and it costs about fifteen minutes every few months. Clean the weatherstripping with a mild soap and water solution to remove dirt and grime buildup, which otherwise works its way into the rubber and accelerates drying. Once it’s clean and fully dry, apply a silicone-based rubber conditioner, not a petroleum-based product, working it in with a clean cloth along every seal, door perimeter, belt molding, and trunk or hatch seals too while you’re at it. This single habit, done consistently, can extend the functional life of your weatherstripping by years, especially if your car spends most of its life parked outside under direct sun exposure.

    I’d also suggest paying attention seasonally. Rubber contracts in cold weather and expands slightly in heat, so a seal that’s borderline in October might actually seal fine again by July, then fail audibly again the following winter. If your wind noise seems to come and go with the seasons rather than being constant, that’s actually useful diagnostic information, it tells you the seal is right on the edge of failure and temperature swings are pushing it over that edge intermittently rather than the seal being catastrophically gone.

    Final Verdict and What You Should Do This Week

    Wind noise is one of those issues that’s easy to dismiss because it doesn’t affect how the car drives or performs, but I’d encourage you to take it seriously for two reasons beyond just annoyance. First, if air is getting in, water can often follow the same path during heavy rain, and water intrusion into door panels leads to electrical issues with window motors and speakers that cost far more than a seal repair. Second, a failing seal rarely improves on its own, and the labor cost to fix it only goes up if it’s left long enough that surrounding trim pieces start to warp or the door alignment shifts further out of spec.

    My honest recommendation is to grab a piece of paper or a dollar bill this weekend and run that test around all four doors, front and back, top and bottom edges included. It takes ten minutes and it’ll tell you almost everything you need to know before you ever have to pay for a diagnostic. If you find a weak spot, note exactly where it is, top, middle, bottom, front, or rear, and bring that specific information to your mechanic. Walking in with “there’s wind noise near my driver’s door, and the paper test showed weak resistance near the top corner by the mirror” gets you a faster, more accurate, and often cheaper repair than walking in with “my car makes a whistling noise sometimes.” The more precise you are about the symptom, the less you pay to fix it, and that’s true for almost every repair in this business, not just wind noise.

  • Your A/C Blows “Cold Enough,” But That Might Be Hiding a Slow, Expensive Failure

    Your A/C Blows “Cold Enough,” But That Might Be Hiding a Slow, Expensive Failure

    Every spring, without fail, I get the same wave of customers rolling into the shop. The line is almost always identical: “My AC still blows cold, but something feels off.” Maybe it’s not as icy as it used to be. Maybe it takes longer to cool down. Maybe there’s a faint smell when it first kicks on. Here’s the thing I tell every one of them, and I’ll tell you now too — “still blows cold” is one of the most misleading phrases in car ownership. An AC system can be actively dying, leaking refrigerant, or straining a failing compressor for months while still technically producing cold air. By the time it stops working entirely, you’re usually not looking at a simple recharge anymore. You’re looking at a compressor replacement that can run $800 to $1,500 with labor. Let’s talk about how to actually know if your system is fine, or just fine for now.

    The Refrigerant Leak Nobody Notices Until It’s Too Late

    Here’s a fact that surprises most drivers: your AC system is a sealed loop. Under normal, healthy operation, it should never lose refrigerant (the chemical compound, usually R-134a or the newer R-1234yf, that actually absorbs heat from your cabin air and carries it outside). If your system is low, that’s not “normal wear.” That means refrigerant is escaping somewhere, and it’s your job, or mine, to find where.

    When I hoist a car up on the lift for an AC complaint, the first thing I’m looking for isn’t the compressor. It’s oil residue. Refrigerant carries a small amount of compressor oil through the entire loop, so wherever there’s a leak, that oil seeps out along with the gas and leaves a slightly greasy, dusty-looking film at the leak point. I check the condenser (the radiator-like component at the very front of your car that releases heat from the refrigerant), the evaporator lines, and every rubber O-ring connection along the way. Many drivers overlook this, but from a mechanic’s perspective, the real critical point is that a system can lose refrigerant at a rate of just a few percent per year from a pinhole leak, and you won’t notice reduced cooling until it’s dropped below roughly 80% of its proper charge. That’s a slow bleed that quietly gets worse every single summer.

    Just last month, a customer brought in a Hyundai Sonata complaining that the AC used to freeze him out in ten seconds and now takes almost two minutes to feel cold. He’d had it “recharged” at a quick-lube place the year before, and assumed that fixed it permanently. What actually happened is that shop topped off the refrigerant without ever finding or fixing the leak, which is a bit like patching a leaking tire with more air instead of finding the nail. We found a small leak at the condenser from a rock strike, replaced the part, properly evacuated and recharged the system with a vacuum pump, and it’s held steady ever since. A recharge without a leak diagnosis is a temporary band-aid, not a repair, and if a shop offers to “just add refrigerant” without checking for leaks first, that’s a fair warning sign of a shortcut being taken.

    The Compressor Clutch and That Specific Clicking Sound

    The AC compressor is the heart of the entire system, mechanically pressurizing the refrigerant so it can absorb and release heat properly. It’s driven by your engine’s serpentine belt through an electromagnetic clutch, a component that engages and disengages the compressor as needed. This clutch is one of the most common failure points I see, and it has a very specific sound signature that experienced ears pick up on almost instantly.

    A healthy compressor clutch engages with a single, clean click when you turn the AC on, and it should stay engaged smoothly with no chatter. A failing clutch, on the other hand, often produces a rapid, repetitive clicking or buzzing — I’d describe it as roughly two to four clicks per second — as the clutch struggles to fully engage or slips under load. That rapid-fire clicking is usually caused by a worn clutch coil, a warped clutch plate, or low refrigerant pressure causing the system’s low-pressure switch to cycle the compressor on and off rapidly to protect it from running dry.

    What would you do if you heard a fast clicking noise from under the hood the moment you switched your AC on? A lot of drivers assume it’s a belt issue and either ignore it or replace the serpentine belt, spending money on a part that was never the problem. In my experience, it’s vital to isolate the sound source first. Pop the hood, have someone turn the AC on and off from inside while you watch the compressor pulley. If the clicking correlates exactly with the AC engaging and disengaging, you’re looking at a clutch or refrigerant pressure issue, not a belt problem, and continuing to run a compressor with a failing clutch risks it seizing entirely, which can also damage the belt and anything else that belt drives, including your power steering pump or alternator depending on your vehicle’s layout.

    Cabin Air Filter and Evaporator: The Airflow Problem Everyone Forgets

    Here’s a category of AC “failure” that has nothing to do with refrigerant at all, and it’s the one I catch most often on inspection that customers never expected. Your cabin air filter, a pleated paper or fabric filter that cleans the air coming into your cabin through the vents, sits directly upstream of your evaporator (the component inside the dash that actually cools the air before it reaches your vents). When that filter clogs with dust, pollen, and debris, airflow through the entire system drops significantly, and drivers interpret that as weak or warm-feeling air even when the refrigerant charge and compressor are both perfectly healthy.

    Back when I was an apprentice mechanic, one of the biggest trial-and-error mistakes I made was chasing a customer’s “weak AC” complaint for almost an hour, checking pressures, checking the compressor clutch, checking for leaks, all while the actual problem was sitting right behind the glovebox the entire time. The cabin air filter was so packed with debris it looked like a solid brick rather than a filter. Pulled it out, replaced it with a fresh one, and airflow at the vents nearly doubled instantly. That taught me to always check the cheapest, simplest possibility first before diving into the complex diagnostics. Cabin filters typically need replacement every 12,000 to 15,000 miles, though if you live somewhere dusty or drive frequently on unpaved roads, I’d cut that interval closer to 8,000 miles.

    There’s also a less obvious airflow killer: a partially frozen evaporator core. If your system is slightly low on refrigerant or has a failing blend door, condensation on the evaporator fins can actually freeze into a thin layer of ice, which then blocks airflow almost completely, ironically making your AC blow warm air because the frozen coil can’t exchange heat with the air passing through it. This is one of those issues that genuinely confuses drivers because it seems backwards. Cold coil, warm air? That’s usually diagnosed by running the AC on high for fifteen to twenty minutes and feeling for a gradual decline in output, rather than instant weak airflow from the start.

    [Mechanic’s Essential AC Diagnostic Checklist]

    Symptom You NoticeLikely CauseRealistic Repair CostUrgency
    Takes longer to cool than it used toRefrigerant leak (slow)$150–$400 (leak repair + recharge)Moderate — worsens over time
    Rapid clicking when AC turns onFailing compressor clutch$400–$800High — risk of compressor seizure
    Weak airflow, but air feels cold when close to ventClogged cabin air filter$20–$60Low — easy DIY fix
    Air starts cold, turns warm after 15–20 minutesFrozen evaporator core$150–$500 depending on causeModerate
    Musty smell on startupMold/bacteria on evaporator$100–$200 (evaporator cleaning)Low, but affects air quality
    No cold air at all, compressor won’t engageElectrical fault or empty system$500–$1,200+High

    I’d point you toward that “urgency” column specifically, because it tells you which symptoms you can genuinely live with for a few weeks and which ones need attention this week. A rapid clicking compressor clutch is the one item on that list I’d never tell a customer to ignore, since running a seizing compressor risks turning a $500 repair into a $1,500 one if it locks up and damages the belt or pulley system around it.

    The Smell Problem Most Drivers Dismiss As Normal

    I want to spend a moment on something that isn’t a performance issue but comes up constantly: that musty, slightly sour smell when you first start your AC, especially after the car’s been sitting for a while. This happens because your evaporator stays damp with condensation after you shut the car off, and in a warm, dark, humid environment, that’s essentially an incubator for mold and bacteria growth on the evaporator fins. It’s extremely common, and it’s not usually a sign of anything mechanically wrong.

    That said, from a health and cabin air quality standpoint, it’s worth addressing. Running your AC on the highest fan setting with the compressor off for the last two or three minutes of any drive helps dry out the evaporator before you park, which meaningfully reduces mold buildup over time. If the smell has already set in, an evaporator cleaning treatment, either a foam cleaner applied through the intake or a professional service that accesses the evaporator housing directly, typically resolves it. I’d caution against ignoring this one indefinitely, particularly if anyone in the household has allergies or asthma, since you’re circulating that air directly into the cabin every single drive.

    Final Verdict and Your Action Plan

    “Blows cold” and “works fine” are not the same sentence, and the gap between them is exactly where expensive repairs quietly incubate. My honest recommendation, and this comes from years of watching small AC issues snowball into compressor replacements, is to treat your AC system with the same seasonal attention you’d give your tires or your oil. Before summer really hits, run your AC on max for a full fifteen minutes and pay attention to whether the cold air stays consistent or fades. Listen closely at startup for any rapid clicking from under the hood. Check your cabin air filter, a five-minute job on most vehicles that requires zero tools beyond your hands. And if you notice a slow decline in cooling performance year over year, don’t settle for a quick recharge without asking your mechanic to actually find the leak first.

    Your AC system doesn’t fail all at once, and that’s exactly what makes it dangerous to your wallet. It fails a percentage at a time, quietly, until one July afternoon it just stops. Catch it in the slow phase, and you’re looking at a $100 to $300 fix. Catch it after it’s dead, and you’re looking at ten times that. The choice of which one you experience is almost entirely in your hands, and it starts with actually paying attention the next time someone asks you if your AC “works fine.”

  • Your Sunroof Isn’t Just Glass — It’s a Drainage System, and Ignoring That Fact Will Rot Your Headliner

    Your Sunroof Isn’t Just Glass — It’s a Drainage System, and Ignoring That Fact Will Rot Your Headliner

    I’ve been wrenching on cars for a decade now, and if there’s one component that gets neglected more than almost anything else on a vehicle, it’s the sunroof assembly. People think of it as a piece of glass that slides open and closed. That’s like calling your heart “a pump” — technically true, but you’re missing everything that actually matters. A sunroof is a drainage system first and a glass panel second, and when I say that to customers in the shop, I usually get a blank stare. By the end of this article, you won’t be giving me that same look.

    Just last month, a customer brought in a Honda CR-V with a musty smell she couldn’t identify. No visible leaks on the seats, no water stains on the carpet that she’d noticed. She’d already had the AC evaporator checked, the cabin air filter replaced, even had someone check for a dead rodent under the dash. Turned out the sunroof drain tubes were completely clogged with a mixture of pine needles, dirt, and what I can only describe as biological sludge that had been fermenting in there for who knows how long. Water was pooling inside the roof channel every time it rained and slowly wicking into the headliner foam. She was maybe six months away from a headliner that would need full replacement — that’s a $400 to $800 repair depending on the vehicle, versus the $0 it would’ve cost her to clean those drains herself twice a year.

    That’s the story I want you to keep in mind as we go through this, because sunroof neglect doesn’t announce itself loudly. It creeps.

    Understanding the Anatomy: Why “Just Wiping the Glass” Isn’t Cleaning

    When most drivers think about cleaning their sunroof, they picture spraying some glass cleaner on it and wiping it down like a window. That’s fine for the visible pane, but it addresses maybe 20% of what actually needs attention. Around the perimeter of that glass panel sits a rubber weatherstrip (the seal that keeps water and wind noise out when the sunroof is closed), and beneath that is a channel — essentially a shallow trough built into the roof structure — designed to catch any water that gets past the seal.

    Here’s the part that surprises people: your sunroof is supposed to let some water into that channel. It’s not a design flaw. The engineers who built your car assumed water would occasionally seep past the seal, so they gave that channel four drain tubes — one near each corner — that route the water down through the pillars of your car (the vertical structural posts, usually labeled A, B, C, and sometimes D pillar depending on your vehicle) and out through small openings near the bottom of the door frames or behind the wheel wells.

    When I hoist a car up on the lift and pull back the interior trim near the base of the A-pillar, I’d say close to half the vehicles I inspect that are five years or older have partially restricted drain tubes. Not fully blocked, necessarily, but restricted enough that water is draining slower than it’s accumulating during a heavy rain. That’s when you get the slow, silent leak — water backing up in the channel, overflowing the lip, and finding its way into the headliner or down the A-pillar trim into your footwell.

    So when I talk about “cleaning your sunroof,” I’m talking about three distinct zones: the glass and seal, the drain channel, and the drain tubes themselves. Skipping any one of those isn’t really cleaning — it’s just polishing the part everyone can see while ignoring the part that actually causes damage.

    The Weatherstrip and Track: What Actually Wears Out and Why

    Let’s talk about that rubber weatherstrip for a second, because this is a piece that many drivers don’t even know exists until it fails. Over time, especially in vehicles that sit outside under direct sun, that rubber dries out and loses its elasticity. A healthy seal has a slight tackiness to it and springs back when you press it with your thumb. A degraded one feels almost chalky, sometimes with fine cracks you can see if you look closely under good light. Once it loses that flexibility, it stops compressing evenly against the glass, and that’s when wind noise at highway speed and water intrusion both start showing up.

    Many drivers overlook this, but from a mechanic’s perspective, the real critical point is lubrication frequency, not just cleaning frequency. That seal needs a silicone-based rubber conditioner — not petroleum-based products like WD-40 or Armor All, which actually accelerate rubber degradation over time by drying out the natural oils in the rubber compound. I recommend a dedicated silicone lubricant applied with a clean microfiber cloth every three to four months. It takes about five minutes and it’s the single cheapest insurance policy you can buy for that seal’s lifespan.

    The sliding track is the second piece people ignore. This is the metal or composite rail the glass panel rides along when it opens and closes. Dirt, leaves, and grit accumulate in there and act like sandpaper every time the sunroof moves. What starts as a smooth, quiet operation slowly turns into a gritty, hesitant motion, and eventually you’ll hear a grinding or clicking noise when the panel travels. I’ve had customers come in convinced their sunroof motor was dying, ready to pay for a full motor replacement — which can run anywhere from $250 to $600 with labor — when the actual problem was compacted debris in the track causing the motor to strain. A track cleaning and re-lubrication with the right grease, something like a lithium-based or silicone dielectric grease, fixed it in under thirty minutes.

    What would you do if your sunroof suddenly started making a grinding sound every time you opened it? Most people either stop using it entirely out of fear, or they keep forcing it and eventually burn out the motor for real. Neither is the right move. Stop, inspect the track visually with the panel tilted open, and if you see visible debris or discoloration in the grease, that’s your answer before you spend money on parts you don’t need.

    The Drain Tube Flush: The Maintenance Step 90% of Owners Never Do

    This is the step I consider non-negotiable, and it’s the one from our CR-V case study earlier. Locate your drain tube access points — usually you’ll find small trim caps near the base of the A-pillars, sometimes accessible from inside the front door jamb, and at the C-pillars near the rear cargo area. Your owner’s manual will usually specify exact locations, and honestly, a thirty-second search for your specific make and model online will show you exactly where to look if the manual isn’t clear.

    Once you’ve located them, the classic mechanic trick is a length of weed trimmer line (the flexible plastic cord from a string trimmer) or a soft plastic zip tie with the sharp edge trimmed off. You gently feed it into the tube opening and work it in a few inches to break up any compacted debris, then follow that with compressed air or, my personal preference, a turkey baster filled with water to flush the tube through. If water comes out the bottom opening near the wheel well cleanly and quickly, you’re in good shape. If it comes out slowly, or not at all, you’ve found your blockage, and you’ll want to repeat the process until flow is restored.

    Back when I was an apprentice mechanic, one of the biggest mistakes I made was using a rigid wire, like a coat hanger, to clear a clogged drain tube on a customer’s Toyota. I punctured the tube wall because I applied too much pressure in the wrong direction, and what should’ve been a free five-minute fix turned into a comeback repair where we had to access the roof channel and replace a section of drain tubing. That taught me permanently: always use flexible material for this job, and always work with gentle, patient pressure. If it’s not moving freely, you back off and flush with water instead of forcing it.

    [Mechanic’s Essential Sunroof Maintenance Checklist]

    TaskFrequencyWhat You’re Preventing
    Wipe glass and seal with mild soap/waterMonthlyDirt buildup pressing into rubber seal
    Silicone lubricant on weatherstripEvery 3–4 monthsSeal cracking, wind noise, water leaks
    Clean and re-grease the sliding trackEvery 6 monthsMotor strain, grinding noise, premature motor failure
    Flush all four drain tubesEvery 6 months (before rainy/winter season)Headliner water damage, mold, electrical shorts
    Inspect channel for standing waterAfter heavy rainSilent leaks into headliner foam
    Full visual inspection of trim and gasketsAnnuallyCatching wear before it becomes a leak

    I’d also add a seasonal note here: if you live somewhere with real winters, get that drain flush done before the first freeze. Water sitting in a partially clogged tube can freeze, expand, and crack the tubing itself, which turns a simple flush into an actual parts replacement.

    When It’s More Than Maintenance: Recognizing Real Failure Signs

    There’s a difference between a sunroof that needs cleaning and one that’s genuinely failing, and I want to make sure you can tell them apart before you spend money you don’t need to spend. A slight increase in wind noise or a sunroof that opens a little less smoothly than it used to is almost always a maintenance issue, the kind of thing we’ve covered above. But certain signs mean you’re looking at a component failure, not just neglect.

    If you hear a distinct motor whine with no corresponding movement of the glass, that typically points to a stripped drive gear inside the motor assembly, a plastic component that wears down over years of use, especially if the track wasn’t kept clean. If the sunroof shudders or seems to bind at the same exact point in its travel every time, that often indicates a bent or damaged track rather than a lubrication problem. And if you’re seeing water stains on your headliner that keep coming back even after you’ve flushed the drains, you may be dealing with a cracked drain tube hidden inside the pillar, which unfortunately requires interior trim removal to access and repair — a job that runs $150 to $350 in labor at most shops depending on how the pillar trim is fastened.

    [Repair Cost Reality Check]

    IssueRealistic Repair CostDIY Possible?
    Dry/cracked weatherstrip seal$40–$90 (parts + labor)Cleaning/lubricating: yes. Full seal replacement: usually no
    Dirty/gritty track$0 (cleaning supplies you likely own)Yes
    Clogged drain tubes$0Yes
    Cracked drain tube (hidden in pillar)$150–$350Not recommended
    Stripped motor gear$250–$600Not recommended
    Headliner replacement (water damage)$400–$800+No

    I want you to look at that table for a second, because the gap between the top three rows and the bottom three rows is the entire point of this article. Everything preventable costs you nothing but a bit of time. Everything that results from neglect costs real money, and in the case of the headliner, it’s often not fully fixable to the same standard — foam-backed headliner fabric that’s absorbed water tends to sag permanently even after it dries, and drying it out doesn’t always eliminate the mildew smell that’s worked its way into the material.

    Final Verdict and What To Do This Weekend

    If you own a car with a sunroof and you’ve never once cleaned or flushed the drain tubes, that’s not a moral failing — most drivers genuinely don’t know this system exists until something goes wrong. But now you do know, and that changes things. My honest professional recommendation is this: this weekend, before you do anything else automotive-related, spend twenty minutes locating your four drain tube access points and flush them with water. Wipe the seal down and apply a silicone conditioner while you’re at it. Open and close the sunroof a few times to check for any grinding or hesitation in the track.

    If everything runs smooth and the water flows freely from all four drains, you’ve just bought yourself another six months of protection against a repair bill that could easily hit four figures. If you find resistance in the track or slow drainage from a tube, you’ve caught a problem while it’s still a five-dollar fix instead of a five-hundred-dollar one. That’s the entire philosophy behind good car ownership, honestly — not reacting to damage, but staying a step ahead of it. Your sunroof will never remind you it needs attention until the day it forces you to notice, and by then, you’re not maintaining it anymore. You’re repairing it.

  • Why You Should Do Wheel Balance? Here’s What’s Really at Stake

    Why You Should Do Wheel Balance? Here’s What’s Really at Stake

    A retired schoolteacher drove her Subaru Outback into my shop a few weeks back, apologizing before she even got out of the car. “I know this sounds crazy,” she said, “but I feel like my car is trying to tell me something.” She described a faint hum that turned into a buzz around 60 miles an hour, one that traveled up through the floor and into her feet. She’d already been to a quick-lube place that checked her oil, topped off her fluids, and sent her on her way with a clean bill of health. Nobody had touched her wheels. Twenty minutes on my balancer later, I found her rear passenger wheel was off by nearly two ounces. That’s not a small discrepancy — that’s enough imbalance to cause real, measurable wear over time, and it’s exactly the kind of thing that gets missed when nobody thinks to look.

    The Physics Nobody Explains to You in Plain English

    Let’s talk about what’s actually happening when a wheel spins down the highway, because once you understand the mechanics, you’ll never skip a balance service again. Every wheel and tire assembly, no matter how well manufactured, has slightly uneven weight distribution around its circumference. Maybe the rubber compound is a hair thicker on one side, maybe the wheel casting has a marginally denser section — these are manufacturing realities, not defects. At low speed, this doesn’t matter. But once you’re rolling at 60 or 70 miles an hour, that wheel is completing somewhere around 800 to 900 rotations per minute, and even a small weight discrepancy creates centrifugal force that translates into vibration you can feel.

    Balancing corrects this by placing small counterweights (precisely calibrated clip-on or adhesive weights measured in fractions of an ounce) at the exact point needed to even out the rotation. When I spin a wheel on my balancing machine, it’s measuring imbalance in two planes — inner and outer — because a wheel can be balanced statically but still wobble dynamically if the weight distribution isn’t correct front-to-back across the rim’s width. That’s the difference between an amateur tire shop eyeballing it and a machine giving you exact gram measurements.

    What would you do if you felt a subtle vibration but your last mechanic told you “everything looks fine”? In my experience, this happens because a lot of quick-service shops simply don’t check balance unless you specifically ask, or unless you’re getting new tires installed. It’s not that they’re being dishonest — it’s just not part of a standard oil change inspection. You have to ask for it directly.

    What Happens When You Ignore It — The Slow, Expensive Damage

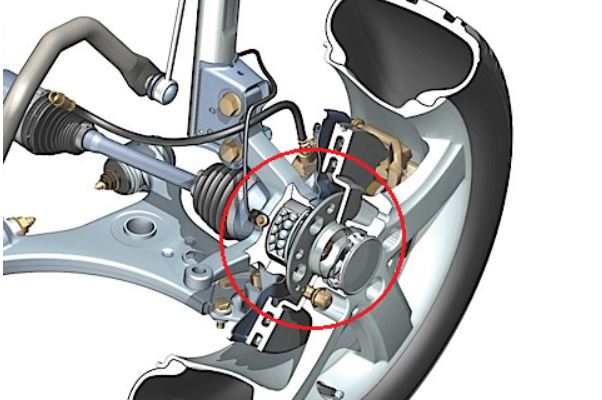
    Here’s the part that really matters, and it’s the piece most drivers never connect. An out-of-balance wheel isn’t just uncomfortable to ride in. It’s actively accelerating wear on parts that are far more expensive to replace than a $20 balance service. When a wheel hops slightly with every rotation instead of maintaining smooth, even contact with the pavement, that repeated micro-impact travels straight into your wheel bearing (the sealed unit that lets the wheel spin freely while carrying the vehicle’s weight), your strut mounts, and your control arm bushings.

    Many drivers overlook this, but from a mechanic’s perspective, the real critical point is that this kind of wear is cumulative and silent. It doesn’t announce itself with a warning light. It just slowly chews away at components until one day you’re hearing a growl or a clunk that seemingly came out of nowhere. When I hoist a car up on the lift after months of ignored vibration, I’m typically finding tires with a cupped, scalloped wear pattern — you can literally feel the wave pattern with your palm — plus early play developing in the wheel bearing when I grab the tire at twelve and six o’clock and rock it.

    Back when I was an apprentice mechanic, one of the biggest trial-and-error mistakes I made was underselling the importance of balance to customers who came in with “just a little shake.” I treated it as cosmetic, something you could put off. It took watching a customer’s minor vibration turn into a $340 strut mount replacement over the course of a year for me to understand that balance isn’t a comfort feature — it’s preventative maintenance in the truest sense.

    The Warning Signs You’re Probably Dismissing Right Now

    Most drivers experience the early stages of wheel imbalance and explain it away. That faint buzz at highway speed gets blamed on “road texture.” The slight wheel shake gets chalked up to “this car’s always been like that.” I want to walk you through what these symptoms actually mean, because recognizing them early is the difference between a cheap fix and an expensive one.

    A vibration that shows up specifically in the steering wheel points to a front wheel imbalance, since vibration transmits most directly through the steering column and front suspension. If you feel it more in the seat cushion or through the floor near your feet, that’s typically a rear wheel issue. Pay attention also to the speed range — classic imbalance vibration tends to appear or intensify somewhere between 50 and 70 miles per hour and often smooths out or changes character above that range, which is a different signature than, say, a bent rim, which tends to worsen consistently as speed increases.

    Mechanic’s Essential Checklist: Wheel Balance Symptoms & Response

    SymptomLikely CauseWhat to DoTypical Cost
    Vibration in steering wheel, 50–70 mphFront wheel imbalanceBalance front wheels$15–$25 per wheel
    Vibration in seat or floorRear wheel imbalanceBalance rear wheels$15–$25 per wheel
    Faint hum or buzz building with speedEarly-stage imbalanceBalance before it worsens$40–$80 full set
    Vibration worsens consistently at all speedsPossible bent rim, not imbalanceHave wheel inspected for damage$80–$300 rim repair/replace
    Recently hit a pothole or curbWeight loss or wheel deformationRebalance and inspect wheel$60–$100 inspection
    New tires just installedFresh mount requires calibrated balancingConfirm balance was performedUsually included in mount fee
    Cupped, wavy tread wear felt by handLong-term unresolved imbalanceBalance plus check suspension components$60 balance + possible repair

    How This Ties Into Your Wallet, Not Just Your Comfort

    I know it’s tempting to think of a vibrating wheel as an annoyance you can just live with, especially if money’s tight. But I’d encourage you to think about it as compound interest working against you. A $20 balance job today prevents accelerated tire wear that would otherwise force you into replacing tires two or three years early. It prevents premature wheel bearing wear that runs $250 to $400 per corner to fix. It reduces unnecessary strain on your struts and bushings, pushing off a suspension repair that could easily run into four figures if multiple components fail around the same time.

    I always tell customers that balance service is one of the best return-on-investment maintenance items in the entire industry. There’s genuinely no other $20 to $40 service that protects this many downstream components simultaneously.

    My Final Verdict From the Garage Floor

    A shaking wheel is your car’s way of flagging a problem before it becomes serious, and ignoring it doesn’t make it go away — it just moves the cost from your wallet today into a much bigger bill down the road. If you’ve noticed any vibration, hum, or buzz that builds with speed, don’t dismiss it as “just how the car feels.”

    Here’s what I want you to do this week. Pay attention to exactly where you feel the vibration, steering wheel versus seat, since that tells your mechanic which end of the car to check first. Ask specifically for a wheel balance any time you get tires rotated or replaced, and don’t assume it’s automatically included unless the shop confirms it. If you’ve hit a significant pothole or curbed a wheel recently, get it checked within a week rather than waiting for symptoms to worsen. And if a shop tells you everything’s fine without actually spinning your wheels on a balancer, that’s worth a second opinion, because you can’t diagnose an imbalance by sight alone — it has to be measured.

  • Why Tire Balancing Matters More Than You Think

    Why Tire Balancing Matters More Than You Think

    A guy brought his Ford Escape into my bay last month, absolutely convinced he needed new tires. His steering wheel was shaking so bad at 65 miles an hour that his coffee cup was rattling in the cup holder. He’d already priced out a full set online and was ready to drop $600. I put the car on the lift, spun each wheel by hand, and within two minutes I found the real problem: one front tire had lost nearly an ounce and a half of its wheel weights, probably from hitting a pothole hard enough to knock them loose. Fifteen minutes and $60 later, his steering wheel was smooth as glass. No new tires needed. That’s the power of proper balancing, and it’s the single most misunderstood, most skipped maintenance item I see in this shop.

    What Balancing Actually Does (And Why Your Tire Isn’t Perfectly Round)

    Here’s something most drivers never think about: no tire and wheel assembly is perfectly uniform in weight distribution, even brand new off the shelf. There are slight variations in the rubber density, the metal in the wheel, even the valve stem adds a tiny bit of weight to one spot. When that assembly spins at highway speed — and we’re talking hundreds of rotations per minute — those tiny imbalances get magnified into real vibration you can feel through the seat, the floor, and especially the steering wheel.

    Balancing is the process of correcting that by adding small precision weights (usually stick-on or clip-on weights, just a few grams each) to counteract the heavy spots. When I mount a wheel on the balancing machine, it spins the assembly and tells me exactly where the imbalance is and how many grams I need, down to a quarter-ounce. It’s genuinely satisfying work when it’s done right — you’re chasing precision most people never realize their car needs.

    What would you do if you felt a vibration only in the steering wheel but not the seat? In my experience, that’s almost always a front tire imbalance, because vibration transmits most directly through the steering column. If it’s in the seat or you feel it in your backside more than your hands, I’m looking at the rear tires first. That little diagnostic trick alone saves me time before I even touch a wrench.

    The Real-World Damage an Unbalanced Tire Causes Over Time

    This is the part that really gets overlooked. Drivers think an unbalanced tire is just an annoyance — a little shake, no big deal, live with it. But from a mechanic’s perspective, what you’re actually looking at is a slow-motion demolition of several expensive components at once.

    An unbalanced wheel doesn’t spin smoothly against the road; it hops, ever so slightly, thousands of times per mile. That repeated micro-impact accelerates wear on your wheel bearings (the assembly that lets your wheel spin freely while supporting the vehicle’s weight), your shocks and struts, and your steering and suspension bushings. When I hoist a car up on the lift with a long-ignored balance issue, I’m typically seeing cupped, scalloped wear on the tire itself — a wavy, uneven pattern you can literally feel with your palm if you run it across the tread. That’s the tire physically bouncing against the pavement instead of maintaining consistent contact.

    I had an apprentice year experience that taught me this lesson the hard way. Early on, a customer complained about a mild vibration, and I brushed it off as “probably just needs a balance, no urgency.” Three months later she came back with a wheel bearing so far gone it was audibly growling in the parking lot before she even got out of the car. That $60 balance job I should have pushed for turned into a $380 bearing replacement. I don’t make that mistake anymore, and I don’t let my customers make it either.

    Balance vs. Alignment — Stop Confusing These Two

    I’d say half the customers who walk in asking for an alignment actually need a balance, and vice versa. They’re not the same thing, and from a diagnostic standpoint, they show up differently. Alignment is about the angles of your wheels relative to each other and the road (think camber, caster, and toe — the geometric positioning that keeps your car tracking straight). A misalignment causes pulling to one side and uneven edge wear on the tire. Balancing, on the other hand, is purely about weight distribution around the wheel, and it causes vibration that typically shows up or worsens at specific speed ranges, often somewhere between 50 and 70 miles per hour.

    Many drivers overlook this, but from a mechanic’s perspective, the real critical point is that you can absolutely have a car that’s perfectly aligned but badly out of balance, and vice versa. If your shop tells you that you need both after a proper inspection, that’s not necessarily an upsell — it’s genuinely common for both to drift out of spec around the same mileage interval, especially after hitting a significant pothole or curb.

    Mechanic’s Essential Checklist: When to Get Your Tires Balanced

    SituationWhat’s HappeningRecommended ActionEstimated Cost
    Steering wheel vibrates at 50–70 mphFront wheel imbalanceBalance front tires$15–$25 per tire
    Vibration felt in seat/floor, not wheelRear wheel imbalanceBalance rear tires$15–$25 per tire
    Just installed new tiresFresh mount always needs calibrated weightsBalance as part of installUsually included in mount price
    Hit a significant pothole or curbWeight loss or wheel damageInspect and rebalance immediately$60–$100 for full inspection
    Every 5,000–6,000 milesRoutine weight shift from normal wearBalance during rotation service$40–$80 for full set
    Cupped or scalloped tread wear visibleLong-term unresolved imbalanceBalance plus suspension inspection$60 balance + possible repair
    Vibration increases with speed, disappears under brakingClassic imbalance signatureBalance first before assuming bigger issue$15–$25 per tire

    How Often Should You Actually Get This Done?

    I recommend balancing every time you rotate your tires, which for most daily drivers works out to roughly every 5,000 to 6,000 miles, or anytime you hit a pothole hard enough to make you wince. New tire installations should always include balancing as standard practice — if a shop mounts your new tires without balancing them, that’s a red flag, and I’d walk out. It’s such a basic part of the job that skipping it tells you something about the quality of the shop you’re dealing with.

    One thing I always tell my customers: balancing isn’t a “fix it once and forget it” service. Weights can shift or fall off, tires wear unevenly over thousands of miles which changes their weight distribution, and normal road impacts knock things out of spec gradually. Think of it less like a one-time repair and more like getting your teeth cleaned — routine maintenance that prevents much bigger problems down the road.

    My Final Verdict From the Garage Floor

    If there’s one thing I want you to walk away with, it’s this: a vibrating steering wheel is never something to just live with. It’s not a character quirk of your car, and it’s definitely not something that fixes itself. Left alone, it quietly grinds down bearings, bushings, shocks, and the tire itself, turning a $60 problem into a $400 one.

    Here’s what I want you to actually do. Pay attention to whether vibration shows up in your steering wheel or your seat, since that tells you front versus rear before you even get to the shop. Get your tires balanced every time you rotate them, no exceptions. Insist on balancing whenever you install new tires, and don’t accept a shop skipping that step. If you’ve recently hit a nasty pothole or curbed a wheel hard, don’t wait for symptoms to show up — get it checked within the week. And if a shop quotes you both an alignment and a balance after a real inspection, don’t assume you’re getting oversold; ask them to show you the readings, because a good mechanic will always be able to explain exactly what they found and why.

  • When Is the Best Time to Replace Your Tires? A Mechanic’s Honest Answer

    When Is the Best Time to Replace Your Tires? A Mechanic’s Honest Answer

    Every week, somebody rolls into my bay, points at their tires, and asks the same nervous question: “Do these still have life in them, or am I gambling with my family’s safety?” And honestly, I get it. Tires aren’t cheap, and nobody wants to drop four to eight hundred dollars on something that “still looks fine” to the untrained eye. But here’s the thing I’ve learned after a decade of hoisting cars up on the lift and running my thumb across thousands of tread patterns: tires rarely fail the way people expect. They don’t just blow out of nowhere. They whisper warnings for weeks, sometimes months, before they scream.

    I still remember a call I got last spring from a woman driving a Toyota Camry who hydroplaned on a rainy highway ramp doing maybe 45 miles an hour. She wasn’t hurt, thank God, but her front bumper wasn’t so lucky. When she brought the car in, I checked her tread depth and it was sitting right around 2/32 of an inch — legally still “passable” in a lot of states, but functionally useless in the rain. She told me she had no idea it was that bad because the tires “still had rubber on them.” That’s the trap. Having rubber left and having safe rubber left are two completely different things, and that gap is where most tire-related accidents happen.

    The Penny Test Isn’t Enough — Here’s What I Actually Check

    Almost every driver knows the classic penny test: stick Lincoln’s head into the tread groove, and if you can see the top of his head, you’re below 2/32 of an inch and it’s time to replace. It’s not a bad starting point, but honestly, it’s a blunt instrument. When I’m doing a real inspection, I’m using a tread depth gauge (a small tool with a spring-loaded probe that gives an exact measurement in 32nds of an inch) at multiple points across the tire — inner edge, center, and outer edge — because tires rarely wear evenly.

    What does uneven wear actually tell you? If the outer edges are bald but the center still has good tread, that usually points to underinflation, where the tire is riding on its shoulders instead of its full contact patch. If the center is worn down but the edges look fresh, you’re probably overinflated, and the tire’s been bulging out and taking all the abuse right down the middle. And if one side of the front tires is chewed up more than the other, I’m immediately thinking alignment issue or a worn suspension component — a tie rod end or a control arm bushing that’s let the wheel drift out of spec (this is the hardware that connects your steering system to the wheel hub and keeps everything pointed the direction you intend).

    Here’s a question worth sitting with: when’s the last time you actually ran your hand across your tread, not just glanced at it from standing height? Because your fingers will catch cupping — that scalloped, wavy wear pattern — long before your eyes will, and cupping almost always means a worn-out shock or strut that’s letting the tire bounce instead of gripping smoothly.

    It’s Not Just About Tread Depth — Age Matters More Than People Think

    This is the part that catches even careful drivers off guard. A tire can have plenty of tread left and still be dangerous because of dry rot, which is what happens when the rubber compound breaks down chemically over time from UV exposure, heat cycles, and ozone in the air. I’ve pulled tires off cars that had 6/32 of tread remaining — technically “fine” by depth standards — but the sidewalls were laced with hairline cracks, almost like the surface of dried-out mud. That tire is a time bomb, especially at highway speed where heat builds up fast and a compromised sidewall can separate or blow without warning.

    Every tire has a DOT code molded into the sidewall, and the last four digits tell you the week and year it was manufactured — for example, “2219” means the 22nd week of 2019. As a rule I give my customers straight: once a tire hits six years old, I want eyes on it every single oil change, checking specifically for sidewall cracking, bulging, or any distortion. Once it hits ten years, I don’t care what the tread depth gauge says — that tire is coming off the car. Rubber compound degrades whether you’re driving on it or not, which is exactly why that “barely used” spare tire sitting in your trunk since 2016 isn’t actually safe just because it’s got low mileage.

    What would you do if you found a tire with almost no visible wear but it’s nine years old? A lot of drivers would keep driving on it because “it looks brand new.” I’d tell you to replace it before your next road trip, full stop. Looks lie. Chemistry doesn’t.

    The Sounds and Feelings That Mean Trouble Right Now

    Let’s talk about what a failing tire actually communicates to you while you’re driving, because this is the stuff you won’t find explained clearly anywhere else. A rhythmic thumping that speeds up as you accelerate — almost like a heartbeat coming through the floorboard — is often a flat spot or, worse, an internal belt separation where the steel belt layer inside the tire has started pulling away from the rubber. That’s not a “get it looked at next week” problem. That’s a “pull over and check right now” problem, because a belt separation can turn into a full tread separation at highway speed, and I’ve seen what that does to a vehicle’s stability. It’s not pretty.

    A persistent pull to one side, where you have to fight the wheel to keep the car going straight, can mean uneven pressure between tires, a defective tire, or an alignment problem, but don’t ignore it hoping it’ll sort itself out — it won’t. And that low humming or roaring noise that gets louder with speed and doesn’t change when you brake? Nine times out of ten that’s irregular wear from an alignment or balance issue that’s been ignored a little too long.

    Just last month, I had a regular customer bring in his Honda CR-V because he said the steering wheel was “buzzing” at 60 miles an hour. Turned out one of his tires had developed a small internal bubble on the inner sidewall — invisible unless you’re specifically looking for it — from hitting a pothole a few weeks earlier and not knowing it. That bubble was a weak spot ready to fail. We caught it in time. If he’d waited another few thousand miles, I genuinely don’t like thinking about how that story ends on the highway.

    Mechanic’s Essential Checklist: Tire Replacement Timing

    Warning SignWhat’s Actually HappeningUrgency LevelEstimated Cost If Ignored
    Tread at 2/32″ or belowLegal minimum reached, minimal water evacuationReplace immediately$80–$200 per tire vs. potential accident
    Sidewall cracking (dry rot)Rubber compound breaking down chemicallyReplace within days$600–$800 full set
    Tire age 6–10 yearsCompound degradation regardless of treadInspect monthly, plan replacementSame as above
    Bulge or bubble on sidewallInternal structural failure, air pressure pushing through weak layerReplace immediately, do not drive highway speedsTow + tire, $150–$300
    Cupping/scalloped wearWorn shocks/struts causing tire bounceInspect suspension + replace tire$400–$1,200 (suspension work included)
    Uneven edge wearUnder/overinflation or alignment issueAddress root cause, then replace$80–$150 alignment + tires
    Rhythmic thumping while drivingPossible belt separationStop driving, inspect same dayTow fee + $150–$250 tire

    What About “Best Time” in Terms of Season and Mileage?

    Beyond wear and age, there’s a practical timing element drivers ask me about constantly, especially heading into fall. If you’re anywhere that sees real winter weather, I always recommend having your tires assessed before temperatures start dropping below 45°F consistently, because tire rubber compounds stiffen in the cold, and a tire that was marginal in summer becomes genuinely unsafe in winter, losing grip exactly when you need it most for braking on wet or icy roads. I’d rather my customers replace tires in October with good tread than limp through a Michigan winter on tires they were “going to replace in spring anyway.”

    Mileage-wise, most all-season tires are rated somewhere between 50,000 and 80,000 miles depending on the manufacturer and compound, but that number assumes proper inflation, regular rotation every 5,000 to 7,000 miles, and decent alignment. I’ve seen tires rated for 60,000 miles die at 35,000 because nobody rotated them, and I’ve seen careful drivers stretch a set to 70,000-plus. Rotation is genuinely one of the cheapest insurance policies you can buy for tire longevity — it’s usually $20 to $40 at most shops, and it evens out wear so you’re not replacing two tires early while the other two still have plenty of life left.

    My Final Verdict From the Garage Floor

    If I’m being straight with you, waiting until a tire “feels dangerous” is waiting too long. Tires give you data constantly — through tread depth, through sidewall condition, through the sounds coming up through your floorboard and steering wheel — and your job as a driver isn’t to become a mechanic, it’s just to pay attention and get things checked before they become emergencies.

    Here’s the checklist I’d want you to actually use, not just read:

    Check your tread depth at three points across each tire monthly, not just when you remember. Look at your DOT date code and know exactly how old your tires are. Run your bare hand across the tread surface feeling for cupping or uneven wear patterns. Inspect sidewalls for cracking, especially if your car sits outside in direct sun. Get an alignment check if you notice any pulling, uneven wear, or if you’ve hit a significant pothole recently. And don’t wait for a blowout to teach you the lesson — get a professional set of eyes on your tires at every oil change, because that’s five minutes that could save you from a very bad day on the highway.

  • You Should Not Underestimate Replacing the Engine Air Filter — Here’s Why

    You Should Not Underestimate Replacing the Engine Air Filter — Here’s Why

    The Twelve-Dollar Part That Quietly Costs Drivers Hundreds

    Of all the maintenance items I deal with on a daily basis, the engine air filter is probably the most disrespected part on the entire vehicle. It’s cheap, it’s easy to access, and most drivers either forget it exists or assume it’s such a minor component that skipping it a few extra years won’t matter. I get it — when you’re staring down a service menu with brake jobs, timing belts, and transmission flushes competing for your attention, a $12 to $25 filter feels like an afterthought. But here’s what I’ve learned after a decade of pulling these things out of engine bays: a neglected air filter doesn’t just sit there being dirty and harmless. It actively works against your engine, your wallet, and in some cases, components you’d never think to connect to something as simple as filtered air. Today I want to walk you through exactly what’s happening when that filter gets ignored, because once you understand the mechanism, you’ll never look at this cheap little part the same way again.

    What That Filter Is Actually Protecting, and What Happens When It Fails Silently

    Let’s get the basics straight first. Your engine air filter’s job is to strain out dust, pollen, dirt, and airborne debris before that air gets pulled into your engine’s intake system and mixed with fuel for combustion. Think of your engine as a large air pump — every single combustion cycle, it’s drawing in a fresh charge of air, and that air has to travel through the filter media (the pleated paper or cotton material inside the filter housing that physically traps particles) before it ever reaches the throttle body and cylinders. When that filter is clean, air flows through it with minimal restriction. When it’s caked with months or years of accumulated grime, you’re essentially asking your engine to breathe through a pillow.

    When I hoist a car up on the lift and pop the air filter housing open on a vehicle that’s never had it changed, this is usually what I see: a filter that’s gone from its original off-white or slightly tan pleated paper color to a dark gray or almost brown, sometimes with visible debris, leaves, or even small insects packed into the folds. The pleats themselves, which should have crisp, well-defined ridges when new, get matted down and compressed from months of moisture cycling and dirt accumulation. At that point, you can hold it up to a light source and barely see any light passing through — that filter has essentially become a barrier rather than a filter. Many drivers overlook this, but from a mechanic’s perspective, the real critical point is that a severely restricted air filter doesn’t just reduce airflow gradually. Past a certain threshold of clogging, your engine’s computer starts making compensating adjustments that can snowball into problems well beyond just “the car feels a little sluggish.”

    How a Dirty Filter Actually Hurts Your Fuel Economy and Performance

    Here’s where I want to get into the mechanics of why this matters, because a lot of articles online just say “dirty filter equals bad gas mileage” without explaining the actual cause and effect. Modern fuel-injected engines rely on a mass airflow sensor or manifold pressure sensor (a component that measures how much air is entering the engine so the computer can calculate the correct amount of fuel to inject) to maintain what’s called the ideal air-fuel ratio. When your filter is severely restricted, less air makes it through to that sensor, and the engine’s computer detects the reduced airflow and pulls back on fuel delivery to try to maintain that proper ratio. On paper, that sounds like it should improve fuel economy, but in practice it does the opposite because your engine is now operating outside its efficient design parameters, often running slightly rich or rough at certain RPM ranges to compensate, and you lose the smooth, efficient combustion the engine was tuned for.

    What would you do if you noticed your car hesitating slightly when you press the gas pedal at a stoplight, almost like a brief stumble before it catches power? A lot of drivers chalk that up to “the car getting older” or blame the transmission. In my experience, it’s vital to check the air filter first in these situations because that hesitation is a classic symptom of restricted airflow, especially under the sudden demand of hard acceleration when the engine desperately needs a large volume of air all at once. I’ve had plenty of cases where a customer was ready to pay for a transmission diagnostic, and the fix ended up being a $20 air filter and about five minutes of labor.

    Back when I was an apprentice mechanic, one of the biggest trial-and-error mistakes I made was underestimating just how much a filter change alone could resolve. A regular customer came in convinced her Toyota Camry had a fuel system problem because of poor mileage and sluggish acceleration, and my senior mechanic at the time told me to check the basics before diving into anything expensive. I remember being almost embarrassed suggesting something as simple as an air filter check to a customer who was expecting a serious diagnosis, but sure enough, that filter was packed solid with dust from what turned out to be years of neglect. We swapped it, and she came back two weeks later reporting noticeably smoother acceleration and an improvement in her fuel economy that she said was “night and day.” That experience taught me never to assume a problem is complicated before ruling out the simple stuff first.

    The Ripple Effect on Other Engine Components You Wouldn’t Expect

    This is the part most drivers genuinely don’t know, and it’s honestly the part that concerns me most when I see a badly neglected filter. A severely restricted air filter forces your engine to work harder to pull air past that clogged media, and that increased vacuum demand can actually pull fine dust and debris around the edges of a poorly sealed or overly deteriorated filter, right past the filtration media entirely. Once that happens, that unfiltered air — carrying dust, sand particles, and other abrasive debris — makes its way directly into your combustion chambers. Over time, that abrasive material acts like a very fine sandpaper against your cylinder walls and piston rings, contributing to accelerated engine wear that you’ll never see coming because it happens gradually over tens of thousands of miles.

    I’ve also seen dirty filters contribute to problems with the mass airflow sensor itself, since some of that fine dust does eventually make it past a degraded filter and coats the delicate sensor wire or hot-film element inside the sensor housing. Once that sensor gets coated in a film of dust and oil residue, it starts sending inaccurate readings to the engine computer, which can trigger rough idling, poor throttle response, or even a check engine light. Replacing a mass airflow sensor isn’t cheap either — depending on the vehicle, you’re looking at anywhere from $150 to over $400 for the part alone, plus labor. Compare that to the cost of just staying on top of your filter changes, and the math makes itself.

    [Component Replacement Schedule & Cost Comparison: Air Filter Neglect vs. Downstream Damage]

    ComponentPreventive CostIntervalCost If Neglected (Downstream Damage)
    Engine Air Filter$15–$30 (DIY) / $25–$50 (shop)Every 12,000–15,000 miN/A — this is the fix
    Mass Airflow SensorN/AFails from dust contamination$150–$400+ (part + labor)
    Spark Plugs (fouled from rich mixture)$80–$150Accelerated wear from compensation$200–$350 for early replacement
    Cylinder Wall/Piston Ring WearN/AGradual, from abrasive particles$2,000+ (engine rebuild territory)
    Fuel Economy LossN/AOngoingRoughly 5–10% reduction, compounding cost over time

    I always tell customers that this table isn’t meant to scare anyone into unnecessary spending — quite the opposite. It’s meant to show just how disproportionate the cost of neglect is compared to the tiny investment of a regular filter swap. A $25 part sitting at the top of that chain is holding back every single downstream cost listed below it.

    How to Actually Check and Replace It Yourself (Because You Really Can)

    Here’s some good news to balance out everything I’ve just laid out — this is genuinely one of the easiest maintenance tasks you can do yourself, and it requires zero specialized tools. Pop your hood, locate the air filter housing (usually a rectangular or slightly rounded black plastic box connected to a wide intake tube, typically positioned near the front or side of the engine bay), and look for either spring clips or a few screws holding the lid closed. Open it up, and you’ll see the filter sitting right there. Take it out and hold it up toward a light source or sunlight — if you can see light streaming clearly through the pleats, you’re still in decent shape. If it looks dark, dense, or you can barely see any light coming through, it’s time for a replacement regardless of what your mileage says.

    When you’re buying a replacement, make sure you’re matching the exact filter size and shape for your specific make, model, and engine year, since filter housings vary even within the same model across different trims and engine options. Dropping the new filter in the correct orientation matters too — most have an airflow direction indicated by an arrow printed on the frame, and installing it backward can reduce its filtering efficiency. The whole process from popping the hood to closing it back up takes most people under ten minutes once they’ve done it once or twice.

    The Bottom Line and What You Should Do This Week

    If there’s one maintenance item that gets dismissed far too easily, it’s this one. The engine air filter sits at the very front of a chain reaction that touches your fuel economy, your throttle response, your sensors, and ultimately the internal health of your engine over the long run. I’d encourage you to go check yours this week — it takes less time than making a cup of coffee. If it’s been over a year or you’re pushing past 12,000 to 15,000 miles since your last change, don’t wait for a sluggish throttle or a check engine light to tell you what a quick visual inspection could’ve told you today. It’s rare in this line of work that I get to recommend something this cheap, this easy, and this genuinely impactful all at once, so take advantage of it while it’s still a simple fix and not a downstream repair bill.