Author: discovery7090

  • You Might Not Want to Put Water in the Washer Reservoir Instead of Proper Washer Fluid — Here’s Why

    You Might Not Want to Put Water in the Washer Reservoir Instead of Proper Washer Fluid — Here’s Why

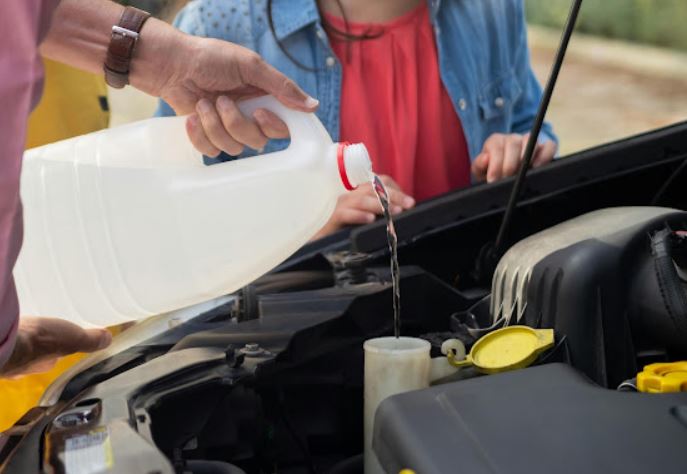
    I had a guy pull into my bay this past winter with a busted washer fluid reservoir, cracked clean through, and washer fluid lines split in two places. He was confused, insisting he’d “never had this happen before.” When I asked what he’d been running in the reservoir, he said plain tap water, had been doing it for years to save a few bucks. That right there was the whole story. He got lucky it only cost him a reservoir and some lines. I’ve seen this exact mistake take out a washer pump too, and that’s a considerably more annoying repair.

    This is one of those corners drivers cut without realizing there’s an actual engineering reason not to. Water seems harmless, it’s basically what washer fluid is mostly made of anyway, right? But that thinking skips over exactly why washer fluid isn’t just water with some blue dye in it, and why that difference matters more in certain seasons than others. Let me walk you through what’s actually going on inside that reservoir and why plain water is a gamble that isn’t worth the savings.

    The Freezing Problem Nobody Thinks About Until It’s Too Late

    Here’s the core issue, and it’s simpler than most people expect: water freezes at 0°C, and washer fluid is specifically formulated with methanol or ethylene glycol-based antifreeze agents to stay liquid well below that, often down to -20°C or colder depending on the fluid’s rating. When straight water sits in your reservoir overnight during a cold snap, it doesn’t just get slushy, it expands as it freezes, because water is one of the few substances that increases in volume when it transitions from liquid to solid.

    That expansion is the actual mechanism of damage, and it’s something a lot of drivers don’t connect until I explain it on the lift. When I pull a cracked reservoir off a car, I can usually tell right away it’s freeze damage rather than impact damage, because the crack pattern is different. Impact cracks tend to be sharp, localized, and radiate from a single point of contact. Freeze cracks are broader, sometimes almost a clean split along a seam or thin wall section of the plastic, because the ice formed inside pushed outward evenly against the container walls until something gave.

    Many drivers overlook this, but from a mechanic’s perspective, the real critical point is that the damage doesn’t always show up immediately. Sometimes the reservoir cracks slightly but doesn’t fully fail until a few days later, once it’s cycled through a few freeze-thaw periods and the stress fracture finally propagates all the way through. That’s why some customers tell me “it was fine last week,” and I have to explain that the failure was likely already happening beneath the surface.

    What would you do if you hit your washer fluid button on a cold morning and heard a weird gurgling sound followed by nothing coming out? Most drivers just assume they’re out of fluid, but if it’s genuinely cold outside and you’ve been running water, that gurgle is very possibly ice forming in the lines, and continuing to mash that button repeatedly is exactly how you burn out a washer pump.

    What Running Water Actually Does to Your Washer Pump and Lines

    I want to get specific here, because this is where the real mechanical damage happens, not just at the reservoir. Your washer pump (the small electric motor submerged inside or beside the reservoir that pushes fluid through the lines to your nozzles) is designed to move liquid, not push against solid ice. If you turn your car on during a freeze and hit the washer button without realizing the fluid is frozen solid inside the reservoir or lines, that pump tries to spin against a blockage it can’t overcome. I’ve pulled more than a few of these pumps out over the years, and you can genuinely smell the difference, there’s a faint burnt electrical odor from the motor windings straining against resistance they were never built to handle.

    A washer pump replacement typically runs $60-120 including labor, depending on the vehicle and how accessible it is. That’s not devastating, but it’s a completely avoidable cost for something that a $6 jug of proper washer fluid would have prevented entirely.

    Beyond the freezing issue, there’s a mineral deposit problem that’s easy to overlook, especially if you’re topping up with tap water rather than distilled. Tap water contains dissolved minerals, calcium and magnesium primarily, and over time as that water evaporates slightly or cycles through your system repeatedly, those minerals can leave deposits inside the narrow washer lines and especially inside the tiny nozzle openings. I’ve cleared clogged washer nozzles with a fine sewing needle more times than I can count, and a good number of those cases trace back to mineral buildup from years of tap water use rather than any fluid contamination.

    Just last week, a client brought in a Honda Civic with a washer spray pattern that had gone from a clean, even fan shape to a weak, lopsided dribble on the driver’s side. She swore she hadn’t touched anything. When I pulled the nozzle and looked closely under a light, there was a visible crust of white mineral buildup partially blocking one of the two spray channels. We cleared it, flushed the system, and switched her over to proper washer fluid, and the spray pattern came back to normal immediately.

    There’s also a cleaning performance gap that matters more than people expect, especially heading into road salt season. Washer fluid contains detergents and solvents specifically formulated to cut through road grime, bug residue, and salt film, none of which plain water handles particularly well. You end up mashing the washer button repeatedly trying to clear a windshield that water just isn’t equipped to clean, and that repeated pump cycling adds unnecessary wear on top of everything else.

    Making the Right Call for Your Climate and Season

    I’m not going to tell you that water is dangerous in every single scenario, because context matters here. If you live somewhere that genuinely never sees freezing temperatures, water carries less risk on the freeze-expansion front, though you’ll still deal with reduced cleaning performance and potential mineral buildup over time. But even in warmer climates, I’d still lean toward proper washer fluid, because the cost difference is minimal and the cleaning performance difference is significant enough to matter every single time you’re driving behind a truck kicking up road spray.

    Back when I was an apprentice mechanic, one of the biggest trial-and-error mistakes I made was assuming a customer’s cracked reservoir was accident damage from a recent fender bender, purely based on timing. Turned out it was freeze damage from weeks earlier that had simply been slowly failing until it finally gave out. I learned to always ask about washer fluid habits before jumping to conclusions on reservoir damage, because the visual clues are genuinely different once you know what to look for.

    Here’s a table I keep on hand for customers who ask about washer fluid selection through the seasons:

    Mechanic’s Essential ChecklistRecommendationWhy It Matters
    Summer washer fluidStandard cleaning formulaNo freeze risk, prioritize bug/grime removal
    Winter washer fluidRated to at least -20°C or your regional lowPrevents freeze expansion damage to reservoir/lines
    Never use plain tap waterEspecially October through MarchFreeze expansion risk plus mineral buildup
    Check fluid rating before first freezeRead the freeze-point label on the jugSome cheap fluids are only rated to -10°C, insufficient for harsh winters
    Distilled water only if dilutingNever dilute in freezing climatesTap water minerals clog narrow nozzle openings
    Inspect nozzles seasonallyClear with a fine needle if spray is weakMineral or debris buildup restricts spray pattern

    One more thing worth mentioning: don’t assume a full reservoir of water is somehow “better than nothing” heading into winter. I’d genuinely rather see a customer run their reservoir low or even empty through a hard freeze than have it full of water sitting there ready to expand. If you’ve been running water and a cold snap is coming, it’s worth draining what you can and refilling with proper fluid rather than just topping off water with fluid and diluting your freeze protection down to something less effective than either option alone.

    Final Verdict and Your Action Checklist

    My honest professional take is this: the few dollars you save running tap water instead of washer fluid isn’t worth the risk of a cracked reservoir, a burnt-out pump, or clogged nozzles, especially once winter temperatures come into play. Washer fluid is formulated the way it is for specific mechanical reasons, not as a marketing gimmick, and skipping it is one of those false economies that ends up costing more than it saves.

    Here’s what I want you to do this week. Check what’s actually in your washer reservoir right now, not what you assume is in there. If it’s water, or a heavily diluted mix, drain it if you can and refill with a proper washer fluid rated for your climate’s coldest expected temperature. Test your washer spray on both nozzles to confirm an even, full pattern on each side, and if you notice a weak or lopsided spray, check for mineral buildup before assuming it’s a pump issue. Heading into any seasonal temperature drop, make this a five-minute check alongside your tire pressure and oil level, because it’s a cheap habit that prevents a genuinely annoying and avoidable repair.

  • Why You Should Replace Wiper Blades On Time

    Why You Should Replace Wiper Blades On Time

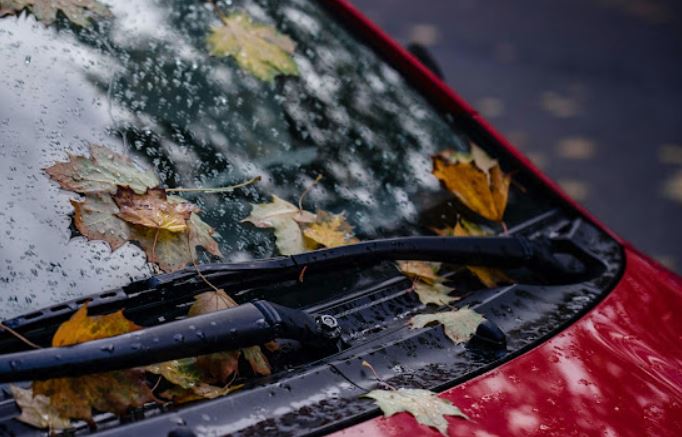
    I had a customer roll into my bay last week during a sudden downpour, windshield wipers screeching and smearing water across the glass in these long, streaky arcs that made it nearly impossible to see the lane markings. She was frustrated, assuming her windshield had some kind of coating issue. I glanced at her wiper blades before I even touched the glass, and I already knew what the problem was. The rubber edge was cracked and curling like old dried leather. She’d been putting off replacing them for over a year because, in her words, “they still move back and forth fine.”

    That’s the misconception I run into more than almost any other maintenance item in this shop. Drivers treat wiper blades as this trivial, forgettable part, something you only think about when it’s already pouring rain and you can’t see. But from where I stand, wiper blades are one of the most underrated safety components on your entire car, and letting them go past their usable life is a gamble most people don’t realize they’re taking until visibility drops to near zero in exactly the moment they need it most.

    What’s Actually Happening Inside That Rubber Blade

    Most drivers think a wiper blade is just a strip of rubber, and that as long as it’s physically attached and moving, it’s doing its job. In reality, the rubber edge (called the squeegee, which is the thin flexible lip that makes direct contact with the glass) is engineered with a specific bevel and flexibility that degrades constantly from the moment it’s installed. UV exposure, ozone in the air, and repeated temperature swings all break down the rubber’s molecular structure over time, a process called oxidation. This isn’t something you can really stop, only slow down.

    When I pull an old blade off a car and run my thumb along the edge, I can usually tell within two seconds whether it needs replacing, just by feel. A healthy blade has a smooth, slightly soft edge that springs back cleanly when you bend it. A degraded one feels stiff, sometimes almost glassy, and if you look closely you’ll often see tiny hairline cracks running perpendicular across the rubber, like the cracks in dry riverbed mud. Those micro-cracks are the real problem, because they change how the blade contacts the glass. Instead of one continuous line of contact, you get dozens of tiny gaps, and that’s exactly what causes that streaking and skipping pattern drivers complain about.

    Many drivers overlook this, but from a mechanic’s perspective, the real critical point is that wiper performance doesn’t fail all at once, it degrades gradually enough that most people don’t notice until it’s genuinely bad. You adapt to slightly reduced visibility without realizing it, the same way you don’t notice a slow leak in a tire until it’s significantly low. By the time you consciously think “these wipers are getting bad,” they’ve usually already been compromised for a couple of months.

    What would you do if you were driving through highway spray from an eighteen-wheeler and your wipers just smeared the water instead of clearing it? That half-second of blindness at highway speed is genuinely dangerous, and it’s almost entirely preventable with an $20-40 part that takes five minutes to swap.

    The Warning Signs I Look For and What They Actually Mean

    There are a handful of specific symptoms I train my apprentices to recognize immediately, because each one points to a slightly different stage of wear. Streaking, where you get a thin line of water left behind after each wipe, usually means the rubber edge has developed those micro-cracks I mentioned, or there’s a small nick from debris that’s disrupting the smooth contact line. Skipping or chattering, that jerky, stuttering motion across the glass, often means the rubber has hardened and lost its flexibility, so it’s no longer conforming smoothly to the slight curve of your windshield.

    Then there’s the squeaking noise, and I want to be specific here because the sound itself tells you something. A high-pitched, rhythmic squeak that happens once per wipe cycle almost always means the blade is dry, hardened, and essentially just dragging rigid rubber across glass instead of gliding. That’s different from a lower, more irregular squeak, which sometimes points to a bent wiper arm rather than the blade itself, and that’s a separate repair. If you’re only replacing blades and the squeak persists, it’s worth having someone check the arm tension and pivot points too.

    Just last month, a client brought in a Toyota Corolla complaining about a rattling, almost clunky sound during wiper operation, not the usual squeak. When I inspected it, the blade itself was fine, but the connector clip attaching it to the arm had worn loose, letting the blade wobble slightly with each pass instead of sitting flush. That’s a good example of why a proper inspection matters, because two different problems can produce a similar frustrating symptom, and swapping blades wouldn’t have fixed her issue at all. We replaced the connector and the blade together, and the noise disappeared entirely.

    Here’s something else worth mentioning: winter is brutal on wiper blades in a way most drivers don’t anticipate. Ice buildup on the blade edge, combined with drivers who run their wipers across a frozen windshield before the defroster has cleared it, causes accelerated cracking and edge deformation. I see a noticeable spike in wiper-related complaints every year in the weeks following the first hard freeze. If you’ve scraped ice off your windshield and your wipers were frozen to the glass, always manually lift and free them before turning the car on, running a motor against frozen resistance can also burn out the wiper motor itself, and that’s a repair running $150-300 instead of a $30 blade.

    Replacement Timing, Costs, and What a Fair Quote Looks Like

    The general rule I give customers is every 6 to 12 months, but honestly, that range exists because climate and usage vary so much. If you live somewhere with intense sun exposure and hot summers, UV degradation happens faster, and you’re looking at closer to the 6-month mark. If you’re in a milder climate with moderate rain and less direct sun, you can often stretch toward 12 months, sometimes slightly beyond, as long as you’re doing the physical inspection I described rather than just going by a calendar.

    I always tell people, don’t wait for a specific date, do the bend test every couple of months instead. Pull the blade away from the glass, run your finger along the rubber edge, and gently flex it. If it feels brittle, cracked, or doesn’t spring back with any elasticity, it’s time, regardless of how many months it’s been.

    Cost-wise, this is genuinely one of the best DIY jobs available to drivers with zero mechanical experience. Basic wiper blades run $15-25 per pair for most standard sedans, while premium beam-style blades (a modern design without the traditional metal frame, which distributes pressure more evenly across the glass) run $30-50 per pair. Most auto parts stores will even install them for free if you buy the blades there, and doing it yourself takes about five minutes once you know the release mechanism for your specific clip type.

    If a shop is charging you a labor fee just to install wiper blades, that’s worth questioning, since it’s genuinely one of the simplest jobs in the entire industry. A fair shop rate for wiper installation, if you’re not doing it yourself, should be minimal, often bundled free with an oil change or inspection rather than billed as a standalone labor charge.

    Component Replacement Schedule & Cost ComparisonRecommended IntervalEstimated Cost (Pair)Warning Signs to Watch For
    Standard wiper blades6-12 months$15-25Streaking, minor skipping
    Premium beam-style blades8-14 months$30-50Slightly longer lifespan, better cold performance
    Rear wiper blade (if equipped)12-18 months$10-20Often forgotten, check separately
    Wiper arm/connector inspectionEvery 2 years or if noise persists$20-60 if replacement neededRattling, wobble during operation
    Washer fluid nozzlesCheck each seasonMinimal (cleaning only)Weak or uneven spray pattern

    Back when I was an apprentice mechanic, one of the biggest trial-and-error mistakes I made was assuming all replacement blades were universal fits as long as the length matched. I installed a generic blade on a customer’s vehicle that had a slightly unusual arm connector, and within two weeks it had worked loose and was rattling against the glass. That taught me to always check the specific connector type for the vehicle, not just the blade length, because a mismatched fit can undo all the benefit of the fresh rubber.

    It’s also worth mentioning washer fluid quality while we’re on the topic, because it directly affects how your new blades perform. Using plain water, especially in winter, can freeze in the reservoir or lines and leave you with zero spray exactly when you need to clear road grime. A proper washer fluid with the correct freeze-rating for your climate works with your wiper blades as a system, not as separate, unrelated parts.

    Final Verdict and Your Action Checklist

    My honest professional opinion is this: wiper blades are one of the cheapest, easiest safety upgrades available on your entire vehicle, and there’s no good reason to run them past their usable life. Reduced visibility during rain, snow, or highway spray is a genuine safety risk, and it’s one that costs less to fix than a single tank of gas.

    Here’s what I want you to do this week. Step outside and physically bend each wiper blade edge between your fingers, checking for cracking, stiffness, or a glassy texture. Run your wipers on a dry windshield briefly, just long enough to check for streaking or skipping across the glass. If you notice any of these signs, or if it’s simply been over a year since your last replacement, pick up a new pair; it’s a five-minute job you can do yourself in a parking lot with nothing more than your hands. And don’t forget your rear wiper if your vehicle has one, since it’s the most commonly neglected blade on the entire car despite doing real work every time you reverse in the rain.

  • Why Exact Tire Pressure Matters

    Why Exact Tire Pressure Matters

    Every single week, at least one customer pulls into my bay with a dashboard warning light glowing and a look of mild panic on their face, convinced something catastrophic is wrong with their car. Nine times out of ten, I walk over with my gauge, check all four corners, and find they’re just running 4 or 5 PSI low. It seems trivial, almost embarrassing to make a fuss over. But here’s what most drivers don’t realize: that “small” pressure discrepancy is one of the most quietly destructive things you can do to your tires, your fuel economy, and in some cases, your safety on the road.

    Tire pressure gets treated like an afterthought, something you check once a year if you remember, or only when a warning light forces the issue. In my ten years on the shop floor, I’ve seen more preventable tire failures, uneven wear patterns, and blown-out sidewalls caused by pressure mismanagement than almost any other single factor. So let’s talk about why that number stamped inside your driver’s door jamb matters so much more than people think, and why “close enough” really isn’t close enough when it comes to PSI.

    The Physics Nobody Explains Properly

    Here’s the thing about tire pressure that most articles gloss over: it’s not really about the tire at all, it’s about the contact patch, which is the small area of rubber actually touching the road at any given moment (usually about the size of your palm, depending on tire size and load). Everything about how your car handles, brakes, and wears down its tires comes down to that contact patch staying the correct shape.

    When a tire is underinflated, the sidewalls flex outward and the tire bulges, which means more of the tire’s outer edges touch the pavement while the center rides slightly higher. When I hoist a car up on the lift and pull a tire that’s been running low for months, I can usually tell before I even check the gauge, just by looking at the wear pattern. You’ll see two distinct worn strips along both outer edges of the tread, with the center still looking relatively fresh. That’s underinflation wear, and it’s one of the clearest diagnostic signs in my job.

    Overinflation does the opposite. The tire becomes rounder and stiffer than it should be, so the center of the tread bears most of the load and wears down faster than the edges. Many drivers overlook this, but from a mechanic’s perspective, the real critical point is that both of these wear patterns are permanent once they set in. You can correct the pressure after the fact, but you can’t undo the uneven wear that’s already happened. That tire is now compromised for the rest of its life, and it’ll need replacing sooner than it should have.

    What would you do if you noticed your front tires were wearing faster on the outside edges than the inside? Most drivers assume it’s an alignment problem right away, and sometimes it is, but I always check pressure history first, because it’s the cheaper and more common culprit.

    Why “Eyeballing It” Fails and Temperature Changes Everything

    I hear this all the time: “I can tell if a tire’s low just by looking at it.” I’ll be honest with you, unless a tire is severely underinflated, that’s simply not true anymore. Modern radial tires (tires built with steel belt layers running radially across the tread for strength and stability) are engineered to look relatively normal even when they’re 15-20% below the recommended pressure. That visual cushion is exactly why so many drivers don’t catch the problem until it’s already caused damage.

    This is where temperature becomes the sneaky variable that catches almost everyone off guard. For roughly every 10°C drop in ambient temperature, tire pressure drops by about 1-2 PSI, because the air inside the tire contracts as it cools. I see this constantly at the start of every winter season, drivers who had perfectly correct pressure in September suddenly showing up in November with a TPMS light on, convinced they have a slow leak. Most of the time, there’s no leak at all, it’s just the seasonal temperature swing catching up with them.

    Just last month, a client brought in a Kia Sportage insisting she had a puncture because her low pressure warning kept coming on every few days. I checked all four tires, found no nails, no punctures, nothing visually wrong. I asked her when the light started, and sure enough it lined up almost exactly with the first cold snap of the season. Her pressure was reading 28 PSI in the front where it should have been 33. We aired everything up to spec, and the light didn’t come back on for the rest of the season. That’s a five-minute fix that saved her an unnecessary tire replacement she was already mentally preparing to pay for.

    There’s a flip side too, and it’s just as important. In the heat of summer, especially after a long highway drive, tire pressure can read 3-5 PSI higher than your cold baseline simply from heat buildup through friction and ambient temperature. This is why I always tell customers to check pressure when tires are cold, meaning the car has been sitting for at least three hours or hasn’t been driven more than a couple kilometers. Checking pressure right after a drive gives you an inflated number that doesn’t reflect your actual baseline, and adjusting based on that reading will leave you underinflated once the tires cool back down.

    The Real Safety and Financial Stakes

    I want to walk you through what actually happens mechanically when a tire runs significantly underinflated, because this isn’t just about tread wear, it directly affects how your car behaves in an emergency. An underinflated tire generates more heat as it flexes through each rotation, since the sidewall is doing more work than it’s designed for. That heat buildup, especially on a highway drive in summer, is one of the leading contributors to sudden tire failure, the kind where a sidewall lets go at speed. I’ve responded to enough roadside situations in my career to tell you that a blowout at highway speed is genuinely one of the scarier things a driver can experience, and it’s almost always preventable with a two-minute pressure check.

    Underinflation also increases your stopping distance in an emergency brake situation, because that distorted contact patch reduces the tire’s grip efficiency. On a wet road, this effect gets even more pronounced. I’ve had customers come in after a near-miss incident, shaken up, describing exactly this scenario, and when I check their tires, they’re running well below spec.

    Then there’s the financial angle, which honestly should be reason enough on its own. Underinflated tires increase rolling resistance, meaning your engine has to work harder to maintain speed, and that translates directly into worse fuel economy, typically around a 1-3% loss for every 1 PSI below spec across all four tires. That might sound small until you calculate it over a full year of driving. On top of that, uneven wear from incorrect pressure can shave 15-20% off your tire’s usable lifespan, meaning you’re replacing a set of tires that could have easily gone another 10,000-15,000km if pressure had been managed properly.

    Back when I was an apprentice mechanic, one of the biggest trial-and-error mistakes I made was assuming factory door-jamb pressure specs were universal across similar vehicles. I once advised a customer with a heavily loaded minivan to run the same pressure as a comparable sedan, purely from memory instead of checking her actual specification sticker. It wasn’t dangerous in her case, but it did contribute to faster wear on her rear tires. That mistake taught me to always physically check the sticker on every vehicle, every time, no matter how confident I feel about the number.

    Here’s a table I keep taped up in my shop office and hand out to customers who ask about proper maintenance intervals:

    Mechanic’s Essential ChecklistRecommended ActionWhy It Matters
    Check pressure monthlyUse a manual gauge, not just TPMSTPMS often only warns once pressure is significantly low
    Check when tires are coldWait 3+ hours after drivingHeat from driving inflates readings temporarily
    Adjust for seasonal temperatureRecheck at each major season changePressure drops ~1-2 PSI per 10°C temperature decrease
    Match spec to door jamb stickerNever guess based on tire sidewall max PSISidewall number is the tire’s maximum, not your vehicle’s recommendation
    Inspect tread wear patternLook for edge vs. center wearReveals under/overinflation history even after correcting pressure
    Don’t forget the spareCheck it during regular pressure checksSpares lose pressure too and are often neglected for years

    One point of confusion I clear up constantly: the number printed on your tire’s sidewall is not your recommended pressure, it’s the maximum pressure that tire can safely hold. Your actual recommended pressure is specific to your vehicle, not the tire, and it’s printed on a sticker inside your driver’s side door jamb, or in your owner’s manual. I’ve seen drivers inflate to the sidewall max thinking they’re being thorough, and end up with a harsher ride, reduced grip, and that telltale center-wear pattern within a matter of months.

    Final Verdict and Your Action Checklist

    My honest professional take is this: tire pressure is one of the cheapest, fastest maintenance checks you can perform, and it has an outsized impact on your safety, your fuel costs, and how much money you’ll spend replacing tires over the life of your car. There’s no reason to leave it to guesswork or wait for a warning light, because by the time that light comes on, you’re often already well below the safe threshold and the damage may already be underway.

    Here’s what I want you to do this week. Find your vehicle’s actual recommended pressure on the door jamb sticker, not the tire sidewall. Buy a decent manual tire gauge if you don’t already have one; they cost less than a coffee and coincidentally are more reliable than most cheap digital ones. Check all four tires, plus your spare, while they’re cold, ideally first thing in the morning before you’ve driven anywhere. Adjust as needed, and make a habit of repeating this check monthly, with extra attention at the start of each new season when temperature swings are steepest. It’s a five-minute habit that will genuinely extend your tire life, improve your fuel economy, and keep you safer every time you’re on the road.

  • 5,000km vs 10,000km Oil Change? The Ultimate Mechanic’s Guide

    5,000km vs 10,000km Oil Change? The Ultimate Mechanic’s Guide

    A few months back, a regular customer stormed into my shop holding a printout from some online forum, practically ready to fight me. “Why did you tell me to change my oil at 8,000km when this article says modern synthetic oil is fine until 15,000km?” I get this argument at least twice a month, and honestly, I don’t blame drivers for being confused. The oil change interval debate has become one of the most polarizing topics in car care, right up there with whether you really need to warm up your engine in winter.

    Here’s the truth that nobody wants to hear: there is no single correct answer. When I hoist a car up on the lift and drain the oil, what I see tells me a story about how that specific vehicle has been driven, and that story is different for every single car that rolls into my bay. Today I want to walk you through exactly how I evaluate this for my own customers, because the 5,000km-versus-10,000km debate isn’t really about a magic number. It’s about understanding your engine, your oil, and your driving habits well enough to make the right call for your situation.

    Why the “One Number Fits All” Myth Keeps Fooling Drivers

    Manufacturers started stretching recommended oil change intervals over the last fifteen years, largely because of improvements in oil chemistry. Full synthetic oil has better thermal stability and resists breakdown longer than the conventional dino oil most of us grew up with. That’s a real, legitimate engineering fact. But here’s what gets left out of the conversation: those extended interval recommendations from manufacturers are almost always based on “ideal” driving conditions — highway commutes, moderate climates, no towing, no stop-and-go traffic.

    Many drivers overlook this, but from a mechanic’s perspective, the real critical point is that almost nobody actually drives in ideal conditions. If you’re doing short trips under 10 minutes, idling in traffic, driving in extreme heat or cold, or towing anything, you’re in what manufacturers classify as “severe service” conditions — and that classification cuts your safe interval down significantly, sometimes by half.

    I want you to picture this: when oil is cold, it’s thick and doesn’t lubricate as well until it reaches operating temperature (typically around 90-105°C). If your daily drive is a 12-minute school run, your engine barely gets warm before you shut it off. That means moisture and unburned fuel vapor never fully cook off, and they end up mixing into your oil, breaking it down chemically far faster than the odometer would suggest. I’ve pulled dipsticks on cars with only 4,000km on the oil that looked like they had 12,000km of highway miles on it, just because of this exact short-trip pattern.

    What would you do if you found out your “gentle” city driving was actually harder on your engine than a highway road trip? Most drivers assume less driving equals less wear, but that’s backwards when it comes to oil degradation.

    Reading the Oil Yourself: What a Mechanic Actually Looks For

    I always tell my customers, don’t just trust the sticker on your windshield — trust your dipstick and your senses too. Here’s what I check every single time a car comes in for service, and what you can check yourself in about two minutes.

    Pull the dipstick, wipe it clean, reinsert it fully, then pull it again. Fresh oil, even in a well-used engine, should have a slight amber-to-brown translucency when you smear a drop on a white paper towel. If it comes out looking like used motor oil straight from a jar — opaque black, gritty between your fingers, or smelling faintly of gasoline — that oil is done, regardless of what the mileage sticker says. A sharp, burnt smell specifically tells me the oil has been running hotter than it should, which sometimes points to a cooling system issue rather than just normal wear.

    Texture matters more than color, honestly. Rub a drop between your thumb and forefinger. If it feels gritty or sandy, that’s metal particulates and carbon buildup, and it means the oil has lost its ability to suspend contaminants properly. Good oil, even dark oil, should still feel relatively smooth. This single check has saved more than a few of my customers from unnecessary panic, and it’s flagged real problems for others who insisted “the mileage isn’t up yet.”

    Just last week, a client brought in a Hyundai Elantra with this exact issue. She was adamant her oil was fine because she’d only driven 6,000km since her last change, well within her “10,000km synthetic” plan. But she’d mentioned offhand that she does a lot of short grocery runs and sits in school pickup lines twice a day. Sure enough, the oil on the dipstick was thin, dark, and had that telltale burnt edge to the smell. Her driving pattern put her squarely in severe service territory, and she’d unknowingly been running degraded oil for weeks. We switched her to a 5,000km interval and she hasn’t had an issue since.

    Building Your Personal Interval: A Mechanic’s Framework

    Instead of picking a number off a forum, I walk customers through a simple framework based on three factors: oil type, driving pattern, and engine age or condition.

    Conventional (mineral) oil breaks down fastest and generally needs changing every 5,000km regardless of driving style, because its additive package depletes quicker under heat cycling. Synthetic blend oil splits the difference, typically good for 6,500 to 8,000km under normal conditions. Full synthetic oil, when paired with genuinely normal driving (mostly highway, moderate climate, no towing), can often stretch to 10,000 to 12,000km safely. But that same full synthetic oil, in a car doing mostly short city trips or frequent towing, should still come back down to around 6,000 to 7,000km in my professional opinion, because the driving conditions are doing the damage, not the oil chemistry itself.

    Engine age plays a role too, and this is something I don’t see discussed enough. Older engines, especially anything past 150,000km, tend to run slightly looser tolerances between components. That means more blow-by (combustion gases leaking past the piston rings into the crankcase), which contaminates oil faster. I generally recommend tightening the interval by about 15-20% once a vehicle crosses that mileage threshold, even if it’s running full synthetic.

    Here’s a comparison table I hand out at my shop to help customers figure out where they land:

    Driving Condition / Oil TypeConventional OilSynthetic BlendFull Synthetic
    Highway-dominant, moderate climate5,000km7,000-8,000km10,000-12,000km
    Mixed city/highway, average conditions4,500km6,500km8,500-9,500km
    Short trips, stop-and-go, extreme heat/cold3,500-4,000km5,000-5,500km6,000-7,000km
    Towing, heavy loads, dusty roads3,000-3,500km4,500-5,000km5,500-6,000km
    High-mileage engine (150,000km+)3,500-4,000km5,000-5,500km6,500-7,500km

    I’ll be upfront with you: some shops use “severe service” as an excuse to upsell unnecessary changes. If a mechanic tells you every single car needs a change every 5,000km no matter what oil or driving style, that’s a lazy, blanket recommendation, and it’s worth questioning. On the other hand, if a quick-lube place is pushing you toward 15,000km intervals on full synthetic just to make the price look attractive, be skeptical of that too — that’s stretching beyond what most manufacturers even recommend for ideal conditions, let alone real-world driving.

    Back when I was an apprentice mechanic, one of the biggest trial-and-error mistakes I made was trusting mileage stickers without asking customers about their actual driving habits. I once serviced a delivery driver’s Kia Sorento strictly by the sticker interval, and about two years in, we found early signs of sludge buildup in the valve cover. That was a wake-up call. Mileage alone was never the full picture — it’s mileage combined with how those kilometers were actually driven.

    Practical Costs and What’s a Fair Quote

    Let’s talk numbers, because I know that’s ultimately what drives the decision for most people. A conventional oil change typically runs $40-60 at a shop. Synthetic blend lands around $60-85. Full synthetic usually comes in at $80-120, depending on your vehicle and how many liters your engine holds. If a shop quotes you significantly above that range without a clear explanation, ask what’s included; sometimes it’s bundled with a filter upgrade or a multi-point inspection that genuinely adds value, but sometimes it’s just markup.

    Mechanic’s Essential ChecklistWhat to CheckWhy It Matters
    Dipstick color and clarityAmber to dark brown, not blackIndicates additive depletion level
    Texture testSmooth vs. gritty between fingersGritty = metal particulates, oil has failed
    Smell testFaint petroleum vs. sharp/burntBurnt smell suggests overheating or degradation
    Oil levelBetween min/max marksLow level accelerates wear and heat buildup
    Filter conditionReplaced every oil changeClogged filter restricts flow, starves engine
    Driving log reviewShort trips vs. highway ratioDetermines true “severe service” classification

    Running your car on old, degraded oil isn’t a small risk. Worn-out oil loses viscosity stability, which means it can’t maintain that protective film between metal components under heat and pressure. Over time, this leads to increased friction wear on bearings and camshaft lobes, and in the worst cases I’ve seen, it contributes to premature timing chain stretch, which is a repair that can run well over $1,500 depending on the vehicle. Compare that to the cost of a few extra oil changes over the life of your car, and the math isn’t close.

    Final Verdict and Your Action Checklist

    My honest, no-upselling professional opinion is this: don’t anchor yourself to either 5,000km or 10,000km as gospel. Use the manufacturer’s recommendation as your starting point, then adjust based on your actual driving pattern and the oil type currently in your engine. If more than half your driving involves trips under 15 minutes, or you regularly deal with stop-and-go traffic, tow anything, or live somewhere with extreme seasonal temperatures, shift your interval toward the shorter end of whatever range your oil type allows.

    Before you leave this article, here’s what I want you to actually do this week:

    Check your owner’s manual for the specific oil type and manufacturer-recommended interval for your vehicle. Pull your dipstick right now and run the color, texture, and smell test I described above. Be honest with yourself about your driving pattern over the last month, and compare it against the table in this article. If you’re overdue based on that honest assessment, don’t wait for a dashboard warning light; get it changed this week. And if a shop ever pushes back on your questions about their interval recommendation, that’s a shop worth reconsidering, because a good mechanic should welcome an informed customer, not brush them off.