Author: discovery7090

  • How to Keep Your Turbo in Good Shape (Before It Costs You Thousands)

    How to Keep Your Turbo in Good Shape (Before It Costs You Thousands)

    The Ticking Time Bomb Under Your Hood That Nobody Explains Properly

    Turbocharged engines are everywhere now. Automakers downsized displacement across the board and slapped a turbo on nearly everything to hit fuel economy targets while still keeping horsepower numbers respectable on the window sticker. Problem is, most drivers who bought into this shift have no idea they’re now driving something that behaves fundamentally differently under the hood compared to the naturally aspirated engines their parents drove. I see it constantly — someone rolls in with a turbocharged compact SUV or sedan, treats it exactly like grandma’s old naturally aspirated Camry, and within 60,000 to 80,000 miles they’re looking at a turbo replacement bill that can run anywhere from $1,500 to well over $3,000 depending on the platform. The frustrating part is that almost all of it was preventable. Today I want to walk you through what’s actually happening inside that turbo housing, why certain habits destroy it faster than people realize, and exactly what you need to do to get that component to last the life of the car instead of becoming a mid-life expense.

    Understanding What’s Actually Spinning Under That Boost Pressure

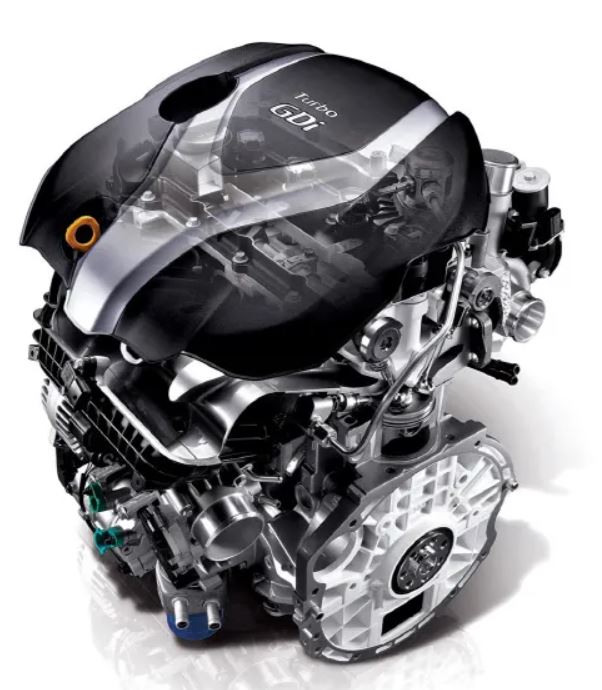
    Let’s start with what a turbocharger actually is, because I find most owners have a vague notion but not a real understanding. A turbocharger uses your engine’s exhaust gases to spin a turbine wheel, which is connected by a shaft to a compressor wheel on the intake side (this is the part that force-feeds extra air into your engine to make more power than the engine could produce on its own). That shaft is spinning at speeds that can exceed 150,000 to 200,000 RPM under load — for comparison, your engine’s crankshaft is doing maybe 6,000 to 7,000 RPM at redline. At that rotational speed, the shaft doesn’t ride on traditional ball bearings in most turbos; it floats on an incredibly thin film of pressurized oil, sometimes as thin as a few microns, called a “journal bearing” (a bearing surface lubricated purely by oil pressure rather than physical rolling elements).

    When I hoist a car up on the lift and pull a failed turbo apart, this is usually what I see: the shaft has developed play you can feel just by wiggling it between your fingers, and there’s often a bluish discoloration on the housing from excessive heat. That discoloration tells me almost immediately that this turbo was starved of oil at some point, even if just for a few seconds. Many drivers overlook this, but from a mechanic’s perspective, the real critical point is that turbo failure is almost never a sudden, random event. It’s the cumulative result of small moments of oil starvation or oil degradation that slowly wear away at that bearing surface until one day it lets go entirely, sometimes taking metal debris and sending it straight into your engine’s intake tract or exhaust system.

    The Habit That Kills More Turbos Than Anything Else

    If I had to point to one single behavior that shortens turbo life more than any other, it’s shutting the engine off immediately after hard driving. Here’s the mechanism behind it, because understanding the “why” is what actually gets people to change the habit. When you’re driving hard — highway merging, climbing a grade, or just spirited acceleration — that turbo is spinning at extreme RPM and running very hot, sometimes with exhaust-side temperatures exceeding 1,700 degrees Fahrenheit. The oil that’s constantly flowing through the bearing housing is doing double duty: lubricating that spinning shaft and carrying heat away from it. The instant you shut the engine off, oil circulation stops immediately, but that turbo housing is still radiating enormous heat into whatever oil remains trapped inside it. That trapped oil essentially cooks and forms a hard, varnish-like carbon deposit inside the bearing housing — mechanics call this “coking” (the process of oil breaking down into carbon deposits from extreme heat without circulation). Once coking starts, it restricts oil flow to the bearing on future startups, and you’ve begun a slow death spiral for that turbo.

    What would you do if you just got off the highway after a long drive and pulled straight into your driveway? Most people shut the car off right then and walk inside. In my professional opinion, that’s exactly the wrong move on a turbocharged vehicle. I tell every customer with a turbo car the same thing: after any period of sustained higher-RPM driving, give the engine 60 to 90 seconds of idle time before shutting it down. That idle period allows oil to keep circulating through the turbo bearing while the housing gradually sheds heat, preventing that coking process from ever starting. Some newer turbo vehicles actually have a turbo timer or an electric auxiliary oil pump that handles this automatically, but the vast majority of daily-driver turbo cars on the road today still rely entirely on driver discipline for this.

    Just last week, a client brought in a Hyundai Elantra with the 1.6-liter turbo engine, and she was describing a whistling noise on acceleration along with a slight puff of blue-gray smoke on startup. When I pulled the intake piping off to inspect the turbo, I could physically spin the compressor wheel by hand and feel gritty resistance along with noticeable side-to-side play in the shaft — that play should be nearly imperceptible on a healthy turbo. Turns out she commuted 40 minutes on the highway every day and always shut the car off the second she parked. Classic coking failure pattern. We replaced the turbo, and the very first thing I did during the walkthrough afterward was teach her that 60-second cool-down habit, because otherwise she’d be back in my bay with the same problem in another two or three years.

    Oil Quality and Change Intervals Matter More Than You Think

    The second biggest factor I see contributing to premature turbo failure is oil neglect, and this ties directly into the bearing lubrication we just talked about. Turbocharged engines are far less forgiving of extended oil change intervals or cheap, low-quality oil than naturally aspirated engines are. That thin oil film supporting the turbo shaft depends entirely on oil that hasn’t broken down, hasn’t lost its viscosity stability, and is still carrying its detergent and anti-wear additive package effectively. Once oil starts to degrade past its useful life, it can no longer maintain that consistent film thickness under extreme heat and RPM, and you get metal-to-metal contact at a microscopic level every single time you drive.

    In my experience, it’s vital to use a full synthetic oil that meets the manufacturer’s specific turbo-rated specification, and to stick to intervals no longer than 5,000 miles even if the manufacturer’s oil life monitor is telling you that you can push it to 7,500 or 10,000 miles. Those extended interval recommendations are often calculated assuming ideal driving conditions, and most people’s real-world driving — short trips, stop-and-go traffic, extreme temperatures — doesn’t match that ideal scenario. I’ve cut open oil filters from turbo vehicles at the 10,000-mile mark using extended synthetic oil, and the filter media already showed a noticeable amount of fine metallic sediment that simply shouldn’t be there yet.

    [Mechanic’s Essential Checklist: Turbo Care & Maintenance Schedule]

    Maintenance TaskRecommended IntervalWhy It MattersEstimated Cost If Skipped
    Full synthetic oil changeEvery 5,000 miMaintains bearing lubrication filmTurbo failure: $1,500–$3,000+
    Post-drive idle cool-downEvery drive (60–90 sec)Prevents oil coking in housingTurbo failure: $1,500–$3,000+
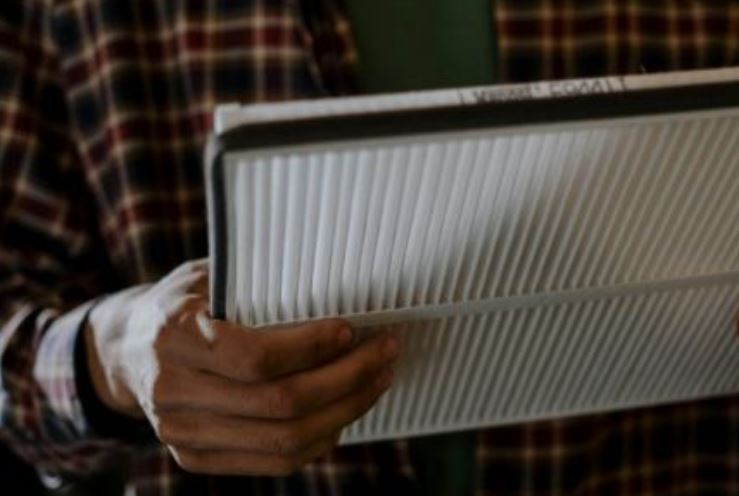
    Air filter inspectionEvery 10,000–12,000 miPrevents debris ingestion into compressorCompressor wheel damage: $600–$1,200
    Boost hose/coupling checkEvery 20,000 miPrevents boost leaks, overspin conditionsReduced power, potential overspin failure
    Warm-up before hard accelerationEvery cold start (1–2 min)Allows oil pressure to stabilize firstAccelerated bearing wear over time

    I’d also add that cold starts deserve just as much respect as hot shutdowns. Many drivers overlook this, but from a mechanic’s perspective, the real critical point on startup is that oil pressure takes a few seconds to fully establish itself throughout the engine, including up at that turbo bearing housing sitting near the top of the engine. Flooring it within the first minute of a cold start, especially in winter, means you’re asking that turbo to spin at high RPM before it has adequate, properly-pressurized lubrication reaching it. Give it a minute or two of gentle driving before you lean into the throttle, and you’ll spare that bearing a lot of unnecessary stress over the life of the car.

    Listening for the Early Warning Signs Before Failure Becomes Catastrophic

    Turbos, much like differentials, tend to give you audible warnings well before they fail completely, and knowing what to listen for can save you from a catastrophic failure that damages your engine internals. A turbo in the early stages of bearing wear typically produces a distinct high-pitched whining or whistling sound during acceleration that rises and falls in pitch with engine RPM — some people describe it as sounding almost like a jet engine spooling up. That’s different from a boost leak, which tends to sound more like a hissing or a fluttering “psshhh” sound, usually most noticeable when you let off the throttle after accelerating.

    If you start noticing blue-gray smoke from the exhaust specifically under acceleration or right after startup, that’s often oil making its way past worn turbo seals into the intake or exhaust tract and getting burned off. That’s a sign the bearing clearance has already opened up beyond a safe tolerance, and in my professional opinion, that turbo needs attention within days, not months. Continuing to drive on a turbo in that state risks it seizing entirely, and when a turbo seizes, it can send metal fragments downstream into the catalytic converter or, worse, back into the engine’s intake, turning a $1,500 turbo replacement into a $5,000-plus engine repair.

    What You Should Actually Do This Week

    If you own a turbocharged vehicle, I want you to walk away from this article with three concrete actions, not just vague awareness. First, check your maintenance records and confirm your oil changes have genuinely been happening every 5,000 miles with a full synthetic that meets your manufacturer’s turbo spec, not just whatever was cheapest at the last quick-lube shop. Second, start practicing that 60-to-90-second cool-down idle after any highway or hard-driving session, and give your engine a gentle minute before demanding hard acceleration on cold starts. Third, pay attention to any new whistling, whining, or smoke on acceleration, and get it checked immediately rather than waiting to see if it goes away on its own — it won’t. Turbochargers are remarkably durable components when they’re treated with the respect their operating conditions demand, but they’re equally unforgiving of neglect. A few small habit changes on your part is genuinely the difference between that turbo lasting the entire life of your vehicle or leaving you with a repair bill that could’ve bought you a decade of oil changes instead.

  • Is Your Car AWD? Then You Need to Read This Before Your Next Oil Change

    Is Your Car AWD? Then You Need to Read This Before Your Next Oil Change

    The Fluid Nobody Remembers Until It’s Too Late

    Every week, at least one AWD owner rolls into my bay convinced they’ve done everything right. Regular oil changes, fresh brake pads, new tires when the tread got low — a genuinely well-maintained car on paper. Then I ask one simple question: “When’s the last time you changed your differential fluid?” More often than not, I get a blank stare. Some don’t even know their car has a differential fluid separate from the engine oil. And honestly, I don’t blame them — nobody tells you about it at the dealership, and it’s not exactly a line item that jumps out on a service reminder sticker. But here’s the thing: if you’re driving an all-wheel-drive vehicle and you’ve never touched that fluid, you’re sitting on a problem that grows more expensive with every mile you drive. Today I want to walk you through exactly why this matters, what actually happens inside that housing when the fluid breaks down, and what a fair repair looks like versus what’s a rip-off.

    What Is Differential Fluid, and Why Does AWD Make It So Critical?

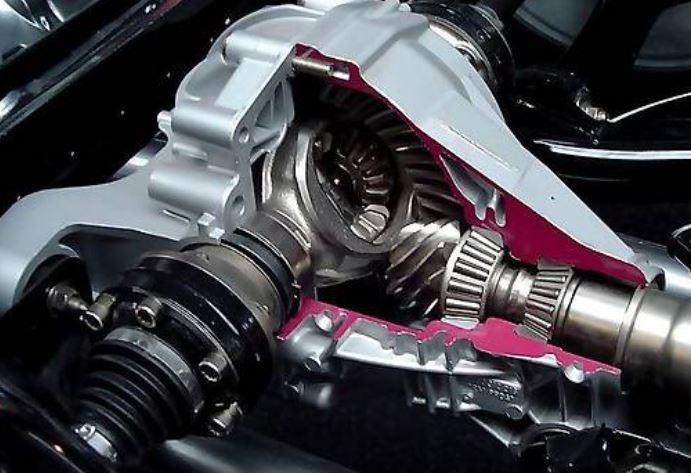
    Let’s clear up the terminology first, because I know it trips people up. Your differential (a gear assembly that allows your wheels to spin at different speeds when turning, which is essential because your outer wheels travel a longer arc than your inner wheels) relies on a thick, specialized gear oil to keep its internal gears and bearings lubricated under extreme pressure. In a front-wheel-drive car, you’ve usually only got one differential to worry about, and it’s often bathed in the same fluid as your transmission. But AWD and 4WD vehicles are a different animal entirely. Depending on the drivetrain layout, you could be looking at a front differential, a rear differential, and a transfer case (the component that splits power between the front and rear axles) — each with its own separate fluid, its own service interval, and its own failure mode if neglected.

    When I hoist a car up on the lift and pull the fill plug on a rear differential that’s never been serviced, I can tell you almost immediately how bad the neglect has been just by the smell and the color. Fresh gear oil has an amber, almost honey-like translucency and a distinct sulfur smell from the extreme-pressure additives. By the time it’s gone 80,000-plus miles without a change, it turns dark, gritty, and starts smelling faintly burnt — that’s from metal-on-metal contact grinding away at the gear teeth and depositing fine metallic particles into the fluid. Many drivers overlook this, but from a mechanic’s perspective, the real critical point is that differential fluid doesn’t just lubricate — it also acts as a heat transfer medium and a cushion against shock loading every time you accelerate hard or take a corner aggressively. Once that fluid degrades, you’re not just losing lubrication, you’re losing your gears’ ability to survive normal driving stress.

    The Warning Signs Most Drivers Miss (Until It’s a $2,000 Problem)

    This is where I really want you to pay attention, because differential failure rarely happens overnight. It whispers before it screams. What would you do if you suddenly heard a low, rhythmic whining sound coming from underneath the car that changes pitch with your speed, kind of like a airplane taking off in the distance? Most drivers just turn up the radio. From my experience, that whine is one of the earliest and most reliable indicators of degraded gear oil or worn ring-and-pinion gears (the main gear set inside the differential that transfers power from the driveshaft to the axle). If you catch it at that whining stage and get a fluid change done, you might avoid a rebuild entirely. But if you let it progress to a clunking noise on acceleration or deceleration — that rhythmic “clunk-clunk-clunk” especially noticeable in slow parking lot turns — you’re likely already dealing with worn spider gears or bearing play, and no fluid change in the world is going to fix that anymore.

    I actually had a client bring in a Subaru Outback a few months back — great car, but the owner had put nearly 95,000 miles on it without ever touching the rear differential fluid. She mentioned an occasional whine on the highway that she’d been ignoring for months, chalking it up to road noise. By the time I got it on the lift, the fluid that came out looked almost like chocolate milk with metal flakes settled at the bottom of the drain pan. We caught it just in time — a fluid change and a magnetic drain plug cleanout solved it, total bill around $180. Had she waited another 10,000 miles, we were looking at a full differential rebuild or replacement, easily $1,800 to $2,500 depending on the parts availability for that specific AWD system. That’s the gap we’re talking about here: a $180 preventive service versus a $2,000+ repair, and the only difference is whether you acted on the early warning signs.

    How Often Should You Actually Change It? (And Why Your Owner’s Manual Might Be Wrong)

    Here’s something that might surprise you, and it’s a point I’ve gone back and forth with service advisors about for years. A lot of manufacturers list differential fluid as a “lifetime fill” or push the interval out to 100,000 miles or more in the owner’s manual. In my professional opinion, that number is written for ideal conditions — mild climates, no towing, no aggressive driving, no off-roading. It’s not written for the reality most people actually live in. If you’re doing any towing, frequent stop-and-go city driving, driving through deep snow or mud regularly, or you live somewhere with real seasonal temperature swings, that fluid is breaking down faster than the manual assumes.

    My own rule of thumb, built from years of comparing fluid condition to actual mileage across hundreds of vehicles, looks something like this:

    [Mechanic’s Essential Checklist: AWD/4WD Fluid Service Intervals]

    ComponentManufacturer’s Typical IntervalReal-World Recommended IntervalWhat Happens If Ignored
    Front Differential60,000–100,000 mi30,000–45,000 miWhining noise, eventual gear pitting
    Rear Differential60,000–100,000 mi30,000–45,000 miMetallic clunking, bearing failure
    Transfer Case Fluid30,000–60,000 mi25,000–30,000 miShuddering during turns, chain wear
    AWD Coupling Fluid (if equipped)Often unlistedEvery 30,000 miLoss of AWD engagement, overheating

    I want to be upfront that these numbers aren’t pulled from a textbook — they’re built from what I’ve personally seen come out of drain plugs at various mileage marks. Back when I was an apprentice mechanic, one of the biggest trial-and-error mistakes I made was trusting the manufacturer’s “lifetime fluid” label at face value on a customer’s Jeep Grand Cherokee. I told him he didn’t need a service, and about a year later he came back with a transfer case that was making a grinding noise on tight turns. That mistake taught me to always ask about driving habits and mileage patterns before quoting someone the manual’s default interval. Lesson learned the hard way, and it’s shaped how I advise every AWD owner since.

    What a Fair Price Actually Looks Like (So You Don’t Get Overcharged)

    This is the part I get asked about constantly, and honestly, it’s where a lot of shops take advantage of the fact that most drivers have no reference point. A straightforward differential fluid change — draining the old fluid, replacing the drain plug gasket, refilling with the correct gear oil — should realistically run you somewhere between $80 and $150 per differential at a reputable independent shop, parts and labor included. If you’ve got a transfer case that also needs service, tack on another $100 to $150. If a shop quotes you $400 or more just for a fluid change with no additional diagnostic work or parts replacement, that’s a red flag worth questioning. On the flip side, if you’re being quoted under $60, ask what fluid they’re actually using — some shops cut corners with generic gear oil instead of the specific viscosity and additive package your AWD system needs, which can actually accelerate wear rather than prevent it.

    One more thing many drivers don’t realize: not all gear oil is interchangeable. Some AWD systems, particularly ones with limited-slip differentials (a mechanism that helps prevent one wheel from spinning uselessly when it loses traction), require special friction-modifier additives in the fluid. Using the wrong fluid in a limited-slip differential can cause a jerky, chattering feeling every time you make a slow, sharp turn — I’ve had customers come in convinced something was broken, when really the last shop just used the wrong fluid on their fill-up.

    The Bottom Line and What You Should Do This Week

    If there’s one thing I want you to walk away with, it’s this — AWD systems give you fantastic traction and confidence in bad weather, but that capability comes with maintenance obligations most drivers simply aren’t told about. The differential and transfer case fluids are working just as hard as your engine oil, arguably harder given the shock loads and heat they absorb, yet they get a fraction of the attention. Pull out your maintenance records this week and check when your differential fluid was last changed. If you genuinely don’t know, or if it’s been more than 30,000 to 40,000 miles, don’t wait for that telltale whine to show up on the highway. Get it inspected, get a fluid sample checked for metal contamination, and budget for that $80 to $150 service now rather than the $2,000 rebuild later. Your gears — and your wallet — will thank you.

  • Is Upgrading to LED Headlight Bulbs Worth It, or Are You Just Wasting Money?

    Is Upgrading to LED Headlight Bulbs Worth It, or Are You Just Wasting Money?

    A guy pulled into my shop last week driving a 2011 Toyota Camry with those factory halogen headlights that had gone yellow and cloudy over the years, and he asked me a question I probably get twice a week now: “Hey, is it worth throwing some LED bulbs in here, or am I just gonna fry my wiring and waste two hundred bucks?” It’s a fair question, and honestly, the answer isn’t a simple yes or no — it depends heavily on your specific headlight housing, your vehicle’s electrical system, and what you’re actually trying to fix. I’ve seen LED conversions that transformed a car’s nighttime visibility for the better, and I’ve seen them create glare complaints, melted housings, and flickering nightmares that had customers back in my bay within a month wanting the halogens put back in.

    Let me walk you through what I’ve learned installing and troubleshooting these conversions for years, because there’s a lot more nuance here than the flashy Amazon listings want you to believe.

    What LED Bulbs Actually Do Differently Inside Your Headlight Housing

    Here’s the fundamental thing most drivers don’t understand: your factory headlight housing, whether it’s a reflector-style or projector-style unit (a projector housing uses a lens to focus and aim light more precisely, while a reflector housing bounces light off a curved mirror-like bowl behind the bulb), was engineered around the specific light source geometry of a halogen filament. Halogen bulbs emit light in a very predictable, omnidirectional pattern from a tiny filament coil. LED bulbs emit light from flat diode chips arranged around a small board, and that light pattern is fundamentally different in shape.

    When I hoist a car up and pull a housing apart to look at why a customer’s LED conversion is throwing glare into oncoming traffic, this is usually what I find: the LED bulb’s light-emitting surface isn’t sitting in the exact same focal point that the halogen filament used to occupy. Even a few millimeters off, and the precisely engineered cutoff line — that’s the sharp light-to-dark boundary you see when you shine your headlights at a wall, designed to keep light out of oncoming drivers’ eyes — gets blurred or shifted. That’s why some LED conversions look incredible from the driver’s seat but get you flashed by every oncoming car on the highway. You’re not seeing better; you’re just blinding everyone else while your own beam pattern becomes scattered and less precise.

    What would you do if another driver started flashing their brights at you every single night on your commute? Most people assume it’s rude oncoming traffic. In my experience, nine times out of ten, it’s their own LED conversion blinding everyone else, and they have no idea.

    Reflector Housings vs. Projector Housings: Why This Determines Everything

    This is the single most important factor in whether an LED upgrade is worth your money, and it’s the part almost nobody explains clearly. If your car has projector-style headlights, LED bulb conversions generally perform reasonably well because the lens in front of the bulb helps compensate somewhat for the different light geometry. I’ve done plenty of projector housing conversions on customer vehicles that turned out clean, bright, and properly focused.

    Reflector housings are a different story entirely. These rely much more heavily on the exact shape and position of the light source to bounce light correctly off that curved bowl. Drop an LED bulb into a reflector housing that wasn’t designed for it, and you’ll often get a scattered, hot-spotted beam pattern with bright patches and dark gaps, along with that glare problem I mentioned. I had a customer with a Ford F-150 — a classic reflector-housing truck — who installed a cheap LED kit himself, and when he drove it over for an unrelated oil change, I pulled him into the bay after dark and showed him his own beam pattern against the shop wall. It was genuinely alarming. Bright hotspots scattered like a shotgun pattern, no clean cutoff line at all, and glare kicking upward into where oncoming drivers’ eyes would be. He hadn’t even realized, because from inside the truck, it just looked “brighter.”

    Just last month, a woman brought in her Hyundai Elantra specifically because she’d had an LED conversion done at a chain parts store, and within two weeks, one of her headlights started flickering intermittently, especially in cold weather. When I diagnosed it, the issue was heat-related resistance buildup in a cheap LED driver module (the small electronic component that regulates and converts your car’s voltage for the LED chips) that wasn’t properly rated for her vehicle’s factory wiring harness. Cheap kits often skip proper thermal management, and headlight bulbs live in a genuinely brutal environment — extreme heat from the engine bay, freezing cold in winter, constant vibration. A driver module that can’t handle that environment fails, and it usually fails intermittently before it fails completely, which is exactly the kind of gradual failure that makes people think their whole electrical system is going haywire.

    Component Replacement Schedule & Cost Comparison: Halogen vs. LED vs. HID

    Bulb TypeAverage LifespanUpfront Cost (Pair)Compatibility RiskTypical Failure Mode
    Halogen (Factory Standard)500 – 1,000 hours$20 – $50Very Low – designed for housingGradual dimming, filament burnout
    LED Conversion Kit (Budget)15,000 – 20,000 hours (rated, not guaranteed)$30 – $80High in reflector housingsFlickering, glare complaints, driver module failure
    LED Conversion Kit (Premium, CANbus-compatible)20,000 – 30,000+ hours$100 – $250Moderate – varies by housing typeRare, usually driver module heat failure after years
    Factory OEM LED / HID Upgrade20,000+ hours$300 – $800+Very Low – engineered for that housingBallast failure (HID), extremely rare

    I want to point something out about that “Compatibility Risk” column because it’s where most of the wasted money happens. A lot of drivers buy a premium-sounding LED kit but don’t check whether it’s CANbus-compatible (CANbus is your vehicle’s internal electronic communication network, and some cars will throw a dashboard error or make your bulb flicker if the LED kit doesn’t properly mimic the electrical resistance of the old halogen bulb). Skipping that detail is how you end up with a “bulb out” warning light staring at you on the dash even though both headlights are working perfectly fine.

    The Real Cost-Benefit Breakdown From the Shop Floor

    Many drivers overlook this, but from a mechanic’s perspective, the real critical point isn’t brightness at all — it’s beam control. A headlight’s job is to light the road in front of you without blinding everyone coming the other way. Raw lumen output numbers on the packaging are honestly one of the least useful metrics you can judge a kit by, because a wildly bright bulb in the wrong housing just means you’re now really good at blinding people, not really good at seeing the road.

    If your factory halogens have simply yellowed and clouded with UV damage over the years, I’d actually tell you to try a proper headlight restoration kit first — sanding down and resealing the polycarbonate lens — because that alone often solves 80% of the “my headlights seem dim” complaint for a fraction of the cost, usually under $20 in materials if you do it yourself on a Saturday afternoon.

    If you’re on a projector-housing vehicle and genuinely want better output, a reputable CANbus-compatible LED kit from an established brand is, in my professional opinion, worth the investment. You’re looking at real, meaningful improvement in nighttime visibility without the headaches. But if you’re driving something with older reflector housings and you’re tempted by a forty-dollar kit with five-star reviews promising “10x brighter,” I’d steer you away from that every time. Back when I was newer to doing lighting work, I underestimated how much housing geometry mattered and installed a cheap kit on my own reflector-housing car just to test it out — and I ended up driving around for two weeks with a beam pattern so scattered that I genuinely couldn’t tell if I was helping or hurting my own visibility until I put the halogens back in and compared them side by side. That was a humbling lesson in why housing design matters more than the bulb technology itself.

    My Professional Verdict

    LED headlight upgrades are absolutely worth it in the right situation, but they are not a universal upgrade you can slap into any car and expect good results. The housing your car came with matters more than the bulb brand you buy.

    Here’s your checklist before you spend a single dollar on a conversion kit:

    Figure out whether you have projector or reflector housings — a quick look at your headlight lens shape, or five minutes of research on your specific trim level, will tell you.

    If you’re dealing with yellowed, cloudy lenses, try a restoration kit first before assuming you need new bulbs at all.

    Only buy CANbus-compatible kits from established brands if you decide to upgrade, and expect to pay in the $100–$250 range for something that won’t flicker or throw error codes.

    Have someone else look at your beam pattern against a wall or garage door after installation, because you genuinely cannot judge glare and cutoff quality from inside the driver’s seat.

    If you’re on a reflector housing and budget is tight, save your money and stick with quality halogens, or consider a full projector retrofit down the line instead of fighting your housing’s limitations with the wrong bulb technology.

  • Have You Replaced Your Transmission Oil? If You Said No, You Need to Read This Before You Drive Another Mile

    Have You Replaced Your Transmission Oil? If You Said No, You Need to Read This Before You Drive Another Mile

    I still remember the sound. It was a Wednesday afternoon, and a woman in her late thirties pulled her 2014 Honda Accord into my bay because the car was “shuddering weird” every time she came to a stop. When I popped the hood and pulled the transmission dipstick — yes, some of these older automatics still have one — the fluid that came off the rag wasn’t the cherry-red color it should have been. It was the color of burnt coffee grounds, and it smelled like scorched popcorn. That smell is something you never forget once you’ve experienced it in a shop for ten years. It’s the smell of a transmission that is dying slowly, one shift at a time, because nobody ever changed the fluid.

    Here’s the uncomfortable truth I tell every customer who asks me this question: transmission oil, whether it’s ATF (Automatic Transmission Fluid) for automatics or gear oil for manuals, is arguably the most neglected fluid in the entire vehicle. Everybody remembers their oil change. Most people remember to rotate their tires. But transmission fluid? It sits there quietly doing one of the hardest jobs in your car — lubricating, cooling, and providing hydraulic pressure to shift dozens of moving gears and clutch packs — and it gets almost zero attention until the transmission itself is already in trouble.

    Why Transmission Fluid Breaks Down Faster Than You Think

    Let’s talk about what’s actually happening inside that transmission case. Unlike engine oil, which mainly has to worry about combustion byproducts and heat from the cylinders, transmission fluid is under constant, brutal hydraulic pressure. It’s being forced through tiny valve bodies and solenoids at high pressure to engage clutch packs that are essentially spinning discs rubbing against each other in a bath of fluid. Every single shift generates friction, heat, and microscopic metal shavings from the clutch material wearing down.

    When I hoist a car up on the lift and drop the transmission pan on a vehicle that’s never had a service, this is usually what I see: a pan magnet coated in a thick, felt-like layer of metallic sludge. That’s not normal wear-and-tear residue — that’s your transmission literally eating itself from the inside, and the fluid that’s supposed to be washing that debris away and keeping things cool has instead turned into an abrasive paste that accelerates the damage.

    Here’s something most drivers don’t know: transmission fluid doesn’t just lubricate, it’s also the hydraulic medium that tells your transmission when to shift. There are friction modifiers in that fluid engineered specifically to allow clutch packs to grip smoothly instead of grabbing harshly. Once those additives break down from heat cycling — which typically starts happening seriously after 60,000 to 80,000 miles depending on your driving style — your shifts start to feel clunky, hesitant, or delayed. That’s not a “check engine light” kind of problem. That’s a “this is going to cost you $3,000 to $5,000 in six months if you ignore it” kind of problem.

    What would you do if your car suddenly hesitated for a second and a half before dropping into gear at a red light? Most drivers just shrug it off as “the car being weird today.” I’m telling you right now — that hesitation is your transmission begging for a fluid service.

    The Manual vs. Automatic Difference (And Why CVTs Are a Different Animal Entirely)

    I want to clear up some confusion here because I get asked about this constantly. Manual transmissions use gear oil, which is thicker and more chemically stable, so intervals tend to be longer — often 60,000 miles is reasonable for a manual gearbox under normal driving. Automatics, especially older four and six-speed units, generally need attention every 30,000 to 60,000 miles, though this varies a lot by manufacturer.

    But CVTs (Continuously Variable Transmissions, which use a belt and pulley system instead of traditional gears) are where I see the most heartbreak. CVT fluid is a highly specialized formulation, and using the wrong fluid — even something that looks similar on the shelf — can destroy the belt or the pulley surfaces within a matter of months. I had an apprentice mistake early in my career where I nearly used a generic ATF on a CVT-equipped Nissan because the shop hadn’t restocked the correct Nissan NS-3 fluid yet. My senior mechanic at the time caught it before I finished the job, and he sat me down and explained exactly why that mistake could’ve cost the customer their entire transmission. I never forgot that lesson, and to this day I triple-check fluid specifications on every CVT that comes through my bay.

    If you drive a CVT vehicle — common in a lot of Nissan, Subaru, and Honda models — do not let a quick-lube place put “universal ATF” in your car. Insist on the manufacturer-specified fluid. This single detail is the difference between a transmission lasting 200,000 miles or failing at 90,000.

    Real Signs Your Transmission Fluid Needs Attention Right Now

    Let me walk you through what I actually check for on the shop floor, because these are things a lot of online articles gloss over.

    First, the smell test. Fresh ATF has a faint, slightly sweet petroleum smell. Burnt fluid smells sharp and acrid, almost like an electrical fire mixed with scorched rubber. If you can smell that on the dipstick, you’re already past due.

    Second, the color and clarity. Healthy fluid is translucent red or pink. If it’s dark brown, black, or has visible metal flecks suspended in it when you hold it up to light, that’s degraded fluid doing more harm than good at this point.

    Third — and this is the one most drivers actually notice first — is shift behavior. Delayed engagement when shifting from park to drive, a noticeable “clunk” or “shudder” during gear changes, or slipping (where the RPMs rise but the car doesn’t accelerate proportionally) are all classic symptoms of fluid that’s lost its friction properties.

    Just last month, a customer brought in a Toyota Camry with about 95,000 miles on it, complaining about a shudder specifically between 35 and 45 mph. That’s a very particular RPM range, and in my experience, it’s almost always the torque converter lockup clutch struggling because of degraded fluid. We did a full fluid exchange — not just a drain and fill, but a proper machine-assisted exchange that replaces closer to 100% of the old fluid instead of the roughly 40-50% you get from a basic pan drop — and the shudder was gone within the first ten miles of the test drive. That customer avoided what could’ve easily become a $4,000 transmission rebuild.

    Mechanic’s Essential Checklist: Transmission Fluid Service Reference

    Transmission TypeRecommended Service IntervalAverage Cost (Parts & Labor)Warning Signs to Watch For
    Manual GearboxEvery 60,000 miles$120 – $200Grinding gears, notchy shifts, whining noise
    Standard Automatic (4-6 speed)Every 30,000 – 60,000 miles$150 – $350 (pan drop) / $200 – $400 (fluid exchange)Delayed engagement, harsh shifts, slipping
    CVTEvery 25,000 – 40,000 miles (check manufacturer specs)$200 – $450 (must use OEM-spec fluid)Whining/droning noise, hesitation on acceleration
    High-Mileage Neglected Unit (100k+, never serviced)Do NOT do a full fluid exchange — consult a mechanic firstVaries significantlyConsult a professional before servicing

    I want to flag that last row specifically because it trips people up. If your transmission has never been serviced and you’re past 100,000 miles, doing an aggressive full fluid flush can actually be risky. The old, thickened fluid may be the only thing keeping worn clutch packs gripping properly, and a sudden flush to fresh, thinner fluid can expose that wear and cause slipping that wasn’t there before. In cases like that, I usually recommend a partial drain-and-fill done twice over a couple months, gradually reintroducing fresh fluid rather than shocking the system all at once. This is exactly the kind of judgment call that separates an experienced technician from someone just following a flat-rate manual.

    What a Fair Price Actually Looks Like (And How to Avoid Getting Overcharged)

    I get asked a lot whether a shop’s quote is fair, so let me break down realistic numbers. A basic pan drop and filter change on a standard automatic should run somewhere between $150 and $350 depending on your region and whether the vehicle needs a new pan gasket. A full machine fluid exchange, which cycles fluid through the torque converter and cooling lines as well, typically runs $200 to $400. If someone quotes you $600 or more for a basic service on a common sedan, ask specifically what’s included — sometimes shops bundle unnecessary “flush treatments” or additive packages that aren’t doing anything a properly formulated fluid isn’t already doing.

    My Professional Verdict

    In my experience, it’s vital to treat transmission fluid with the same seriousness as engine oil, if not more, because transmission repairs are dramatically more expensive than engine repairs in most cases. A neglected transmission doesn’t just fail — it fails expensively, usually right when you can least afford it.

    Here’s your actionable checklist before you close this article:

    Check your owner’s manual for the manufacturer’s specific fluid type and interval — don’t rely on generic “lifetime fluid” claims, because in my experience almost nothing automotive is truly lifetime.

    Smell and inspect your dipstick fluid if your vehicle has one, and if it’s dark or burnt-smelling, schedule a service this week, not next month.

    If you drive a CVT, confirm with your service center that they’re using the exact OEM-spec fluid, not a generic substitute.

    Pay attention to shift behavior — hesitation, shudder, or slipping are your car’s way of telling you something before it becomes a five-figure repair bill.

    Your transmission doesn’t get a warning light in most vehicles. It just quietly wears down until one day it doesn’t shift at all. Don’t wait for that day.

  • The Coolant Mistake That Kills More Engines Than People Realize

    The Coolant Mistake That Kills More Engines Than People Realize

    Introduction

    I’d guess that out of every ten cars that roll into my bay with a blown head gasket or a cracked cylinder head, at least six of them share the exact same root cause buried in their maintenance history: nobody ever touched the coolant. Drivers will chase every oil change deadline like clockwork, but coolant gets treated like it’s a “lifetime fluid” that never needs attention. That myth alone has cost some of my customers thousands of dollars in engine repairs that a forty-dollar coolant flush would have prevented entirely. Today I want to walk you through when coolant actually needs to be replaced, why the timing depends on more than just mileage, and what I personally look for when I’m trying to tell a customer whether their cooling system is fine or one hot summer away from disaster.

    Why “Lifetime Coolant” Is the Most Dangerous Myth in the Owner’s Manual

    A lot of newer vehicles ship with what manufacturers call “long-life” coolant, usually an OAT or HOAT formulation (Organic Acid Technology, a chemical additive package that resists breakdown longer than older green coolants). Marketing around these products often throws around numbers like 100,000 miles or ten years, and drivers latch onto that number as gospel. What doesn’t get explained is that those intervals assume ideal conditions, a properly sealed system, no air intrusion, no cross-contamination from a previous top-off with the wrong coolant type, and consistent operating temperatures.

    When I hoist a car up on the lift and pull a sample of “lifetime” coolant that’s six or seven years old, I’m frequently looking at fluid that’s shifted from its original bright orange or pink toward a murky brown, sometimes with tiny black flecks suspended in it. Those flecks matter more than most people realize. That’s usually oxidized metal or degraded additive package settling out of solution, and it tells me the corrosion inhibitors in that coolant have exhausted themselves. Once those inhibitors are gone, the coolant essentially becomes slightly acidic water circulating through aluminum components, and aluminum does not do well against sustained low-grade corrosion.

    Many drivers overlook this, but from a mechanic’s perspective, the real critical point isn’t the base interval printed in the manual, it’s the condition of the fluid itself. That’s why I always recommend testing coolant with a refractometer or simple pH test strips rather than blindly trusting a mileage number, especially once a vehicle passes the five-year mark regardless of what the sticker under the hood claims.

    What Happens Internally When Coolant Is Neglected Too Long

    Coolant does three jobs simultaneously, and drivers usually only think about the first one. It transfers heat away from the engine block, obviously, but it also lubricates the water pump’s internal seal and bearing, and it protects every piece of metal it touches from corrosion, including aluminum heads, cast iron blocks, brass radiator fittings, and rubber hoses. When the corrosion inhibitor package breaks down, all three functions degrade at once, not just one.

    The water pump failure pattern is something I see constantly. That internal seal I mentioned relies on coolant with intact lubricating properties to stay pliable. Once the coolant turns acidic and loses its lubricity, that seal starts to wear unevenly, and you’ll hear it before you see it. It’s usually a light, high-pitched whining or chirping noise from the front of the engine that increases in pitch with RPM, not to be confused with a belt squeal, which tends to be more of a sharp shriek on cold startup. If you catch that whining early, you’re looking at a water pump replacement, maybe $300 to $500 depending on the vehicle. Catch it late, after the bearing seizes and the pump either leaks coolant onto a hot exhaust manifold or the impeller physically fails, and you’re now dealing with a potential overheating event that can warp a cylinder head.

    What would you do if your temperature gauge crept up ten degrees higher than normal on a hot day, but the car seemed to be running fine otherwise? Most drivers ignore it because the engine isn’t visibly overheating yet. My advice is the opposite: that small, consistent upward shift is exactly the early warning sign worth investigating immediately, because by the time the needle swings into the red zone, you’re often past the point of a cheap fix.

    Just last week, a client brought in a Hyundai Elantra with this exact issue, a slightly elevated temperature gauge reading that she’d noticed for about two weeks but assumed was normal for summer driving. When I popped the radiator cap, the coolant looked like weak chocolate milk, and there was a faint but distinct sweet smell, which is a telltale sign of coolant breakdown or a small internal leak. Pressure testing the system showed a slow leak at the water pump weep hole (a small drainage hole designed to let coolant escape externally rather than get pushed past the pump seal into the engine oil, which is actually a good design feature doing its job as a warning sign). We caught it in time for a $420 water pump and coolant flush. Had she waited another month through a heat wave, that seal failure could have escalated into a full overheating event with head gasket damage running well into four figures.

    Reading the Signs: How I Judge Coolant Condition on the Lift

    Color alone isn’t a perfect diagnostic tool because manufacturers use different base colors, orange, pink, blue, green, and mixing coolant types is actually one of the more common mistakes I see from well-meaning DIYers who just grab whatever jug is cheapest at the auto parts store. Mixing an OAT-based long-life coolant with an old-school IAT (Inorganic Acid Technology) green coolant can cause the additive packages to react poorly, sometimes forming a gel-like sludge that clogs radiator passages. I’ve pulled radiators apart with passages so clogged with this gel that coolant flow was reduced by what I’d estimate was nearly half, which explains why a customer’s car was randomly overheating in stop-and-go traffic but running fine on the highway.

    Texture matters just as much as color. Fresh coolant should feel slick between your fingers, almost silky. Degraded coolant often feels slightly gritty, and if you run it through a paper towel, you’ll sometimes see fine sediment left behind, that’s scale and corrosion byproduct that’s been circulating through your radiator, heater core, and engine passages, slowly eroding thin-walled components. The heater core especially concerns me, since it’s essentially a miniature radiator tucked deep in your dashboard, and replacing one due to internal corrosion or clogging is a labor-intensive job that can run $600 to $900 depending on how much of the dashboard has to come apart to reach it.

    Here’s a reference table I hand out to customers so they understand not just when to service coolant, but why the interval isn’t one-size-fits-all:

    [Mechanic’s Essential Checklist: Coolant Service Guidelines]

    Coolant TypeTypical IntervalWarning Signs to Watch ForEstimated Flush Cost
    Conventional Green (IAT)Every 2 years / 24,000 milesRust-colored tint, gritty texture$80–$120
    Extended-Life Orange/Red (OAT)Every 5 years / 60,000 milesBrown discoloration, sweet smell$100–$150
    Hybrid HOAT (Yellow/Orange)Every 5 years / 100,000 milesCloudiness, black flecks$110–$160
    Any coolant, high-mileage vehicleTest annually after 5 yearsElevated temp gauge, whining noise$100–$150

    Beyond mileage, driving conditions matter more than most owners assume. Frequent towing, stop-and-go city traffic, or living somewhere with extreme summer heat all accelerate coolant breakdown regardless of what the sticker says, because the system is working harder and cycling through more heat stress than the manufacturer’s ideal test conditions ever accounted for.

    The DIY Question: Can You Flush Your Own Coolant Safely?

    For a mechanically confident owner, a coolant flush is absolutely doable at home, provided you respect a few non-negotiable safety points. Coolant is toxic to pets and wildlife due to its sweet smell and taste, so any spills need to be cleaned up immediately and old coolant disposed of at a recycling center rather than poured down a drain. You also need to burp the system properly after refilling, meaning you run the engine with the radiator cap off or the bleeder valve open until air pockets work their way out, because a trapped air pocket in the cooling system can cause localized hot spots even when your overall coolant level looks fine.

    Back when I was an apprentice mechanic, one of the biggest trial-and-error mistakes I made was refilling a system, buttoning everything up, and sending the car out the door without properly burping it. The customer came back two days later with a car that ran hot specifically at idle but seemed fine at highway speeds, classic symptom of a trapped air pocket sitting right at the thermostat housing. It taught me to always run the engine up to operating temperature with the heater on full blast before final topping off, since the heater core pulls coolant through the entire loop and helps push trapped air out toward the highest point in the system.

    Final Verdict

    Coolant isn’t a fluid you can set and forget for a decade just because a sticker under your hood says so. The real indicator is the condition of the fluid itself, its color, its smell, its texture, combined with how your vehicle is actually driven. My professional recommendation is simple: get your coolant tested annually once your car passes the five-year mark, regardless of what interval the manufacturer originally quoted, and don’t wait for a rising temperature gauge to take action, because by then you’re often negotiating with a mechanic over a water pump or a head gasket instead of writing a much smaller check for a routine flush.

  • Why Brake Fluid Is the Most Ignored Fluid in Your Car (And Why That’s Dangerous)

    Why Brake Fluid Is the Most Ignored Fluid in Your Car (And Why That’s Dangerous)

    Introduction

    Every week, at least two or three cars roll into my shop for a routine oil change, and I ask the same follow-up question: “When was the last time you had your brake fluid flushed?” More often than not, I get a blank stare. Drivers obsess over oil change intervals, they watch their tire tread depth like a hawk, but brake fluid sits quietly in that little reservoir under the hood, completely forgotten until something goes wrong. Here’s the uncomfortable truth I’ve learned after a decade of pulling brake systems apart: brake fluid is arguably the most overlooked maintenance item in the entire vehicle, and neglecting it doesn’t just cost you money down the road, it can genuinely put your life at risk the moment you need your brakes most. Today I want to walk you through exactly why this fluid degrades, what it looks like when it’s gone bad, and why that “optional” flush your service advisor mentioned is actually one of the cheapest insurance policies you can buy for your car.

    The Science Nobody Explains: Why Brake Fluid Goes Bad

    Most drivers assume that because brake fluid lives in a sealed system, it should last forever. That assumption is wrong, and here’s the mechanical reality behind it. Brake fluid, specifically the common DOT 3 and DOT 4 varieties, is hygroscopic, meaning it actively absorbs moisture from the air over time. This isn’t a flaw in the fluid, it’s actually intentional, because if water pooled in one spot inside your brake lines, it could freeze in cold weather and cause a catastrophic failure. Instead, the fluid is designed to absorb and distribute moisture evenly throughout the system.

    The problem is that every time you open the reservoir cap, every time humidity works its way past the rubber seals, and simply through the passage of time, that moisture content climbs. When I hoist a car up on the lift and pull fluid from a system that hasn’t been serviced in five or six years, I’m often looking at something the color of weak coffee, sometimes even darker, almost like used motor oil. Fresh fluid should be a pale straw color, almost like light apple juice. That color change alone tells me the fluid has absorbed moisture and picked up contamination from rubber seals breaking down internally.

    Here’s why that moisture content matters so much: brake fluid’s job is to transfer the force from your foot on the pedal into hydraulic pressure that clamps your brake pads against the rotors. Water has a boiling point of 212°F, but your brake system, especially during hard braking or descending a mountain pass, can generate temperatures well above that at the caliper. When moisture-contaminated fluid hits those temperatures, the water content boils and turns into vapor. Unlike fluid, vapor compresses easily. That’s when you get the sensation every mechanic dreads explaining to a customer: a spongy, sinking brake pedal that keeps going toward the floor with no resistance. In extreme cases, on a long downhill grade with brakes riding constantly, this can escalate into what’s called brake fade, where you press the pedal and almost nothing happens.

    What I See When I Open Up a Neglected Brake System

    Many drivers overlook this, but from a mechanic’s perspective, the real critical point isn’t just about pedal feel, it’s about what’s happening to the metal components bathed in that degraded fluid. Contaminated brake fluid becomes mildly corrosive over time. When I disassemble a caliper on a car that’s never had a fluid flush, I frequently find the caliper pistons pitted with corrosion, sometimes seized partially in their bores. That rough, pitted texture under my fingertip is a dead giveaway that moisture has been sitting against that metal for years. A healthy piston should slide back into its bore smooth as glass. A neglected one drags, catches, and sometimes won’t retract at all, which causes the pad to keep dragging against the rotor even when you’re not braking.

    I’ll never forget a Toyota Camry that came in a few years back. The owner complained about a burning smell after highway driving and said her car pulled slightly to the left under braking. When I got it on the lift and pulled the front-left caliper, the piston was so corroded it had essentially frozen in a partially extended position. That pad had been dragging for who knows how long, overheating the rotor to the point where it had developed heat spots, those bluish discoloration rings you sometimes see on badly abused rotors. What should have been a $120 fluid flush turned into a $650 repair involving two calipers, pads, and rotors. That’s the story I tell every customer who waves off a fluid flush as unnecessary.

    Master cylinders suffer the same fate internally. The rubber seals inside rely on clean fluid to stay pliable and to lubricate properly as they move. Once moisture and grit accumulate, those seals harden and start to leak internally, which is why some older cars develop a pedal that slowly sinks to the floor if you hold steady pressure at a stoplight. That’s not something a quick visual inspection catches, but it’s exactly what a fluid boiling point test or a simple test strip can flag before it becomes a full master cylinder replacement.

    How to Actually Check Your Brake Fluid (And What Those Numbers Mean)

    You don’t need a shop to get a rough sense of your fluid’s condition. Most auto parts stores sell brake fluid test strips for under ten dollars, and they work similarly to pool test strips, you dip them in the reservoir and match the color change against a chart that estimates moisture content by percentage. As a general guideline, fresh DOT 3 fluid has a dry boiling point around 401°F, but once moisture content creeps up toward 3-4%, that effective boiling point can drop by over 100 degrees. That’s the difference between a brake system that shrugs off a mountain descent and one that fades halfway down.

    What would you do if your brake pedal suddenly felt softer than usual after a long trip down a steep grade? A lot of drivers just pump the pedal and assume it’s normal, but that spongy feeling under sustained heat is often the first physical symptom of moisture-saturated fluid starting to boil. My advice is simple: if you notice pedal softness that wasn’t there before, especially after towing, mountain driving, or repeated hard stops, get the fluid checked immediately rather than waiting for your next scheduled service.

    Here’s a breakdown I give customers so they understand where brake fluid service fits into the broader maintenance picture:

    [Mechanic’s Component Replacement Schedule & Cost Comparison]

    ComponentRecommended IntervalAverage Cost (Parts + Labor)Consequence of Neglect
    Brake fluid flushEvery 2 years or 30,000 miles$100–$150Corroded calipers, spongy pedal, reduced stopping power
    Brake padsEvery 30,000–50,000 miles$150–$300 per axleRotor damage, reduced braking performance
    Brake rotorsEvery 50,000–70,000 miles$250–$450 per axleVibration, extended stopping distance
    Caliper (if seized)As needed, reactive$300–$600 per caliperUneven pad wear, pulling, overheating
    Master cylinderAs needed, typically 100,000+ miles$400–$700Pedal sinks to floor, complete brake loss risk

    Looking at that table, the fluid flush is by far the cheapest line item, yet it’s the one that prevents nearly every expensive failure listed below it. That’s not a coincidence, it’s the entire point of hydraulic system maintenance.

    The DIY Reality Check: What You Can and Can’t Do Yourself

    I’m a big believer in empowering drivers to handle basic maintenance themselves, and a brake fluid flush is technically within reach for a confident DIYer with the right tools, a vacuum bleeder or a simple two-person pump-and-hold method, fresh fluid matched to your manufacturer’s spec, and a way to safely dispose of the old fluid, since it’s toxic and shouldn’t go down a drain. That said, back when I was an apprentice mechanic, one of the biggest trial-and-error mistakes I made was bleeding a system out of sequence. Brake systems need to be bled in a specific order, typically starting with the wheel farthest from the master cylinder and working toward the closest one, because doing it out of order can trap air pockets that never fully work their way out. I spent an embarrassing amount of time chasing a soft pedal on a Honda Civic before my supervisor pointed out I’d bled the wheels backward. It’s a small detail, but it makes or breaks the entire job.

    If you’re not comfortable bleeding a hydraulic system, this is genuinely one of those jobs worth paying a shop for. Air in the lines isn’t just annoying, it directly reduces your stopping power, so getting it wrong isn’t a minor inconvenience, it’s a safety issue.

    Final Verdict and What You Should Do This Week

    If there’s one maintenance item I’d tell every driver to stop ignoring, it’s brake fluid. It’s inexpensive, it’s fast to service, and it directly protects the one system in your car you absolutely cannot afford to have fail. Don’t wait for a spongy pedal or a burning smell to take action, by that point you’re often already looking at caliper or master cylinder damage rather than a simple fluid swap.

    This week, pop the hood, locate your brake fluid reservoir, usually a translucent container near the back of the engine bay on the driver’s side, and take a look at the color. If it’s dark, cloudy, or you honestly can’t remember the last time it was changed, get it tested or flushed before your next long drive. Your brakes are the one component in your car with zero margin for error, and a $120 flush today is a lot cheaper than the alternative I see far too often on my lift.

  • Why Did Your Brake Job Cost More Than Your Neighbor’s? Here’s The Honest Mechanic’s Breakdown

    Why Did Your Brake Job Cost More Than Your Neighbor’s? Here’s The Honest Mechanic’s Breakdown

    I get this complaint at least once a week, usually from a customer holding up their phone with a screenshot from a Facebook group or a text from a friend. “My coworker only paid $120 for his brake pads, why did mine cost $340?” And look, I get the frustration, nobody likes feeling like they got overcharged. But here’s the thing, in probably eight out of ten of these conversations, the two brake jobs being compared aren’t actually the same job at all. They just both get called “brake pads” in casual conversation. Let me walk you through exactly where that price gap comes from, because once you understand it, you’ll be able to look at any quote and know whether it’s fair or whether you’re being taken advantage of.

    Not All Brake Pads Are Created Equal, And The Material Difference Is Real

    The single biggest factor I see driving price differences is pad material, and this is something most drivers have genuinely never been taught about. Semi-metallic pads, which contain metal fibers blended with fillers, are typically the cheapest option, and they’re what a lot of quick-lube chains default to because the parts cost is low. Ceramic pads, on the other hand, use a denser compound with copper or other fibers embedded in a ceramic matrix, and they cost noticeably more per set, sometimes double the price of semi-metallic.

    Many drivers overlook this, but from a mechanic’s perspective, the real critical point is that this price difference isn’t a scam, it reflects genuinely different performance characteristics. Ceramic pads produce far less brake dust, which means cleaner wheels, they run quieter, and they tend to be gentler on your rotors over the life of the pad. When I hoist a car up on the lift and pull a rotor that’s been paired with cheap semi-metallic pads for 60,000 miles, I typically see more scoring and a rougher surface texture compared to a rotor that’s been running ceramic pads for the same mileage. That’s not marketing talk, that’s just what I physically feel when I run my finger across the rotor face during inspection.

    So if your neighbor got semi-metallic pads for $120 and you got ceramic for $220, you didn’t get ripped off, you paid for a different product. Always ask your shop specifically what pad material is quoted before comparing prices with anyone else.

    The Hidden Line Items That Turn A Simple Job Into A Bigger One

    Here’s where things get more complicated, and where I think shops sometimes fail to properly explain what’s happening. A basic pad-only replacement assumes your rotors are still within spec, meaning they’re smooth and haven’t worn below the minimum thickness stamped right on the rotor edge or hub. But that’s frequently not the case by the time a customer actually brings the car in.

    Just last week, a client brought in a Hyundai Elantra expecting a standard pad swap based on a quote she’d gotten over the phone. Once I actually got the wheel off and measured her rotor thickness with a micrometer, they were already below minimum spec, thin enough that resurfacing wasn’t even an option anymore, they legally and safely needed replacement. That added roughly $180 to her original quote for two rotors plus labor. She was frustrated at first, understandably, but I showed her the micrometer reading against the minimum thickness spec stamped on the rotor itself, and once she saw it in person, she understood this wasn’t upselling, it was a genuine safety requirement.

    This happens constantly with phone quotes, and honestly it’s one of my biggest pet peeves in this industry. A shop can’t accurately quote you a rotor job over the phone without physically measuring your rotors first. Any shop that gives you a rock-bottom guaranteed price before ever looking at your car is either going to lowball you and hit you with surprise charges later, or they’re going to skip a rotor that genuinely needed replacing just to keep the price where they promised.

    What would you do if a shop told you your rotors “should be fine” without ever measuring them?

    Honestly, I’d ask them directly what the measured thickness was and how it compares to the minimum spec. A rotor that’s warped or below minimum thickness can genuinely extend your stopping distance, this isn’t a nice-to-have upsell, it’s a real safety issue. If a shop can’t give you a specific number, that’s a red flag worth paying attention to.

    Beyond rotors, other common additions include caliper slide pin service, which I mentioned is often skipped by lower-cost shops. Back when I was an apprentice mechanic, one of the biggest trial-and-error mistakes I made early on was rushing through pad jobs without properly cleaning and regreasing those slide pins, because it felt like an unnecessary extra step when the customer just wanted brakes done fast and cheap. I learned the hard way when a few of those cars came back within months with uneven pad wear or a caliper that had seized entirely, which is a far more expensive repair than the five extra minutes it takes to service those pins properly the first time. Now I never skip it, and if you’re comparing quotes, ask specifically whether slide pin service and caliper inspection are included, because that’s often exactly where the price gap between a $120 quote and a $200 quote comes from.

    [Brake Job Price Comparison: What’s Actually Included]

    Service LevelTypical Price Range (Per Axle)What’s Actually Included
    Bargain quick-lube pad swap$100–$140Semi-metallic pads only, no slide pin service, no rotor inspection detail
    Standard shop pad replacement$150–$220Ceramic or semi-metallic pads, slide pin cleaning/greasing, visual rotor check
    Pads plus rotor resurfacing$220–$300New pads, rotors machined smooth if within spec, full caliper inspection
    Pads plus new rotors$350–$450New pads and new rotors, full caliper and hardware inspection, brake fluid check
    Pads, rotors, plus caliper replacement$500–$700+Full corner rebuild, typically needed if caliper piston is seized or leaking

    Labor Rates And Regional Pricing Actually Do Matter Too

    I also want to be honest about something shops don’t always explain clearly, which is that labor rates genuinely vary by region and by shop overhead. A dealership in a major metro area might charge $150 to $180 an hour for labor, while an independent shop in a smaller town might charge $90 to $110. That difference alone, even with identical parts, can create a $60 to $100 gap in your final bill for the same exact job. Dealerships also sometimes use OEM (Original Equipment Manufacturer, meaning parts made by or for your car’s specific brand rather than a generic aftermarket alternative) pads and rotors exclusively, which cost more than quality aftermarket alternatives that perform nearly identically for most daily drivers.

    None of this means the higher price is automatically the better deal, or that the lower price is automatically a scam. It just means comparing two brake job prices without knowing the pad brand, whether rotors were replaced or resurfaced, whether hardware was serviced, and what the local labor rate is genuinely doesn’t tell you very much at all.

    My Final Verdict And What You Should Actually Ask For Next Time

    The next time you get a brake quote, or the next time you want to compare your bill against a friend’s, don’t just compare the total dollar figure. Ask your shop three specific questions: what pad material are they using, were the rotors measured and are they being resurfaced or replaced, and is slide pin and caliper hardware service included in that price. Once you have those three answers, you can genuinely compare apples to apples instead of feeling anxious that you got overcharged for a job that, in reality, may have simply included more thorough and safer work than the cheaper option down the street.

    If you’re currently sitting on a quote and unsure whether it’s fair, ask the shop to show you the measured rotor thickness against the minimum spec stamped on the part itself. Any shop confident in their work will show you that number without hesitation, and that single request will tell you more about whether you’re getting a fair deal than any price comparison with a coworker ever could.

  • When Is The Best Time To Replace Your Brake Pads? Here’s What Your Ears And Pedal Are Telling You

    When Is The Best Time To Replace Your Brake Pads? Here’s What Your Ears And Pedal Are Telling You

    I had a customer pull into my bay a few months back white-knuckling the steering wheel, telling me her brakes had been “squealing a little” for about three weeks but she figured it could wait until her next oil change appointment. When I pulled her front wheels off, there was maybe two millimeters of pad material left on one side, and the wear indicator had already been grinding metal against her rotor for who knows how long. That visit ended up costing her almost triple what it should have. This is genuinely one of the most common ways I see drivers turn a routine maintenance item into an expensive repair, simply because nobody ever clearly explained what the actual warning signs mean and when you truly need to act.

    The Sounds Your Brakes Make Actually Mean Something Specific

    Most people think brake noise is just brake noise, but in my experience, it’s vital to understand that different sounds point to different stages of wear, and knowing the difference can save you hundreds of dollars. That thin, high-pitched squeal you hear when you first press the brake pedal, especially right after your car has been sitting overnight, is usually coming from a small metal tab called a wear indicator (a small spring-loaded piece built into the pad specifically designed to contact the rotor and make noise once the pad material gets thin). That sound is your car’s built-in early warning system, and honestly, it’s a gift. When I hoist a car up on the lift after a customer reports this exact squeal, I typically find pads still sitting around 3 to 4 millimeters, which means you’ve got some runway left, but you should be scheduling a replacement within the next few weeks, not months.

    The sound that should genuinely worry you is different, a deeper, grinding, metal-on-metal noise, almost like a low growl that gets louder when you brake harder. Many drivers overlook this, but from a mechanic’s perspective, the real critical point is that this sound means your pad material is completely gone and the metal backing plate is now grinding directly against your rotor. What would you do if you heard this exact grinding sound tomorrow morning on your way to work? Honestly, I’d tell you to drive as little as possible and get it looked at that same day, because at this stage you’re not just facing a pad replacement anymore, you’re likely facing rotor replacement too, and that bill can jump from around $150 to $180 per axle for a straightforward pad job up to $400 or more once rotors are involved.

    Reading Your Pads And Pedal Feel, Not Just Listening

    Sound isn’t the only indicator, and honestly it’s not even the most reliable one, because plenty of pads wear down without ever making noise, especially on newer vehicles with ceramic compound pads that tend to be quieter overall. This is where actually looking at the pad, or paying attention to how your pedal behaves, becomes essential.

    If you can see your wheels through the spokes, take a look at the pad pressed against the rotor. A healthy pad has a decent amount of visible thickness, generally you want to see at least a quarter inch of material, which is roughly the thickness of two stacked nickels. Once that pad looks thin as a coin, thinner than about 3 millimeters, you’re on borrowed time. Just last week, a client brought in a Hyundai Elantra for what she thought was just a routine inspection, and when I checked her rear pads, they were worn down to almost nothing, completely uneven too, thicker on one side than the other. That uneven wear told me immediately that one of her caliper slide pins was seized (the metal pins that allow the caliper to slide smoothly and apply even pressure across the pad), which is something a simple pad swap alone wouldn’t have fixed. We ended up cleaning and regreasing the slide pins as part of that job, which is a step some quick-lube shops skip entirely, and skipping it is exactly why some customers come back six months later with the same uneven wear problem.

    Pedal feel matters just as much. If you notice your brake pedal sinking closer to the floor than it used to before you feel resistance, or if you feel a pulsing or vibration through the pedal when braking at highway speeds, these are both signs worth paying attention to. That pulsing feeling specifically often points to warped rotors rather than pad wear alone, which happens when rotors overheat and cool unevenly, developing thickness variations you can actually feel through the pedal.

    Mileage Isn’t Useless, But It’s Not The Full Picture Either

    I get asked constantly, “so what’s the actual mileage number I should watch for?” And I understand why people want a clean number, but the honest answer is that it varies wildly based on your driving style and environment. Back when I was an apprentice mechanic, one of the biggest trial-and-error mistakes I made was giving customers a blanket “every 50,000 miles” answer, because that number completely falls apart depending on the person. A driver doing mostly highway miles with steady braking might stretch their front pads to 60,000 or even 70,000 miles, while someone doing stop-and-go city driving, or frequent mountain descents using their brakes heavily, might burn through a set in 25,000 to 30,000 miles.

    Front pads almost always wear faster than rear pads too, generally handling around 60 to 70 percent of your total braking force, so don’t be surprised if your mechanic tells you the fronts need replacement while the rears still have plenty of life left. That’s completely normal and not something to be suspicious about.

    [Brake Pad Wear Indicator Checklist]

    Warning SignWhat It MeansRecommended Action
    Light squeal on first brake pressWear indicator contacting rotor, pads around 3-4mmSchedule replacement within 2-4 weeks
    Deep grinding, metal-on-metal soundPad material fully gone, backing plate exposedStop driving, get inspected immediately
    Pad thickness under 3mm visuallyNearing end of usable lifeReplace within days, not weeks
    Pedal sinks lower than normalPossible fluid leak or excessive pad wearGet brake fluid and pads checked same week
    Vibration or pulsing at highway speedWarped or uneven rotor wearInspect rotors, may need resurfacing or replacement
    Uneven wear side to sideSeized caliper slide pinClean and regrease pins during pad service

    The Cost Difference Between Acting Early And Waiting Too Long

    I think the piece that really drives this home for people is the actual dollar comparison, because it’s rarely close. A standard front pad replacement job, done before rotors are damaged, typically runs between $150 and $220 depending on your vehicle and whether you’re using ceramic or semi-metallic pads. That’s a completely fair price range for quality parts and proper labor, including that slide pin service I mentioned earlier. Compare that to what happens when you wait until you’re grinding metal on metal. At that point, your rotors are almost certainly scored or warped beyond resurfacing, pushing that same job up to $350 to $450 per axle once you factor in new rotors. In the worst cases I’ve seen, waiting even longer can damage the caliper piston itself if it gets pushed too far out from the excessively worn pad, and that adds another $200 to $300 per caliper on top of everything else.

    My Final Verdict And What You Should Do This Week

    The best timing for brake pad replacement genuinely comes down to catching that early warning squeal and acting within a few weeks, not waiting for the grinding sound that tells you the damage is already spreading to your rotors. Don’t wait for a specific mileage number on your odometer, because your driving habits matter far more than any generic interval a manual gives you.

    This week, take five minutes and actually look at your front pads through your wheel spokes if you can see them, or pay closer attention the next few times you brake at a stoplight for any squealing, grinding, or pulsing you might have been tuning out. If you’ve heard even a faint squeal recently and brushed it off, don’t wait for your next scheduled service, get it checked now. That single decision is the difference between a routine $180 repair and a much more painful $400 one down the road.

  • What Gear Should You Actually Be In At A Red Light? The Answer Might Surprise You

    What Gear Should You Actually Be In At A Red Light? The Answer Might Surprise You

    I want to clear something up today because it’s one of those topics where I see drivers doing the wrong thing constantly, and honestly, even some mechanics give bad advice on this one. Every single day at that long light near my shop, I watch cars idling in Drive with a foot mashed on the brake pedal for two, sometimes three minutes at a stretch. Then on the other end of the spectrum, I get customers who shift into Park or Neutral at every single stop sign, convinced they’re saving their transmission. Both habits come from somewhere, but neither one tells the full story, and getting this wrong over years of driving can genuinely cost you real money in transmission wear.

    Why Sitting In Drive At Long Lights Isn’t Actually “Fine”

    Let’s talk about what’s physically happening inside your transmission when you’re stopped at a light with your foot on the brake and the shifter still in D. Your torque converter (the fluid coupling that transfers power from your engine to your transmission, essentially acting like a rotating clutch filled with fluid) never fully disengages in Drive. Even at a complete stop, it’s still trying to transmit rotational force to the transmission input shaft. Your brakes are fighting against that constant forward pressure the entire time you’re sitting there.

    Many drivers overlook this, but from a mechanic’s perspective, the real critical point is heat. That torque converter is generating friction heat internally the whole time you’re stopped in gear, and on a scorching summer day stuck at a five-minute construction light, that heat has nowhere good to go. When I hoist a car up on the lift for a transmission fluid service and I pull the fluid from a car whose owner admits they idle in Drive constantly at long lights, it’s noticeably darker and has a faint burnt smell compared to a car whose owner is more mindful about it. That’s not scientific proof from a lab, but after ten years of pulling transmission pans, I trust what my nose and eyes tell me.

    There’s also the brake wear angle that nobody talks about. Holding a car stationary against the torque converter’s forward push requires more consistent brake pad pressure than holding a car that’s already in Neutral with no forward force fighting it. It’s a small difference per stop, but multiply that by thousands of stops over the life of a vehicle and you’re looking at measurably faster pad wear.

    So Should You Shift To Neutral At Every Red Light? Not Exactly.

    Here’s where I have to push back on the other extreme, because I get this question constantly from customers who read something online and now shift to Neutral at every stop sign, including quick two-second stops. What would you do if you were stopped at a light for maybe five to ten seconds behind two other cars? Honestly, in that scenario, I’d just stay in Drive with my foot on the brake. Shifting in and out of gear repeatedly for brief stops actually introduces its own wear pattern, specifically on the shift solenoids and the internal clutch packs that engage each gear range.

    Just last week, a client brought in a Hyundai Sonata with a complaint about a delayed or “clunky” engagement when shifting from Park into Drive in the mornings. When I scanned it and pulled the transmission adaptation data, along with hearing her driving habits, it turned out she’d developed a habit of shifting to Neutral at literally every stop, even brief ones behind a single car at a stop sign. That repetitive shifting, especially combined with slightly low fluid level, had accelerated wear on her shift solenoid pack. The repair wasn’t catastrophic, a solenoid pack replacement ran her about $340 including labor, which is a fair price for that job, but it was a completely avoidable expense.

    My actual rule of thumb, and this is what I tell every customer who asks, is based on duration. For a normal light cycle where you’ll likely be stopped under fifteen or twenty seconds, Drive with your foot firmly on the brake is perfectly fine and won’t meaningfully harm anything. For longer stops, extended construction delays, railroad crossings, or any situation where you know you’ll be sitting for thirty seconds or more, shift into Neutral and let your foot rest, or use your parking brake if you’re going to be there a while. That reduces the sustained heat buildup in the torque converter without introducing the wear pattern that comes from constant in-and-out shifting at every single stop.

    The Uphill Stop Situation Nobody Prepares You For

    This next scenario is where I’ve genuinely seen drivers cause real damage, and it deserves its own conversation. When you’re stopped on an incline, whether it’s a hill start situation at a light or a steep driveway, resist the urge to hold the car in place using only the accelerator pedal while in Drive, sometimes called “riding the brake and gas together” or just gently feathering the throttle to prevent rollback. I understand the instinct, but doing this regularly puts you in a situation where the transmission is trying to move the car forward while gravity pulls it back, and that fight generates significant heat and clutch pack wear inside the transmission, on top of unnecessary engine load.

    Back when I was an apprentice mechanic, one of the biggest trial-and-error mistakes I made was underestimating just how much damage this specific habit causes over time. I worked on a Kia Sorento that came in with premature transmission slipping at only 68,000 miles, which is far too early for that kind of wear under normal circumstances. After talking with the owner, we learned she lived at the top of a steep hill and used exactly this technique to hold her position at the stop sign near her house every single day for years. That habit, repeated thousands of times, contributed directly to accelerated internal wear. The fix at that point wasn’t cheap either, a transmission rebuild or replacement typically runs anywhere from $2,800 to $4,500 depending on the vehicle, versus a simple habit change that costs absolutely nothing.

    The correct approach on an incline is to use your foot brake to hold the car, and if you anticipate a longer wait, engage your parking brake. Many newer vehicles also come equipped with hill-hold assist, a system that automatically maintains brake pressure for a second or two after you release the brake pedal, giving you time to transition to the gas without rolling backward. If your vehicle has this feature, use it, that’s genuinely what it’s designed for.

    Quick Reference: Gear Position By Stop Duration

    Stop SituationRecommended GearWhy
    Brief stop (under 15 sec, e.g. quick light or stop sign)Drive, foot on brakeAvoids unnecessary solenoid and clutch pack cycling
    Extended stop (30+ sec, construction, train, long light)Neutral, foot off brake or parking brake engagedReduces sustained torque converter heat buildup
    Uphill stop, any durationFoot brake or parking brake, never gas-only holdingPrevents transmission fighting gravity, reduces clutch wear
    Parked and waiting (over 2-3 min)Park, engine can stay on or off per local idling lawsFully disengages transmission load
    Automatic with hill-hold assistUse the assist feature, transition normally to gasDesigned specifically to prevent rollback without added wear

    I also want to touch on something that surprises a lot of people, which is that this advice changes slightly depending on your transmission type. If you’re driving a vehicle with a CVT (Continuously Variable Transmission, which uses a belt and pulley system instead of traditional fixed gears to provide smoother, stepless acceleration), the same general principles apply, but CVTs tend to run a bit warmer under sustained load in Drive at a stop, so I’d lean even more toward Neutral for anything beyond a short light if you’re driving one of these.

    My Final Verdict And What To Actually Do Starting Today

    If you take one thing away from this, let it be that gear position at a stop isn’t a one-size-fits-all rule, it’s about matching the gear to the situation. Quick stops, stay in Drive and rest your foot on the brake, that’s perfectly normal wear your transmission is designed to handle. Longer stops, especially on flat ground where you can safely do so, shift to Neutral and give that torque converter a break from constant heat generation. And on any incline, train yourself out of the gas-pedal-holding habit immediately, because that one habit alone is responsible for more premature transmission repairs than almost anything else I see come through my shop that isn’t related to basic fluid maintenance.

    Pay attention to your own driving pattern this week. If you commute through a route with a few long lights or a steep hill stop, that’s exactly the kind of daily repetition that either protects your transmission for the next hundred thousand miles or slowly wears it down years ahead of schedule. Small habit, big long-term difference.

  • Understanding Your EPB System: Why That Little Button Is More Important Than You Think

    Understanding Your EPB System: Why That Little Button Is More Important Than You Think

    A customer rolled into my shop last month absolutely convinced her transmission was dying. Her complaint? Every time she pressed a certain button on her center console, the car made a faint whirring noise and a light blinked on the dash. Turns out she’d never actually read her owner’s manual and didn’t even realize her “parking brake pedal” from her old car had been replaced with an electronic button in her new one. She’d been driving around for eight months low-key terrified of her own vehicle. That conversation is honestly what pushed me to finally sit down and write this piece, because I get some version of that same confused phone call at least twice a month.

    So What Exactly Is an EPB, and Why Did Automakers Even Bother Changing It?

    EPB stands for Electronic Parking Brake, and it’s the modern replacement for the mechanical hand lever or foot pedal parking brake that older cars used. Instead of you physically pulling a cable that mechanically clamps the rear brake pads or shoes, you press a small switch, usually a button with a “P” and a circular arrow icon, and an electric motor does the clamping for you. Each rear caliper (or a separate drum mechanism, depending on the vehicle) has a small actuator motor built right into it. When you hit that button, a control module sends voltage to those motors, which rotate a spindle that pushes the brake pad against the rotor with a preset, computer-controlled amount of force.

    When I hoist a car up on the lift and pop off a rear wheel to service an EPB-equipped caliper, the first thing I always point out to newer techs is how different it looks from a standard caliper. There’s a visible electric motor housing bolted right onto the back of the caliper itself, usually with a two-wire connector running to it. That’s not something you’ll see on a traditional parking brake setup, where it’s just a cable and a lever arm.

    The reason manufacturers moved to this system isn’t just about looking futuristic on the dashboard. From an engineering standpoint, it frees up a ton of interior space. That old mechanical lever between the front seats used to eat up console real estate. Getting rid of it let designers build bigger cupholders, wireless charging pads, and storage bins instead. It also allows for something called Auto Hold, which many drivers genuinely love once they understand it, where the car automatically keeps the brakes engaged at a stoplight or in traffic without you keeping your foot on the pedal, then releases the instant you touch the gas.

    The Maintenance Side Nobody Warns You About

    Here’s where things get genuinely important, and where I see the most expensive mistakes happen. Many drivers overlook this, but from a mechanic’s perspective, the real critical point is that EPB systems fundamentally change how you have to do a brake pad replacement. On an old-school car, you could just compress the caliper piston with a C-clamp and swap the pads in fifteen minutes. Try that on an EPB-equipped rear caliper and you risk stripping the motor gear internally or throwing the whole system into a fault state, because the piston isn’t just spring-loaded, it’s threaded onto a spindle driven by that little motor.

    To do it correctly, you need a scan tool that supports a “service mode” or “caliper retraction” function. This electronically commands the motor to back the piston out to its fully retracted position before you touch the pads. Skip this step, force the caliper back with brute mechanical pressure, and you can burn out that actuator motor. I’ve replaced more than a few of these motors, and I’ll be honest with you, they are not cheap. Depending on the make, a single rear caliper assembly with the integrated motor can run anywhere from $250 to $450 for the part alone, before labor. Compare that to a traditional caliper, which is often half that price.

    Just last week, a client brought in a Hyundai Elantra with this exact issue. A quick-lube shop, not us, had done her rear brake pads and apparently just cranked the piston back with a standard tool like it was a normal caliper. Two weeks later her parking brake light was flashing constantly and the button did nothing when pressed. When I scanned it, I found a communication fault stored for the right rear actuator motor. Sure enough, the internal gearing had been damaged from being forced. That “quick and cheap” brake job ended up costing her an extra $380 to fix properly, money that never needed to be spent if the shop had just used the correct procedure from the start.

    What would you do if you suddenly heard a faint grinding or clicking sound specifically when you pressed your parking brake button, rather than while driving? Don’t panic, but don’t ignore it either. That’s very likely the actuator motor struggling against something, whether it’s a seized guide pin, a warped rotor, or debris in the caliper bracket. Get it scanned for fault codes before it turns into a full motor replacement.

    Battery Health and the EPB: A Connection Most Owners Never Consider

    Here’s a detail that catches a lot of people off guard, and honestly it took me a few years in this trade to fully appreciate it myself. EPB systems are surprisingly sensitive to your 12V battery’s condition. Because those actuator motors need a solid, consistent voltage supply to clamp and release properly, a weak or aging battery can cause some genuinely strange symptoms. I’ve seen cars come in with a parking brake warning light on, customer swearing the brake system is broken, and the actual root cause was a battery testing at 60% capacity with excessive voltage drop under load.

    Back when I was an apprentice mechanic, one of the biggest trial-and-error mistakes I made was chasing an EPB fault code for nearly two hours, checking wiring harnesses, testing the actuator resistance, even considering replacing the control module, before my senior tech walked over, glanced at the battery terminals, and said “did you even load test the battery yet?” I hadn’t. Sure enough, it was a battery on its last leg. Ever since then, a battery load test is always my very first move on any EPB complaint, before I touch anything else. It takes five minutes and can save you from chasing ghosts for an entire afternoon.

    There’s also a cold weather angle here that’s worth mentioning. In freezing temperatures, if your rear brakes have any moisture that’s turned to ice around the pads and rotor, or if the caliper mechanism itself is stiff from cold grease, the actuator motor has to work harder to release the brake. On a marginal battery, this extra current draw can sometimes trip a fault code temporarily. It’s not usually a permanent problem, but it’s exactly the kind of thing that makes people nervous when that little brake light blinks unexpectedly on a January morning.

    Reading the Warning Signs: When to Worry and When Not To

    Not every EPB quirk means impending disaster, and I think a lot of drivers work themselves into unnecessary anxiety over normal system behavior. A slight whirring or motor sound when engaging or releasing is completely normal, that’s just the actuator doing its job. What’s not normal is a grinding metallic sound, a burning smell after repeated use, the brake failing to release at all even after multiple button presses, or a warning light that stays solid rather than briefly flashing during startup.

    SymptomLikely CauseUrgency Level
    Brief flash of EPB light at startupNormal self-check cycleNone, this is expected
    Solid, continuous EPB warning lightFault code stored in moduleModerate, scan soon
    Grinding noise on engagementWorn pads or seized actuatorHigh, inspect immediately
    Brake won’t release, car won’t moveActuator or module failureHigh, tow if necessary
    Whirring sound, no warning lightNormal motor operationNone
    Clicking sound only when parkingGuide pin or bracket debrisModerate, inspect soon

    I also want to address something I hear constantly: “Can I manually release my EPB if the battery dies or the system fails?” In most vehicles, yes, there’s an emergency release procedure, usually a small manual override cable or bolt access point near the rear caliper or under a trim panel in the trunk. But here’s my honest professional opinion on this: don’t attempt this yourself unless you’ve specifically looked up your exact make and model’s procedure in the owner’s manual. Every manufacturer does this differently, and guessing wrong can mean removing interior panels you didn’t need to touch, or worse, not actually releasing the brake and thinking your car is broken when it isn’t.

    My Final Take and What You Should Actually Do Today

    If there’s one thing I want you to walk away from this article with, it’s that an EPB system isn’t something to be intimidated by, but it absolutely deserves more respect than most drivers give it. This isn’t a simple mechanical lever anymore, it’s a small electromechanical system with its own logic, its own failure points, and its own maintenance requirements that differ from what an entire generation of drivers grew up learning.

    Go ahead and pull out your owner’s manual this week, genuinely, and read the two or three pages dedicated to your specific EPB system. Learn where your manual release point is located before you ever need it in an emergency. If you’re due for rear brake service, ask your shop directly whether they have the correct scan tool to put the caliper into service mode, and don’t be shy about it, a reputable shop will have no problem confirming this for you. And if your parking brake light has been flashing intermittently and you’ve just been ignoring it because the car still drives fine, get it scanned. A twenty-minute diagnostic now is always cheaper than an actuator motor replacement later.