Author: discovery7090

  • Why Exact Tire Pressure Matters

    Why Exact Tire Pressure Matters

    Every single week, at least one customer pulls into my bay with a dashboard warning light glowing and a look of mild panic on their face, convinced something catastrophic is wrong with their car. Nine times out of ten, I walk over with my gauge, check all four corners, and find they’re just running 4 or 5 PSI low. It seems trivial, almost embarrassing to make a fuss over. But here’s what most drivers don’t realize: that “small” pressure discrepancy is one of the most quietly destructive things you can do to your tires, your fuel economy, and in some cases, your safety on the road.

    Tire pressure gets treated like an afterthought, something you check once a year if you remember, or only when a warning light forces the issue. In my ten years on the shop floor, I’ve seen more preventable tire failures, uneven wear patterns, and blown-out sidewalls caused by pressure mismanagement than almost any other single factor. So let’s talk about why that number stamped inside your driver’s door jamb matters so much more than people think, and why “close enough” really isn’t close enough when it comes to PSI.

    The Physics Nobody Explains Properly

    Here’s the thing about tire pressure that most articles gloss over: it’s not really about the tire at all, it’s about the contact patch, which is the small area of rubber actually touching the road at any given moment (usually about the size of your palm, depending on tire size and load). Everything about how your car handles, brakes, and wears down its tires comes down to that contact patch staying the correct shape.

    When a tire is underinflated, the sidewalls flex outward and the tire bulges, which means more of the tire’s outer edges touch the pavement while the center rides slightly higher. When I hoist a car up on the lift and pull a tire that’s been running low for months, I can usually tell before I even check the gauge, just by looking at the wear pattern. You’ll see two distinct worn strips along both outer edges of the tread, with the center still looking relatively fresh. That’s underinflation wear, and it’s one of the clearest diagnostic signs in my job.

    Overinflation does the opposite. The tire becomes rounder and stiffer than it should be, so the center of the tread bears most of the load and wears down faster than the edges. Many drivers overlook this, but from a mechanic’s perspective, the real critical point is that both of these wear patterns are permanent once they set in. You can correct the pressure after the fact, but you can’t undo the uneven wear that’s already happened. That tire is now compromised for the rest of its life, and it’ll need replacing sooner than it should have.

    What would you do if you noticed your front tires were wearing faster on the outside edges than the inside? Most drivers assume it’s an alignment problem right away, and sometimes it is, but I always check pressure history first, because it’s the cheaper and more common culprit.

    Why “Eyeballing It” Fails and Temperature Changes Everything

    I hear this all the time: “I can tell if a tire’s low just by looking at it.” I’ll be honest with you, unless a tire is severely underinflated, that’s simply not true anymore. Modern radial tires (tires built with steel belt layers running radially across the tread for strength and stability) are engineered to look relatively normal even when they’re 15-20% below the recommended pressure. That visual cushion is exactly why so many drivers don’t catch the problem until it’s already caused damage.

    This is where temperature becomes the sneaky variable that catches almost everyone off guard. For roughly every 10°C drop in ambient temperature, tire pressure drops by about 1-2 PSI, because the air inside the tire contracts as it cools. I see this constantly at the start of every winter season, drivers who had perfectly correct pressure in September suddenly showing up in November with a TPMS light on, convinced they have a slow leak. Most of the time, there’s no leak at all, it’s just the seasonal temperature swing catching up with them.

    Just last month, a client brought in a Kia Sportage insisting she had a puncture because her low pressure warning kept coming on every few days. I checked all four tires, found no nails, no punctures, nothing visually wrong. I asked her when the light started, and sure enough it lined up almost exactly with the first cold snap of the season. Her pressure was reading 28 PSI in the front where it should have been 33. We aired everything up to spec, and the light didn’t come back on for the rest of the season. That’s a five-minute fix that saved her an unnecessary tire replacement she was already mentally preparing to pay for.

    There’s a flip side too, and it’s just as important. In the heat of summer, especially after a long highway drive, tire pressure can read 3-5 PSI higher than your cold baseline simply from heat buildup through friction and ambient temperature. This is why I always tell customers to check pressure when tires are cold, meaning the car has been sitting for at least three hours or hasn’t been driven more than a couple kilometers. Checking pressure right after a drive gives you an inflated number that doesn’t reflect your actual baseline, and adjusting based on that reading will leave you underinflated once the tires cool back down.

    The Real Safety and Financial Stakes

    I want to walk you through what actually happens mechanically when a tire runs significantly underinflated, because this isn’t just about tread wear, it directly affects how your car behaves in an emergency. An underinflated tire generates more heat as it flexes through each rotation, since the sidewall is doing more work than it’s designed for. That heat buildup, especially on a highway drive in summer, is one of the leading contributors to sudden tire failure, the kind where a sidewall lets go at speed. I’ve responded to enough roadside situations in my career to tell you that a blowout at highway speed is genuinely one of the scarier things a driver can experience, and it’s almost always preventable with a two-minute pressure check.

    Underinflation also increases your stopping distance in an emergency brake situation, because that distorted contact patch reduces the tire’s grip efficiency. On a wet road, this effect gets even more pronounced. I’ve had customers come in after a near-miss incident, shaken up, describing exactly this scenario, and when I check their tires, they’re running well below spec.

    Then there’s the financial angle, which honestly should be reason enough on its own. Underinflated tires increase rolling resistance, meaning your engine has to work harder to maintain speed, and that translates directly into worse fuel economy, typically around a 1-3% loss for every 1 PSI below spec across all four tires. That might sound small until you calculate it over a full year of driving. On top of that, uneven wear from incorrect pressure can shave 15-20% off your tire’s usable lifespan, meaning you’re replacing a set of tires that could have easily gone another 10,000-15,000km if pressure had been managed properly.

    Back when I was an apprentice mechanic, one of the biggest trial-and-error mistakes I made was assuming factory door-jamb pressure specs were universal across similar vehicles. I once advised a customer with a heavily loaded minivan to run the same pressure as a comparable sedan, purely from memory instead of checking her actual specification sticker. It wasn’t dangerous in her case, but it did contribute to faster wear on her rear tires. That mistake taught me to always physically check the sticker on every vehicle, every time, no matter how confident I feel about the number.

    Here’s a table I keep taped up in my shop office and hand out to customers who ask about proper maintenance intervals:

    Mechanic’s Essential ChecklistRecommended ActionWhy It Matters
    Check pressure monthlyUse a manual gauge, not just TPMSTPMS often only warns once pressure is significantly low
    Check when tires are coldWait 3+ hours after drivingHeat from driving inflates readings temporarily
    Adjust for seasonal temperatureRecheck at each major season changePressure drops ~1-2 PSI per 10°C temperature decrease
    Match spec to door jamb stickerNever guess based on tire sidewall max PSISidewall number is the tire’s maximum, not your vehicle’s recommendation
    Inspect tread wear patternLook for edge vs. center wearReveals under/overinflation history even after correcting pressure
    Don’t forget the spareCheck it during regular pressure checksSpares lose pressure too and are often neglected for years

    One point of confusion I clear up constantly: the number printed on your tire’s sidewall is not your recommended pressure, it’s the maximum pressure that tire can safely hold. Your actual recommended pressure is specific to your vehicle, not the tire, and it’s printed on a sticker inside your driver’s side door jamb, or in your owner’s manual. I’ve seen drivers inflate to the sidewall max thinking they’re being thorough, and end up with a harsher ride, reduced grip, and that telltale center-wear pattern within a matter of months.

    Final Verdict and Your Action Checklist

    My honest professional take is this: tire pressure is one of the cheapest, fastest maintenance checks you can perform, and it has an outsized impact on your safety, your fuel costs, and how much money you’ll spend replacing tires over the life of your car. There’s no reason to leave it to guesswork or wait for a warning light, because by the time that light comes on, you’re often already well below the safe threshold and the damage may already be underway.

    Here’s what I want you to do this week. Find your vehicle’s actual recommended pressure on the door jamb sticker, not the tire sidewall. Buy a decent manual tire gauge if you don’t already have one; they cost less than a coffee and coincidentally are more reliable than most cheap digital ones. Check all four tires, plus your spare, while they’re cold, ideally first thing in the morning before you’ve driven anywhere. Adjust as needed, and make a habit of repeating this check monthly, with extra attention at the start of each new season when temperature swings are steepest. It’s a five-minute habit that will genuinely extend your tire life, improve your fuel economy, and keep you safer every time you’re on the road.

  • 5,000km vs 10,000km Oil Change? The Ultimate Mechanic’s Guide

    5,000km vs 10,000km Oil Change? The Ultimate Mechanic’s Guide

    A few months back, a regular customer stormed into my shop holding a printout from some online forum, practically ready to fight me. “Why did you tell me to change my oil at 8,000km when this article says modern synthetic oil is fine until 15,000km?” I get this argument at least twice a month, and honestly, I don’t blame drivers for being confused. The oil change interval debate has become one of the most polarizing topics in car care, right up there with whether you really need to warm up your engine in winter.

    Here’s the truth that nobody wants to hear: there is no single correct answer. When I hoist a car up on the lift and drain the oil, what I see tells me a story about how that specific vehicle has been driven, and that story is different for every single car that rolls into my bay. Today I want to walk you through exactly how I evaluate this for my own customers, because the 5,000km-versus-10,000km debate isn’t really about a magic number. It’s about understanding your engine, your oil, and your driving habits well enough to make the right call for your situation.

    Why the “One Number Fits All” Myth Keeps Fooling Drivers

    Manufacturers started stretching recommended oil change intervals over the last fifteen years, largely because of improvements in oil chemistry. Full synthetic oil has better thermal stability and resists breakdown longer than the conventional dino oil most of us grew up with. That’s a real, legitimate engineering fact. But here’s what gets left out of the conversation: those extended interval recommendations from manufacturers are almost always based on “ideal” driving conditions — highway commutes, moderate climates, no towing, no stop-and-go traffic.

    Many drivers overlook this, but from a mechanic’s perspective, the real critical point is that almost nobody actually drives in ideal conditions. If you’re doing short trips under 10 minutes, idling in traffic, driving in extreme heat or cold, or towing anything, you’re in what manufacturers classify as “severe service” conditions — and that classification cuts your safe interval down significantly, sometimes by half.

    I want you to picture this: when oil is cold, it’s thick and doesn’t lubricate as well until it reaches operating temperature (typically around 90-105°C). If your daily drive is a 12-minute school run, your engine barely gets warm before you shut it off. That means moisture and unburned fuel vapor never fully cook off, and they end up mixing into your oil, breaking it down chemically far faster than the odometer would suggest. I’ve pulled dipsticks on cars with only 4,000km on the oil that looked like they had 12,000km of highway miles on it, just because of this exact short-trip pattern.

    What would you do if you found out your “gentle” city driving was actually harder on your engine than a highway road trip? Most drivers assume less driving equals less wear, but that’s backwards when it comes to oil degradation.

    Reading the Oil Yourself: What a Mechanic Actually Looks For

    I always tell my customers, don’t just trust the sticker on your windshield — trust your dipstick and your senses too. Here’s what I check every single time a car comes in for service, and what you can check yourself in about two minutes.

    Pull the dipstick, wipe it clean, reinsert it fully, then pull it again. Fresh oil, even in a well-used engine, should have a slight amber-to-brown translucency when you smear a drop on a white paper towel. If it comes out looking like used motor oil straight from a jar — opaque black, gritty between your fingers, or smelling faintly of gasoline — that oil is done, regardless of what the mileage sticker says. A sharp, burnt smell specifically tells me the oil has been running hotter than it should, which sometimes points to a cooling system issue rather than just normal wear.

    Texture matters more than color, honestly. Rub a drop between your thumb and forefinger. If it feels gritty or sandy, that’s metal particulates and carbon buildup, and it means the oil has lost its ability to suspend contaminants properly. Good oil, even dark oil, should still feel relatively smooth. This single check has saved more than a few of my customers from unnecessary panic, and it’s flagged real problems for others who insisted “the mileage isn’t up yet.”

    Just last week, a client brought in a Hyundai Elantra with this exact issue. She was adamant her oil was fine because she’d only driven 6,000km since her last change, well within her “10,000km synthetic” plan. But she’d mentioned offhand that she does a lot of short grocery runs and sits in school pickup lines twice a day. Sure enough, the oil on the dipstick was thin, dark, and had that telltale burnt edge to the smell. Her driving pattern put her squarely in severe service territory, and she’d unknowingly been running degraded oil for weeks. We switched her to a 5,000km interval and she hasn’t had an issue since.

    Building Your Personal Interval: A Mechanic’s Framework

    Instead of picking a number off a forum, I walk customers through a simple framework based on three factors: oil type, driving pattern, and engine age or condition.

    Conventional (mineral) oil breaks down fastest and generally needs changing every 5,000km regardless of driving style, because its additive package depletes quicker under heat cycling. Synthetic blend oil splits the difference, typically good for 6,500 to 8,000km under normal conditions. Full synthetic oil, when paired with genuinely normal driving (mostly highway, moderate climate, no towing), can often stretch to 10,000 to 12,000km safely. But that same full synthetic oil, in a car doing mostly short city trips or frequent towing, should still come back down to around 6,000 to 7,000km in my professional opinion, because the driving conditions are doing the damage, not the oil chemistry itself.

    Engine age plays a role too, and this is something I don’t see discussed enough. Older engines, especially anything past 150,000km, tend to run slightly looser tolerances between components. That means more blow-by (combustion gases leaking past the piston rings into the crankcase), which contaminates oil faster. I generally recommend tightening the interval by about 15-20% once a vehicle crosses that mileage threshold, even if it’s running full synthetic.

    Here’s a comparison table I hand out at my shop to help customers figure out where they land:

    Driving Condition / Oil TypeConventional OilSynthetic BlendFull Synthetic
    Highway-dominant, moderate climate5,000km7,000-8,000km10,000-12,000km
    Mixed city/highway, average conditions4,500km6,500km8,500-9,500km
    Short trips, stop-and-go, extreme heat/cold3,500-4,000km5,000-5,500km6,000-7,000km
    Towing, heavy loads, dusty roads3,000-3,500km4,500-5,000km5,500-6,000km
    High-mileage engine (150,000km+)3,500-4,000km5,000-5,500km6,500-7,500km

    I’ll be upfront with you: some shops use “severe service” as an excuse to upsell unnecessary changes. If a mechanic tells you every single car needs a change every 5,000km no matter what oil or driving style, that’s a lazy, blanket recommendation, and it’s worth questioning. On the other hand, if a quick-lube place is pushing you toward 15,000km intervals on full synthetic just to make the price look attractive, be skeptical of that too — that’s stretching beyond what most manufacturers even recommend for ideal conditions, let alone real-world driving.

    Back when I was an apprentice mechanic, one of the biggest trial-and-error mistakes I made was trusting mileage stickers without asking customers about their actual driving habits. I once serviced a delivery driver’s Kia Sorento strictly by the sticker interval, and about two years in, we found early signs of sludge buildup in the valve cover. That was a wake-up call. Mileage alone was never the full picture — it’s mileage combined with how those kilometers were actually driven.

    Practical Costs and What’s a Fair Quote

    Let’s talk numbers, because I know that’s ultimately what drives the decision for most people. A conventional oil change typically runs $40-60 at a shop. Synthetic blend lands around $60-85. Full synthetic usually comes in at $80-120, depending on your vehicle and how many liters your engine holds. If a shop quotes you significantly above that range without a clear explanation, ask what’s included; sometimes it’s bundled with a filter upgrade or a multi-point inspection that genuinely adds value, but sometimes it’s just markup.

    Mechanic’s Essential ChecklistWhat to CheckWhy It Matters
    Dipstick color and clarityAmber to dark brown, not blackIndicates additive depletion level
    Texture testSmooth vs. gritty between fingersGritty = metal particulates, oil has failed
    Smell testFaint petroleum vs. sharp/burntBurnt smell suggests overheating or degradation
    Oil levelBetween min/max marksLow level accelerates wear and heat buildup
    Filter conditionReplaced every oil changeClogged filter restricts flow, starves engine
    Driving log reviewShort trips vs. highway ratioDetermines true “severe service” classification

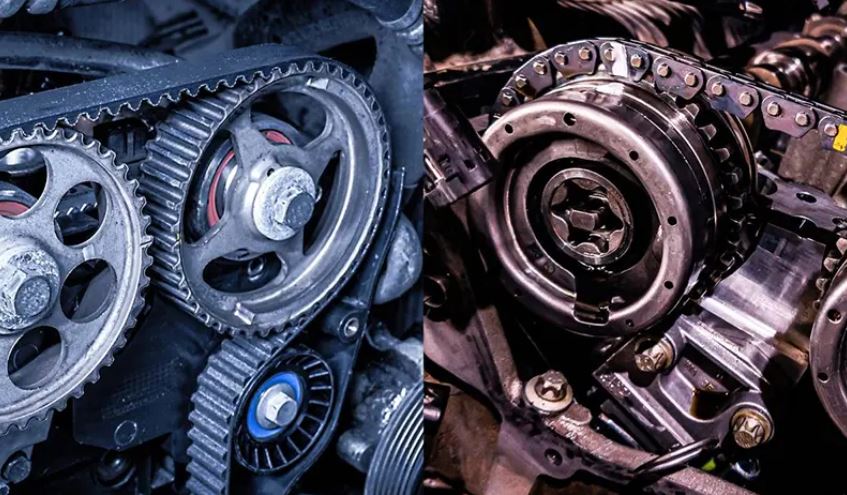
    Running your car on old, degraded oil isn’t a small risk. Worn-out oil loses viscosity stability, which means it can’t maintain that protective film between metal components under heat and pressure. Over time, this leads to increased friction wear on bearings and camshaft lobes, and in the worst cases I’ve seen, it contributes to premature timing chain stretch, which is a repair that can run well over $1,500 depending on the vehicle. Compare that to the cost of a few extra oil changes over the life of your car, and the math isn’t close.

    Final Verdict and Your Action Checklist

    My honest, no-upselling professional opinion is this: don’t anchor yourself to either 5,000km or 10,000km as gospel. Use the manufacturer’s recommendation as your starting point, then adjust based on your actual driving pattern and the oil type currently in your engine. If more than half your driving involves trips under 15 minutes, or you regularly deal with stop-and-go traffic, tow anything, or live somewhere with extreme seasonal temperatures, shift your interval toward the shorter end of whatever range your oil type allows.

    Before you leave this article, here’s what I want you to actually do this week:

    Check your owner’s manual for the specific oil type and manufacturer-recommended interval for your vehicle. Pull your dipstick right now and run the color, texture, and smell test I described above. Be honest with yourself about your driving pattern over the last month, and compare it against the table in this article. If you’re overdue based on that honest assessment, don’t wait for a dashboard warning light; get it changed this week. And if a shop ever pushes back on your questions about their interval recommendation, that’s a shop worth reconsidering, because a good mechanic should welcome an informed customer, not brush them off.