Blog

  • Alloy vs. Steel Rims: What’s Actually Bolted to Your Car and Why It Matters More Than You Think

    Alloy vs. Steel Rims: What’s Actually Bolted to Your Car and Why It Matters More Than You Think

    I had a customer walk in a few months back holding a cracked wheel he’d pulled off his own car after hitting a pothole on a construction detour, asking me whether he’d just gotten unlucky or whether he’d bought the wrong wheels for his car in the first place. That’s a question I get more than you’d expect, especially from people who bought aftermarket wheels purely because they looked good on a website, without anyone explaining what they were actually made of and why that matters once the wheel meets a real road with real potholes, real winters, and real curbs.

    Most articles treat this as a simple aesthetics-versus-price debate. It’s not. The material your wheel is made from changes how your car handles, how it responds in a collision with debris or a curb, how much unsprung weight your suspension has to manage, and even how your brakes perform under hard stops. Let me walk you through this the way I would if you were standing next to me in the shop with a wheel off the car.

    The Actual Metallurgical Difference and Why It Changes Everything

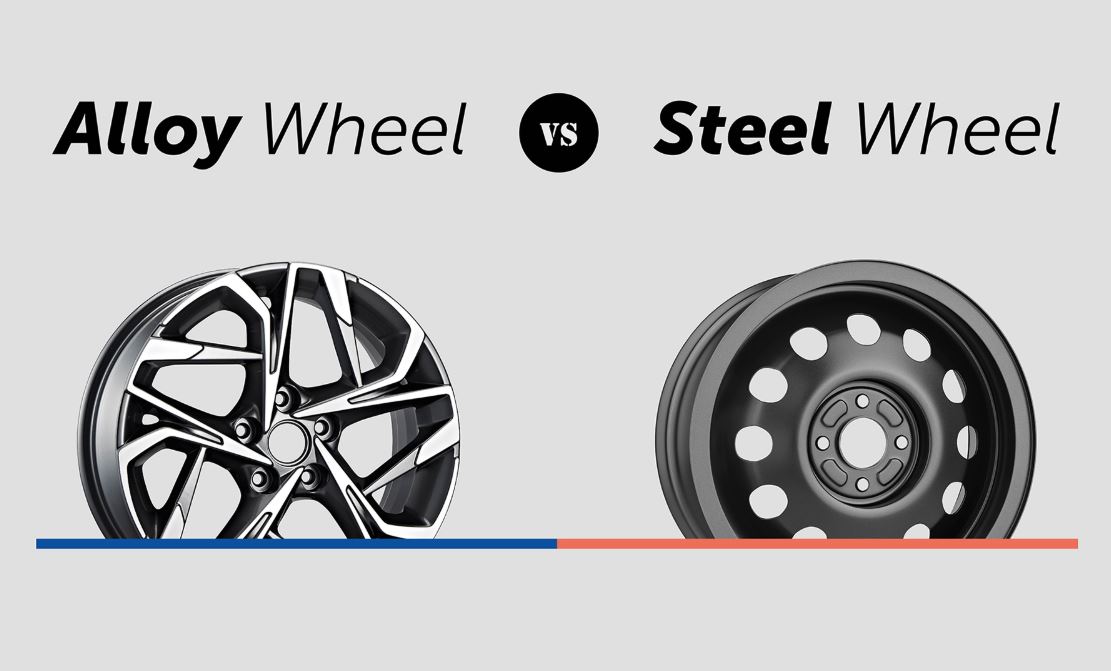
    Steel wheels are stamped and welded from sheet steel, typically in two pieces — the wheel disc and the wheel barrel — joined together, then usually covered with a plastic hubcap for appearance. Alloy wheels, on the other hand, are cast or forged from a mixture of aluminum with small amounts of other metals like nickel or magnesium (this is what “alloy” actually refers to — a blended metal composition designed to balance strength and weight, rather than a single pure element).

    When I hoist a car up on the lift and pull a steel wheel off, the first thing you notice is the weight difference in your hands — it’s substantial, often four to six pounds heavier per wheel compared to a similarly sized alloy wheel. That doesn’t sound like much until you understand what that weight actually is: it’s unsprung mass, meaning weight that isn’t supported by your car’s springs and suspension, sitting right at the corner of the vehicle where your tire meets the road. Every pound of unsprung weight makes your suspension work harder to keep the tire in contact with uneven pavement, because the wheel itself has more inertia to overcome every time it hits a bump. Many drivers overlook this, but from a mechanic’s perspective, the real critical point is that lighter alloy wheels genuinely improve ride quality and handling response, not just fuel economy — it’s not marketing fluff, it’s physics playing out at every pothole you hit.

    Steel, though, has a property that aluminum alloy doesn’t replicate quite as well: ductility under impact. When a steel wheel hits a deep pothole or a curb hard, it tends to bend or dent rather than crack. That sounds bad, and cosmetically it is, but structurally a bent steel wheel is often still functional to limp home on. Alloy wheels, especially the more brittle cast varieties, are more prone to cracking under that same sharp impact rather than deforming. I’ve seen this exact contrast play out on back-to-back jobs in the same week — a steel-wheeled work truck that hit a pothole and just had a visible dent I could point to with my finger, versus a customer’s sedan on cast alloy wheels that hit a similar-sized pothole and came away with a hairline crack near the spoke, invisible unless you know exactly where to look and shine a light at the right angle.

    What would you do if you hit a pothole hard enough to hear a loud clunk and immediately feel a vibration through the steering wheel? In my experience, it’s vital to pull over as soon as it’s safe and visually inspect the wheel, specifically running your fingers along the inner and outer barrel and around each spoke junction, feeling for any ridge, crack line, or air leak. If you see any bulging in the tire sidewall near the bead, or if the car is pulling to one side afterward, don’t keep driving on it — get it on a lift. A cracked alloy wheel can lose air pressure gradually or, in worse cases, fail suddenly under load, and that’s not a risk worth testing on the highway.

    Where Each Type Actually Makes Sense — Not Just Which One “Wins”

    This is the section that separates a mechanic’s honest advice from a tire shop’s upsell pitch. Alloy wheels aren’t objectively “better” in every situation, and I say that as someone who personally prefers them on my own daily driver.

    Alloy wheels dissipate heat significantly faster than steel, because aluminum has a much higher thermal conductivity. This matters more than people realize when it comes to brake performance — your brake rotors and pads generate substantial heat under hard or repeated braking, and a wheel that pulls that heat away more efficiently helps prevent brake fade (a temporary loss of stopping power that happens when brake components get too hot and the pad material starts to glaze or off-gas instead of gripping properly). That’s part of why you’ll almost never see steel wheels on a performance-oriented trim — the heat management alone makes a real difference during aggressive driving or mountain descents where you’re riding the brakes.

    But here’s what I tell customers who live somewhere with real winters and heavy road salt exposure: steel wheels are, frankly, the tougher and cheaper choice for a dedicated winter tire set. They shrug off curb rash from snowbanks and parking mishaps far better cosmetically — a scrape on a steel wheel is invisible under a coat of touch-up paint, while the same scrape on a polished alloy wheel is a visible, nagging cosmetic flaw that bugs people every time they look at it. Steel is also considerably cheaper to replace, which matters because winter driving conditions statistically increase your odds of curb strikes and pothole impacts.

    Just last week, a client brought in a Kia Sorento with a full set of aftermarket alloy wheels she’d put on purely for looks, then complained that her winter braking felt “grabby and inconsistent” compared to her old setup. After we went through everything, it came down to wheel width — the aftermarket alloys were an inch wider than stock, which changed her contact patch geometry slightly and, combined with all-season tires she hadn’t upgraded, was giving her a completely different braking feel than what her car was originally tuned for. The wheels weren’t defective, they just weren’t matched thoughtfully to her actual driving conditions and tire choice. That’s a mistake I see constantly — people choosing rims for aesthetics without accounting for how the whole system, tires included, needs to work together.

    The Repair, Cost, and Maintenance Reality Nobody Explains Upfront

    Let’s talk money, because this is where I see the most confusion. A basic steel wheel typically runs somewhere in the range of $50 to $120 to replace, depending on your vehicle, while a comparable alloy wheel can run anywhere from $150 to $500 or considerably more for larger diameters or specialty finishes. That price gap is real, and it’s the main reason budget-conscious drivers still choose steel for winter sets or spare tires even when their factory wheels are alloy.

    Repair is a different conversation from replacement, though, and this is where I have to be blunt about something the wheel repair industry doesn’t always volunteer. Cosmetic curb rash on an alloy wheel — meaning surface scraping that doesn’t go deep into the structural lip — can usually be sanded, refinished, and repainted or repowder-coated safely, and that’s a legitimate, safe repair. But if a wheel has a bend affecting the bead seat (the specific inner lip where the tire’s edge seals against the wheel to hold air pressure) or any crack at all, I do not recommend “repairing” it, no matter what a shop tells you about welding or straightening it back into shape. I’ve inspected wheels that were welded back together by a previous shop, and even when it looks clean on the surface, you cannot fully verify the internal metal fatigue at the weld point without specialized testing most shops don’t have. On a moving vehicle where a wheel failure at speed can be catastrophic, that’s not a corner I’m willing to help a customer cut, and I’d tell you the same thing sitting across the counter.

    Here’s the maintenance and decision-making reference I actually hand customers when they’re weighing this choice:

    FactorSteel WheelsAlloy Wheels
    Typical Cost per Wheel$50–$120$150–$500+
    Weight (Unsprung Mass)Heavier, more suspension strainLighter, better ride/handling response
    Impact BehaviorBends/dents, often drivable afterCracks or shatters, often unsafe after
    Heat DissipationPoor, more prone to brake fade under stressExcellent, helps prevent brake fade
    Corrosion/Curb RashCosmetic only, cheap touch-upVisible cosmetic damage, pricier refinishing
    Best Use CaseWinter/spare sets, budget daily driversPerformance driving, daily comfort, resale value
    Crack Repair SafetyBends can sometimes be professionally straightenedNever drive on a cracked wheel — replace, don’t weld

    I keep a version of that table taped inside my service bay because it settles more customer arguments than any sales pitch ever could.

    My Professional Verdict

    If you’re asking me straight up which one to buy, my honest answer is that it depends on what that specific set of wheels needs to survive, not which one sounds more premium. For a dedicated winter setup in a climate with real snow, salt, and pothole season, I steer people toward steel every time — it’s cheaper to replace, more forgiving of impacts, and nobody’s crying over curb rash on a wheel that’s covered in road grime for four months anyway. For your primary daily-driver wheels, especially if you value ride comfort, braking consistency, and resale appeal, alloy is worth the added cost, provided you’re diligent about inspecting them after hard impacts rather than assuming a wheel that “still holds air” is automatically fine structurally.

    Before you make your next wheel decision, or if you’ve recently hit a pothole hard enough to worry about, run through this quickly: check for any visible bend, crack, or bulge around the entire wheel and tire bead, have a shop check that the wheel still holds a stable air pressure reading over 24 to 48 hours, confirm the wheel width and offset match your vehicle’s original specification rather than just “the size that fit,” and never accept a welded repair on a cracked alloy wheel as a permanent fix. Get that wrong, and you’re not just risking a bent rim — you’re risking the one component that has zero backup if it fails while you’re doing sixty-five on the highway.
  • Decoding the Alphabet Soup on Your Sidewall: What Your Tire Specs Actually Mean

    Decoding the Alphabet Soup on Your Sidewall: What Your Tire Specs Actually Mean

    Every single week, at least one driver rolls into my bay holding a printout from a tire shop, looking at me like I just told them their car needs a new soul. They ask, “Why is this one three hundred dollars and that one’s ninety, they’re the same size, right?” And that’s usually the moment I grab a rag, wipe my hands, and walk them over to the actual tire still mounted on their car so I can point at the sidewall and explain what I call the “birth certificate” of that tire — the string of numbers and letters that tells you everything about what you’re rolling on.

    Here’s the thing that drives me nuts about how this topic gets covered online. Most articles just regurgitate what “P215/65R16” means letter by letter, like a dictionary entry, and call it a day. That’s fine if you just want to pass a trivia quiz. But it doesn’t tell you why a mechanic winces when he sees a mismatched load rating, or why I’ve had to turn customers away because the tire they wanted to buy would technically be illegal — and dangerous — on their vehicle. So let’s actually get into the stuff that matters when the rubber meets the road.

    Breaking Down the Sidewall Code Like a Mechanic, Not a Textbook

    When I hoist a car up on the lift and start my pre-inspection, one of the first things my eyes go to — before I even touch a wrench — is the sidewall. That little block of text is non-negotiable information, and misreading it is one of the more common (and expensive) mistakes I see DIYers make.

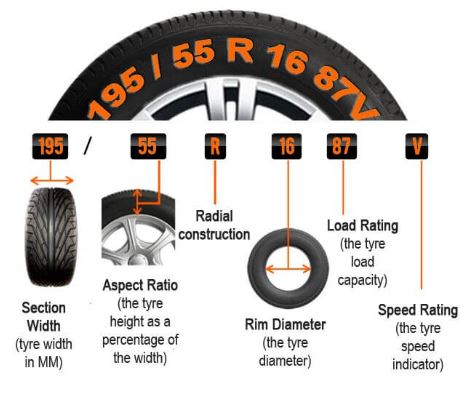
    Take a typical designation: P215/65R16 96H. I’ll walk you through this the way I’d explain it to an apprentice standing next to me.

    The “P” stands for Passenger vehicle (you might also see “LT” for Light Truck, which means a beefier tire designed to handle bigger loads — trucks and vans towing trailers usually want LT-rated tires, not P-rated ones, even if the size fits, because the internal construction is different). Skip that distinction and you could end up with a tire that’s technically the right diameter but structurally too weak for what you’re hauling. I’ve seen this exact mistake on a customer’s Ford F-150 that was riding on passenger tires his brother-in-law “hooked him up with” — the sidewalls were already showing bulge deformation from carrying camper equipment they were never designed for.

    Next, “215” is the tire’s width in millimeters, measured sidewall to sidewall. Then “65” — and this one trips people up constantly — is the aspect ratio, meaning the sidewall height as a percentage of that width. A lower number like 45 means a shorter, stiffer sidewall (common on sportier cars, gives you sharper handling but a rougher ride), while a higher number like 70 means a taller, more cushioned sidewall (smoother ride, more forgiving over potholes, but slightly less crisp cornering feel). “R” just means radial construction, which is essentially universal now — you’re not going to run into old bias-ply tires unless you’re restoring a classic.

    The “16” is your wheel diameter in inches — this one has to match your rim exactly, no wiggle room. Then “96” is the load index, a coded number (not a direct weight figure) that corresponds to the maximum weight that single tire can carry when properly inflated. And “H” is your speed rating, a letter code indicating the maximum sustained speed the tire is engineered to handle safely.

    Let me be blunt about something most articles gloss over: the load index and speed rating are not decorative. I had a client, a fairly young guy, bring in his Honda Civic complaining about a “weird wobble” at highway speeds. Turned out he’d bought tires online — great price, wrong specs, load index two points lower than what the door jamb sticker called for. The tire itself wasn’t defective. It was just being asked to carry more than it was rated for, especially once he had three passengers and a trunk full of gear. It wasn’t failing catastrophically, but it was flexing more than it should, generating excess heat, and that wobble was the tire essentially telling us it was overworked.

    Why “The Same Size” Doesn’t Mean “The Same Tire”

    This is the section I wish every driver read before walking into a tire shop, because I watch people get talked into bad decisions constantly, and I also watch people talk themselves out of good ones because they’re chasing the wrong number.

    Beyond size, tires are categorized by type, and this is where personal driving habits actually matter more than most people think. You’ve got all-season tires, which are the default for a reason — they’re a compromise built for reasonable grip across a wide temperature range, decent tread life, and acceptable wet performance. Then there are summer (or “performance”) tires, which use a softer rubber compound for maximum grip in warm, dry conditions, but that same soft compound turns rock-hard and loses grip dramatically once temperatures drop below roughly 45°F (7°C) — I’ve seen guys with summer tires spin out in a parking lot during the season’s first light frost because they didn’t realize the compound itself had essentially gone numb. And then winter tires, which use a rubber compound formulated to stay pliable in freezing temperatures and feature aggressive tread patterns with tiny slits called sipes (thin zigzag cuts across the tread blocks that bite into snow and ice for extra traction) that all-season tires simply don’t have enough of.

    What would you do if a tire shop tried to sell you “all-season” tires as a year-round solution when you live somewhere that regularly drops below freezing for four months? In my experience, it’s vital to push back on that advice. All-season tires are a “good enough for most people, most of the time” product — they are not a substitute for real winter tires if you’re dealing with actual snow and ice, and treating them as one is how I end up seeing rear-ended sedans in my shop every January.

    There’s also the UTQG rating — Uniform Tire Quality Grading — stamped on the sidewall, covering treadwear, traction, and temperature resistance. The treadwear number is comparative, not an exact mileage promise (a 400 isn’t literally “lasts 400 miles,” it’s roughly twice as durable as a tire rated 200 under standardized test conditions), and I always tell customers not to treat it as gospel — driving style, alignment, and inflation habits will swing real-world tread life far more than that number will.

    Just last week, a client brought in a Toyota Camry with two mismatched rear tires — one a proper all-season, the other some no-name budget tire with a completely different tread pattern the previous owner had thrown on to save money on a flat repair. Different types, different compounds, different grip characteristics on the same axle. That’s a genuine safety issue, not just an aesthetic mismatch, because it creates uneven handling response between the left and right rear wheel, especially in wet braking. I refused to just “top off the air” and send her on her way — we replaced the pair as a set.

    Reading Between the Numbers: Load Range, DOT Codes, and the Stuff Nobody Asks About

    Here’s where I’ll share something from my own early days that still makes me a little embarrassed. Back when I was an apprentice mechanic, one of the biggest trial-and-error mistakes I made was assuming that as long as the width and diameter matched, a tire swap was a non-issue. I once helped a senior tech mount a set of tires on a customer’s minivan without paying close attention to the load range — Standard Load versus Extra Load, sometimes marked “XL” on the sidewall. Extra Load tires are built with reinforced sidewalls and slightly higher recommended inflation pressures to safely carry more weight. We didn’t adjust the inflation pressure to match the XL spec, and the customer came back a few weeks later with premature wear on the shoulders of the tread. My senior mechanic caught it, corrected our pressure settings, and gave me a lecture I still repeat to apprentices today: the number on the sidewall isn’t advisory, it’s an engineering spec, and every part of that code changes how you’re supposed to service the tire.

    Then there’s the DOT code, which most drivers have never even looked for. It’s a string starting with “DOT” followed by a series of characters, and the last four digits tell you the week and year of manufacture — so “2324” means the 23rd week of 2024. This matters more than people realize because rubber degrades with age regardless of tread depth. I’ve pulled tires off cars with plenty of visible tread remaining, but the tire itself was nine or ten years old, and the rubber had gone brittle — you can actually feel it, a kind of dry, slightly chalky texture when you flex the sidewall, completely different from the supple give of a newer tire. Most manufacturers recommend replacement around six to ten years from the manufacture date regardless of tread wear, and I’ve had a spare tire, of all things, fail a customer because nobody thought to check its age.

    Let me put together the checklist I actually use when I’m walking a customer through a tire purchase, because this is the stuff that prevents comebacks to my shop:

    Spec to CheckWhat It Tells YouMechanic’s Real-World Note
    Width / Aspect Ratio / Rim DiameterPhysical fit to your wheel and wheel wellMust match your door-jamb sticker unless you’ve confirmed a plus-size fit with a professional
    Load IndexMax weight capacity per tireNever go lower than OEM spec, even if the tire “looks” similar
    Speed RatingMax sustained safe speedDowngrading this can void certain insurance claims after an accident
    Load Range (Standard vs XL)Sidewall reinforcement and required PSIXL tires need higher inflation pressure — check your manual, don’t guess
    Tire Type (All-Season/Summer/Winter)Compound behavior across temperaturesMatch to your actual climate, not just the season on the calendar
    DOT Date CodeManufacture week/yearReplace regardless of tread if the tire is 6–10 years old
    UTQG Treadwear GradeComparative durability estimateUseful for comparing two tires, not a literal mileage guarantee

    I always tell people: this table is basically the pre-flight checklist before you sign anything at a tire shop. If a salesperson can’t answer questions about any row on that list, that’s a signal to ask more questions, not less.

    My Professional Verdict

    If there’s one thing I want you to walk away with, it’s that the sidewall of your tire is not decoration — it’s a spec sheet written in a code that exists for good reason, and every character on it has a direct relationship to how your car handles, stops, and carries weight. Matching “the size” alone is the bare minimum, not the finish line. Your climate, your typical passenger and cargo load, and the age of the rubber itself all matter just as much as the number stamped in millimeters.

    Before your next tire purchase, do yourself a favor: check your door-jamb sticker (not just your old tire’s sidewall, since a previous owner may have installed the wrong ones), write down the full spec including load index and speed rating, and check the DOT date code on your current tires even if the tread looks fine. And if a shop tries to sell you something that deviates from the manufacturer’s original spec without a clear explanation of why, ask them to walk you through it the way I just walked you through it. A good mechanic will never mind explaining the code — it’s the ones who wave you off with “don’t worry about it” that you should be cautious of.

  • The Rhythmic Hum That’s Trying to Warn You: Understanding Wheel Hub Bearing Failure

    The Rhythmic Hum That’s Trying to Warn You: Understanding Wheel Hub Bearing Failure

    There’s a specific sound that makes my ears perk up the moment a customer describes it over the phone before they’ve even pulled into the bay: a low, droning hum that rises and falls with vehicle speed, sometimes described as sounding like driving with a window cracked open on the highway, or like a low-flying airplane passing overhead. Almost every time, this turns out to be a wheel hub bearing on its way out, and almost every time, the driver has been living with this noise for weeks or months, assuming it was road noise, tire wear, or “just an older car thing.” I want to walk you through why this noise happens, how to actually pinpoint which wheel it’s coming from, and why ignoring it for too long turns a moderate repair into a genuine safety issue.

    What a Hub Bearing Actually Does and Why It Fails the Way It Does

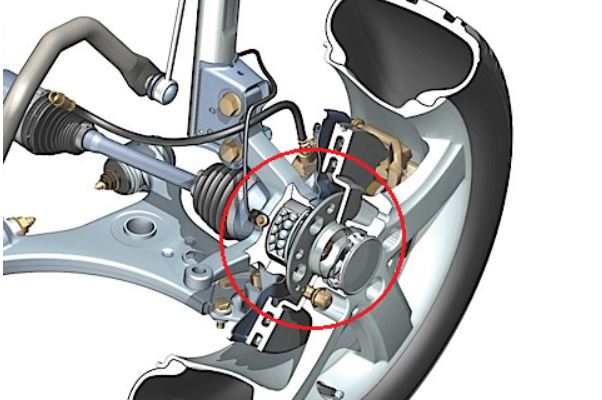
    The wheel hub bearing assembly is the component that allows your wheel to spin freely while still being rigidly attached to your vehicle’s suspension and, on most modern cars, it houses the ABS sensor ring as well (the toothed ring that the anti-lock braking system reads to determine wheel speed). Inside this sealed unit sits a set of precision ball or roller bearings packed in grease, sealed against moisture and road debris. When I hoist a car up on the lift to inspect a suspected bearing issue, this is usually what I see: the bearing itself has developed pitting or scoring on the internal races from years of repetitive load cycling, and once that microscopic pitting begins, it accelerates rapidly because the smooth rolling surface the bearings need has been compromised.

    Many drivers overlook this, but from a mechanic’s perspective, the real critical point is that hub bearings don’t fail from a single dramatic event in the vast majority of cases—they fail gradually from accumulated micro-damage caused by potholes, curb impacts, and constant cornering loads. Every time you hit a pothole hard enough to feel it in the cabin, you’re potentially creating a tiny brinelling mark (a small indentation in the bearing race caused by impact under load) that doesn’t cause noise immediately but becomes a starting point for corrosion and further pitting over the following months. This is exactly why a bearing can seem to fail “suddenly” from the driver’s perspective, when in reality it’s been quietly deteriorating for a long time.

    Just last week, a client brought in a Hyundai Elantra with a complaint of a humming noise that got louder specifically when turning right, and quieter—though not silent—when turning left. This directional change in noise intensity is actually one of the most useful diagnostic clues we have. Loading the bearing through a turn increases pressure on one side of the damaged races, which is why the noise gets more pronounced in one turning direction. In her case, it confirmed the driver’s side front bearing was the culprit, since turning right shifts more weight onto the left side wheels, increasing load on that already-damaged bearing.

    How to Diagnose Which Wheel Without Guessing

    What would you do if you heard this humming noise but couldn’t tell whether it was coming from the front or the back of the car? This is honestly one of the most common points of confusion, because sound travels and resonates through a vehicle’s chassis in ways that can trick your ears into thinking a rear bearing noise is coming from the front, or vice versa. In my experience, it’s vital to use a systematic approach rather than guessing based on where the sound seems loudest inside the cabin.

    The most reliable method I use in the shop is a controlled road test paying attention to three specific variables: speed sensitivity, turning direction, and whether the noise changes when you very lightly apply the brakes while maintaining speed (a failing bearing will often quiet down slightly under light brake application because the reduced wheel speed decreases the load cycling frequency). Beyond the road test, once the car is on the lift, I perform a hand-check by grabbing the tire at the 12 and 6 o’clock positions and rocking it firmly in and out, feeling for any play or looseness that shouldn’t be there. A healthy bearing should show zero perceptible movement. Any detectable wobble, even slight, confirms bearing wear rather than something else like a suspension bushing issue.

    Back when I was an apprentice mechanic, one of the biggest trial-and-error mistakes I made was diagnosing a humming noise as a bearing issue without properly ruling out uneven tire wear first. Certain tire wear patterns, particularly cupping (a wavy, scalloped wear pattern on the tire tread caused by suspension or alignment issues), can produce a remarkably similar droning hum that changes with speed. I ended up replacing a bearing that was actually still within acceptable tolerance, and the real issue was a worn strut causing tire cupping. Ever since, I always run my hand across the tire tread surface feeling for that telltale wavy pattern before committing to a bearing diagnosis, and I’d encourage any driver to do the same simple check before assuming the worst.

    The Safety Risk Most Drivers Don’t Realize They’re Taking

    Here’s the part that genuinely concerns me as a mechanic, beyond just the noise annoyance. A severely worn hub bearing doesn’t just make noise—it introduces play into a component that’s directly responsible for keeping your wheel attached and properly aligned with the road. As deterioration progresses past the early humming stage, you can start to feel actual steering wander or a subtle pulling sensation, because the excessive play allows minute changes in wheel alignment as the bearing shifts under load. In the most severe, long-neglected cases I’ve encountered, the bearing can seize entirely or, in genuinely rare but serious situations, fail catastrophically enough that the wheel develops excessive wobble at speed.

    This is not a component I’d ever tell a customer to “keep an eye on and drive on for now” once it’s confirmed through the hand-check test. Unlike some wear items where a bit of extra time doesn’t meaningfully change your risk, a bearing that’s already showing physical play is actively getting worse every mile you drive on it, and the failure curve accelerates rather than staying linear.

    [Mechanic’s Essential Checklist: Hub Bearing Diagnosis]

    SymptomWhat to CheckWhat It Confirms
    Humming noise that increases with speedRoad test at varying speedsLikely bearing wear (early to moderate stage)
    Noise changes when turning left vs rightNote which direction is louderIdentifies which side the bearing is on
    Noise fluctuates with light brake tapLight brake application while rollingConfirms bearing vs. other noise source
    Physical wobble when rocking tire at 12/6 positionHand-check with wheel off groundConfirms bearing play (moderate to severe)
    Wavy, scalloped tread pattern on tireRun hand across tread surfaceRules out tire cupping as false positive
    ABS warning light combined with hummingScan for wheel speed sensor codesConfirms bearing affecting ABS sensor ring

    Realistic Repair Costs and What a Fair Quote Looks Like

    For most front-wheel-drive sedans like a Sonata or Elantra, a single wheel hub bearing assembly replacement typically runs $250 to $450 including parts and labor, since most modern vehicles use a sealed hub bearing unit that bolts on as a complete assembly rather than requiring the old-school press-and-remove individual bearing races. If you’re being quoted significantly above this range for a single wheel on a standard sedan, it’s worth asking whether they’re including unnecessary additional work, though larger SUVs or all-wheel-drive vehicles with more complex hub assemblies can legitimately run higher, sometimes $350 to $600 per wheel.

    One thing I always tell customers honestly: if one front bearing has failed due to age and mileage rather than a specific impact event, the opposite side bearing has experienced roughly the same cumulative stress and mileage. I don’t automatically push replacing both, but I do flag it as something to monitor, because it’s not unusual for the second side to start showing symptoms within six to twelve months of the first repair.

    What You Should Do This Week

    If you’ve noticed any humming, droning noise that changes with your speed or with turning direction, don’t wait for it to get dramatically worse before addressing it. Take note of exactly when the noise is loudest, whether that’s during turns, at highway speed, or during light braking, because that information will help your mechanic diagnose the correct wheel far faster than starting from scratch. And if you’re at all mechanically comfortable, the tire rock test at 12 and 6 o’clock with the wheel off the ground is something you can genuinely do yourself in your driveway with a jack, giving you real information before you even step into a shop. A hub bearing repair caught early is a straightforward, predictable expense. One ignored for months becomes a safety conversation I’d rather not be having with you after the fact.

  • Conventional vs Synthetic vs High-Mileage: What’s Really Different Between Engine Oils

    Conventional vs Synthetic vs High-Mileage: What’s Really Different Between Engine Oils

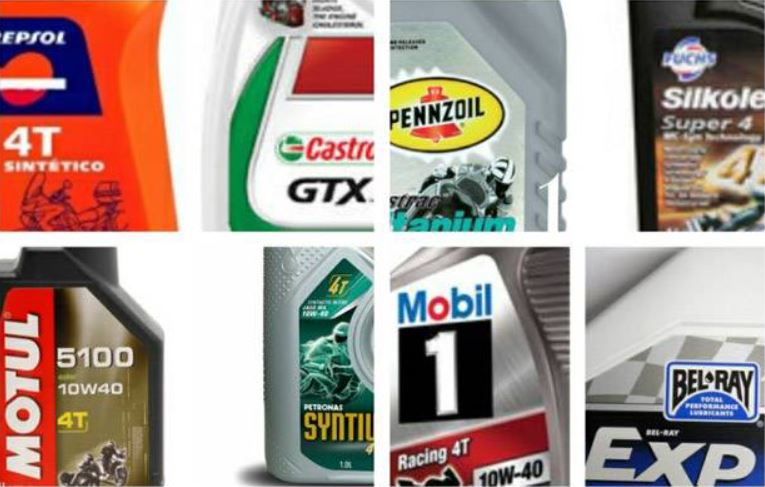
    Every week I have at least one customer standing at the counter holding two bottles of oil, genuinely paralyzed by indecision, asking me which one actually deserves the extra money. The oil aisle at any auto parts store has turned into a wall of marketing claims—full synthetic, synthetic blend, high mileage, conventional—and most of it reads like it was written to confuse you into buying the most expensive bottle rather than the right one. I’ve drained thousands of quarts out of thousands of engines at this point, and I can tell you firsthand that the differences between these oil types are real and meaningful, but they’re not always the differences the marketing implies. Today I want to break down what’s actually happening inside your engine with each oil type, when spending more genuinely pays off, and when you’re just throwing money away.

    What Actually Separates Conventional From Synthetic at the Molecular Level

    Conventional oil is refined directly from crude oil, which means its molecular structure is naturally inconsistent—some molecules are large, some are small, and they’re not uniform in shape or size. Synthetic oil, by contrast, is engineered in a lab to have uniform, consistently sized molecules, which is why it flows more predictably across a much wider temperature range. When I hoist a car up on the lift and drain the oil pan, this is usually what I see with conventional oil that’s been run for a while: it tends to carry more visible sludge and darker sediment, especially in engines that see a lot of short trips or stop-and-go city driving, because the inconsistent molecular structure breaks down faster under heat stress and doesn’t resist oxidation as well.

    Many drivers overlook this, but from a mechanic’s perspective, the real critical point isn’t just about lubrication—it’s about how each oil type behaves during cold starts. Synthetic oil maintains a more consistent viscosity (viscosity being essentially how thick or resistant to flow the oil is) even in cold temperatures, meaning it reaches critical engine components like the camshaft and bearings faster during that first startup, when the vast majority of engine wear actually occurs. Conventional oil, especially in cold climates, can thicken up more noticeably overnight, leaving your engine running on marginal lubrication for those first crucial seconds before the oil warms and thins out properly.

    I remember distinctly a Toyota Camry that came in a few winters back, owned by a customer who’d been running conventional oil for years without issue in a milder climate before relocating somewhere with harsher winters. He started noticing a faint knocking sound specifically on cold mornings that would disappear once the engine warmed up. After inspecting things, the wear pattern on his upper cylinder components was consistent with marginal cold-start lubrication—nothing catastrophic yet, but exactly the kind of gradual wear that synthetic oil is specifically engineered to reduce. Switching him to full synthetic didn’t just quiet the noise down; it was genuinely the right call for his new climate.

    Synthetic Blend and High Mileage – The Middle Ground That Actually Makes Sense for Some Cars

    Synthetic blend oil is exactly what it sounds like—a mixture of conventional and synthetic base oils, typically giving you some of synthetic’s oxidation resistance and cold-flow properties at a price point closer to conventional. In my experience, it’s vital to understand who this actually makes sense for. If you’re driving a newer vehicle with low mileage, under normal conditions, without heavy towing or extreme temperature exposure, a quality synthetic blend can genuinely provide adequate protection without the full synthetic price tag. It’s a reasonable middle-ground choice, not a compromise you should feel guilty about.

    High mileage oil is where things get more specifically targeted, and it’s also where I see the most misunderstanding. High mileage formulations aren’t really about the oil’s base composition at all—they’re about additive packages designed to address problems that develop as engines age and accumulate wear. These formulations typically include seal conditioners (additives that cause rubber gaskets and seals to swell slightly, helping close up microscopic gaps that develop as seals harden and shrink with age) along with higher concentrations of detergents to combat sludge buildup in engines that have already accumulated some internal wear.

    What would you do if your older vehicle, past 100,000 miles, suddenly started showing a small oil spot on your driveway that wasn’t there a year ago? In my experience, it’s worth trying a high mileage formulation before assuming you need an expensive seal replacement. Back when I was an apprentice mechanic, one of the biggest trial-and-error mistakes I made was recommending a full gasket replacement to a customer with a minor rear main seal weep, when a simple switch to high mileage oil with proper seal conditioners actually resolved about 80% of his leak within a few oil change cycles. That’s not to say high mileage oil is magic—it won’t fix a genuinely torn or hardened seal—but for minor seepage in older engines, it’s a legitimately effective and vastly cheaper first step before jumping to a $400 to $800 gasket repair.

    Full Synthetic – When It’s Worth the Extra Cost and When It Genuinely Isn’t

    Full synthetic oil commands a real price premium, typically running $60 to $100 for a full oil change compared to $35 to $55 for conventional, and I get asked constantly whether that gap is actually justified. Here’s my honest professional answer: it depends heavily on your driving conditions and your engine’s specifications, not just on wanting “the best” for its own sake. If your vehicle’s manufacturer specifically requires synthetic oil—which is increasingly common on turbocharged engines and many newer models with tighter tolerances—that’s not optional, and using conventional oil in these engines can actually void your warranty and lead to accelerated wear because these engines are engineered around synthetic oil’s specific properties.

    Just last week, a client brought in a Honda Civic with a turbocharged engine, and he’d been using conventional oil for two oil changes because a quick-lube shop had talked him into it as a cost-saving measure. Turbocharged engines run significantly hotter than naturally aspirated ones because the turbo itself generates substantial heat, and conventional oil breaks down faster under that sustained thermal stress. When I checked his oil at the next service interval, it had already darkened and thinned noticeably more than I’d expect from a synthetic at the same mileage, which told me the additive package was degrading faster than it should. I switched him back to the manufacturer-specified full synthetic, and beyond just following the spec sheet, it was the financially smarter move long-term given how much more a turbocharger replacement costs compared to the oil price difference.

    For naturally aspirated engines in older vehicles doing mostly highway driving in moderate climates, I’ll be honest with you—the performance gap between a quality synthetic blend and full synthetic is often smaller than the price difference suggests. This is one of those areas where mechanics sometimes upsell full synthetic across the board because it’s simply easier than explaining the nuance, but you deserve the real answer.

    [Engine Oil Type Comparison: Performance, Cost, and Best Use Case]

    Oil TypeCold Start ProtectionTypical Cost (Full Change)Best Suited For
    ConventionalModerate$35-$55Older, simpler engines; mild climates; low annual mileage
    Synthetic BlendGood$45-$70Newer vehicles under normal driving conditions
    Full SyntheticExcellent$60-$100Turbocharged engines, extreme climates, high-performance driving
    High MileageGood (with seal conditioning)$50-$80Vehicles past 75,000-100,000 miles, minor seal seepage

    Change Intervals – Where the Real Money Gets Saved or Wasted

    The oil type conversation is incomplete without talking about change intervals, because this is genuinely where I see drivers waste the most money. Many people are still operating under the old “every 3,000 miles” rule, which honestly hasn’t applied to most modern full synthetic oils in years. Full synthetic oil can typically go 7,500 to 10,000 miles between changes under normal driving conditions, which means the higher upfront cost per change is often offset, or even outweighed, by needing far fewer changes annually compared to conventional oil’s 3,000 to 5,000 mile intervals.

    Many drivers overlook this, but from a mechanic’s perspective, the real critical point is that “normal driving conditions” is doing a lot of heavy lifting in that recommendation. If you’re doing frequent short trips under five miles, extensive idling, towing, or driving in extreme heat or cold, you fall into what manufacturers classify as “severe service,” and your interval should be cut closer to the 5,000 mile mark regardless of oil type, because these conditions accelerate oil breakdown and contamination significantly faster than steady highway driving does.

    My Final Take and What You Should Actually Do

    If I had to distill years of draining oil pans into one piece of advice, it’s this: match your oil to your engine’s actual requirements and your real driving conditions, not to whatever premium marketing convinces you that you need. Check your owner’s manual for the manufacturer’s specified oil type before anything else, because using anything below spec on a modern turbocharged or tightly-toleranced engine isn’t a minor shortcut, it’s a genuine long-term risk to components that cost thousands to replace. If your engine doesn’t specifically require synthetic and you’re doing mostly moderate, normal driving, a quality synthetic blend is a financially sound choice that won’t leave your engine underprotected. And if you’re past the 75,000 mile mark and starting to notice minor seepage or a slightly louder cold start, try a high mileage formulation before you assume you need expensive seal work—it’s a cheap first step that solves the problem more often than people expect.

  • MDPS vs RDPS: What’s Actually Inside Your Steering Wheel, and Why It Matters More Than You Think

    MDPS vs RDPS: What’s Actually Inside Your Steering Wheel, and Why It Matters More Than You Think

    Every time a customer brings their car in complaining about steering that feels “off”—too light, too heavy, or making a strange whining noise when they turn the wheel at low speed—one of the first questions I ask is what kind of power steering system their car actually has. Most drivers have no idea, and honestly, why would they? Nobody teaches you this stuff unless you’re standing next to a lift with grease under your fingernails. But understanding the difference between MDPS and RDPS isn’t just trivia—it directly affects your repair costs, how your car will feel to drive as it ages, and what kind of problems you should actually be worried about versus what’s just normal wear. I’ve spent years diagnosing steering complaints, and I can tell you that a huge percentage of unnecessary repairs happen simply because the shop—or the driver—didn’t understand which system they were dealing with.

    What MDPS and RDPS Actually Are Under the Hood

    Let’s get the fundamentals straight first, because this is where most online explanations get frustratingly vague. MDPS stands for Motor Driven Power Steering, meaning an electric motor assists your steering effort, and that motor is typically mounted either directly on the steering column (inside the cabin, near your dashboard) or occasionally on the rack itself depending on the vehicle’s design. RDPS, on the other hand, stands for Rack Driven Power Steering, which is essentially a specific type of electric power steering where the assist motor is mounted directly on the steering rack (the long bar connected to your front wheels that translates your steering wheel movement into actual wheel turning) rather than up on the column.

    When I hoist a car up on the lift, this is usually what tells me which system I’m looking at without even needing to check the manual: if I can trace a thick electrical harness running down to a motor bolted onto the rack itself near the middle of the front axle, that’s RDPS. If instead the motor housing is tucked up near the firewall or behind the dashboard close to the steering column, that’s column-mounted MDPS. This distinction matters enormously because RDPS motors are physically exposed to road grime, moisture, and temperature swings in a way that column-mounted MDPS units simply aren’t, and that exposure has real consequences for longevity.

    Many drivers overlook this, but from a mechanic’s perspective, the real critical point is that both systems eliminated the need for power steering fluid and hydraulic pumps, which used to be the standard setup in older vehicles. That older hydraulic system relied on a belt-driven pump constantly circulating fluid under pressure, which is why older cars needed periodic power steering fluid changes and why you’d hear that telltale whining groan when fluid levels got low. Both MDPS and RDPS do away with that entirely, which is genuinely a good thing for maintenance simplicity, but it also means when something does go wrong, you’re dealing with electronics and sensors rather than a fluid leak you can visually spot.

    Why RDPS Tends to Feel Better But Costs More When It Fails

    Here’s something I tell customers shopping for a used car: RDPS generally provides a noticeably more natural, connected steering feel, especially at higher speeds on the highway. Because the motor assists directly at the rack, closer to the wheels themselves, there’s less mechanical translation happening between your input and the actual road feedback reaching your hands. Column-mounted MDPS, by contrast, sometimes feels slightly more artificial or numb, particularly in older or budget implementations, because the assist is happening further away from where the actual tire contact with the road occurs.

    What would you do if you suddenly felt a slight vibration or inconsistency in your steering wheel specifically during highway driving, but everything felt normal in the parking lot? In my experience, it’s vital to check whether the vehicle uses RDPS in these cases, because the rack-mounted motor and its associated sensors are more susceptible to this kind of speed-dependent irregularity when internal components start wearing unevenly. I’ve diagnosed this exact pattern on several Hyundai and Kia models with RDPS, where the torque sensor inside the rack assembly begins degrading and creates inconsistent assist levels that are far more noticeable at speed than when creeping through a parking lot.

    Just last week, a client brought in a Kia K5 with exactly this complaint—steering that felt fine around town but developed a subtle wandering, inconsistent weight on the highway. After running diagnostics, the torque sensor within the RDPS rack assembly was reading erratic values. The problem with RDPS failures like this is that you typically can’t just replace the failed sensor in isolation; in most cases, the entire rack assembly needs replacement because the motor, sensor, and rack are integrated into a single sealed unit. That repair ran the customer close to $900 including labor, which is a genuinely fair market price for this kind of job, but it caught him off guard because he assumed steering issues were always a simple, cheap fix.

    MDPS Repair Costs and the Failure Points You Should Actually Watch For

    Column-mounted MDPS systems have their own particular failure signature, and honestly, in my experience, it’s usually more forgiving on the wallet when something goes wrong. The most common issue I see is what we call motor brush wear or a failing torque angle sensor within the column unit itself, which often announces itself through a distinctive light rattling or clicking noise when you turn the wheel at very low speed, like when you’re parking. Back when I was an apprentice mechanic, one of the biggest trial-and-error mistakes I made was assuming this rattling noise was always something loose in the steering column bushings, and I’d spend an hour chasing mechanical looseness when the actual culprit was internal motor wear that you simply can’t see or feel without specialized diagnostic equipment.

    The distinctive rhythm of this noise matters more than people realize. A true MDPS motor issue tends to produce a noise that’s synchronized precisely with how far you turn the wheel—stop turning, and the noise stops immediately. If instead the noise continues even after you’ve stopped turning, or it seems to correlate with road bumps rather than steering input, you’re likely looking at a completely unrelated suspension component, and I’d urge you not to let anyone talk you into an unnecessary steering repair based on that kind of noise alone.

    [Mechanic’s Essential Checklist: MDPS vs RDPS Diagnosis]

    SymptomLikely SystemWhat’s Actually HappeningTypical Repair Cost
    Clicking noise while parking, low speedMDPS (column-mounted)Motor brush wear or gear mesh wear$300-$600
    Inconsistent steering weight at highway speedRDPS (rack-mounted)Torque sensor degradation in rack assembly$700-$1,000
    Complete loss of power assist, warning light onEither systemMotor failure or communication fault with ECU$500-$1,200
    Steering wheel slightly off-center after alignmentEither systemSensor recalibration needed, not a repair issue$0-$100 (recalibration only)
    Whining or groaning noise while turningNeither (older hydraulic system)Low power steering fluid or failing pump$80-$250

    One thing I always emphasize to customers is that a genuine MDPS or RDPS repair estimate should almost never include power steering fluid flushes or pump replacements, since neither system uses hydraulic fluid at all. If a shop quotes you for a “power steering fluid service” on a vehicle you know has electric assist, that’s an immediate red flag that they either misdiagnosed your vehicle or aren’t being fully transparent about what they’re actually charging for.

    Which System Should Influence Your Buying Decision

    If you’re shopping for a used vehicle and cross-referencing MDPS versus RDPS, my honest professional take is that this shouldn’t be your primary deciding factor, but it’s absolutely worth knowing before you buy. RDPS tends to offer better steering feel and is increasingly common on newer, higher-trim vehicles, but when it fails, you’re generally looking at a full rack replacement rather than an isolated component fix. MDPS is more budget-friendly to repair in isolated failures, but the column-mounted motor can occasionally develop that low-speed clicking noise earlier in the vehicle’s life, particularly in vehicles that see a lot of stop-and-go city driving with constant full-lock parking maneuvers.

    For sedans like the Sonata or Elantra that I see constantly in my shop, both configurations exist across different model years and trims, so it genuinely comes down to checking your specific vehicle’s specifications rather than assuming based on the model name alone. I’d recommend asking your mechanic directly, or checking your vehicle’s manual, rather than guessing.

    What You Should Do Right Now

    If your steering has started feeling different lately—whether that’s a new noise, inconsistent weight, or a subtle vibration—don’t ignore it hoping it resolves itself, because unlike the old hydraulic systems, these electric assist components don’t give you the visual warning of a fluid leak to tip you off early. Pay close attention to whether the symptom correlates with speed, steering input, or road conditions, since that single detail will tell your mechanic almost everything they need to know before even touching a diagnostic scanner. And if you do get a repair quote, don’t hesitate to ask specifically whether it’s the sensor, the motor, or the entire rack assembly being replaced, because that distinction alone can mean a difference of several hundred dollars in your final bill.

  • The Warning Signs of a Dying 12V Battery Most Drivers Ignore Until It’s Too Late

    The Warning Signs of a Dying 12V Battery Most Drivers Ignore Until It’s Too Late

    There’s a particular kind of dread that comes with turning your key—or pressing that start button—and hearing nothing but a weak, hesitant click. Most drivers treat this as a sudden, unexpected failure, but I can tell you from thousands of hours spent with my hands in engine bays that a dying 12V battery almost never fails without warning. It whispers before it screams. The problem is that modern cars have gotten so good at masking early symptoms that by the time most people notice something’s wrong, they’re already standing in a parking lot at 6 AM waiting for a jump start. Today I want to walk you through exactly what I look for when I suspect a battery is on its way out, the subtle signs that precede total failure, and how to avoid getting stranded before it happens to you.

    The Slow Crank – Your Battery’s First Cry for Help

    The single most reliable early warning sign is what we call a “slow crank” in the shop. This is that split-second hesitation before the engine catches—the starter motor turning over noticeably slower than it should, almost like the car is groggy and doesn’t want to wake up. When I hoist a car up on the lift after a customer complains of this, I’m almost never surprised to find the battery testing below 70% of its rated cold cranking amps (CCA is essentially a measurement of how much power a battery can deliver in cold temperatures to start your engine).

    Many drivers overlook this, but from a mechanic’s perspective, the real critical point is that a slow crank on a warm day is far more concerning than one on a cold morning. Cold weather naturally thickens engine oil and reduces chemical reaction speed inside the battery, so some sluggishness in winter is expected and not necessarily alarming. But if your car is cranking slowly in the middle of July, that battery is genuinely failing internally, not just struggling with temperature. I’ve had customers dismiss this symptom for weeks because “it always starts eventually,” not realizing that every slow crank puts additional strain on the starter motor and alternator, potentially turning a $150 battery replacement into a $600 repair bill involving multiple components.

    Electrical Gremlins – The Symptoms That Have Nothing to Do With Starting

    Here’s something that surprises a lot of drivers: a failing battery often announces itself through problems that have nothing to do with starting the car at all. What would you do if your dashboard lights suddenly dimmed while idling at a red light, or your power windows started rolling up noticeably slower than usual? Most people assume these are separate, unrelated electrical issues. In my experience, it’s vital to understand that your battery isn’t just responsible for starting the engine—it’s the buffer and stabilizer for your entire electrical system, even after the alternator takes over.

    Just last week, a client brought in a Honda Civic complaining that her radio kept resetting itself and her interior lights flickered whenever she used the AC on high. She’d already spent money at another shop replacing a fuse, assuming it was an isolated issue. When I tested her battery, it was holding a charge but failing badly under load—meaning it looked fine sitting still, but the moment real electrical demand hit it, it couldn’t keep up. This kind of intermittent flickering, dimming, or accessory resetting is a textbook sign of a battery losing its internal capacity, even when a basic voltage check might still show numbers that look “acceptable” at rest.

    Physical Clues Under the Hood You Can Check Yourself

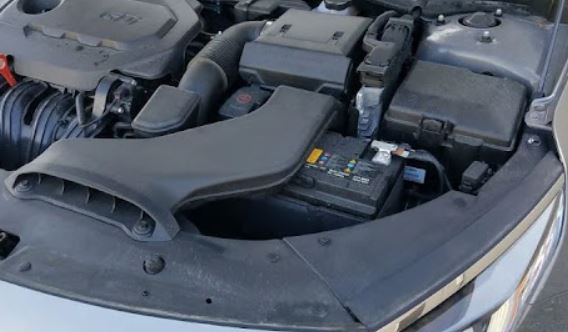
    Beyond how the car behaves, there are physical signs I always check that most drivers never think to look at. Pop your hood and actually look at the battery casing itself. A healthy battery case should be flat and firm on all sides. If you notice any swelling or bulging, particularly on the sides, that battery is done—full stop. This swelling happens because internal chemical reactions produce gas that has nowhere to escape, and it’s often a sign of overcharging, extreme heat exposure, or the battery simply reaching the end of its usable chemical life. Driving on a swollen battery isn’t just an inconvenience waiting to happen; in rare but serious cases, it can crack and leak corrosive sulfuric acid onto other engine components.

    Then there’s the corrosion around the terminals—that chalky, bluish-white or greenish crust that builds up where the cables connect to the battery posts. Back when I was an apprentice mechanic, one of the biggest trial-and-error mistakes I made was assuming that cleaning off corrosion always fixed a “battery problem.” Sometimes it does, since heavy corrosion can genuinely prevent proper electrical contact and mimic the symptoms of a dying battery. But I learned quickly that corrosion is often a symptom, not the root cause—it frequently indicates the battery itself is venting hydrogen gas excessively, which points to internal breakdown rather than a simple cleaning fix. Now, whenever I see heavy terminal corrosion, I always follow up with a proper load test rather than just cleaning it and sending the customer on their way.

    [Mechanic’s Essential Checklist: Signs Your Battery Needs Attention]

    Warning SignWhat’s Actually HappeningUrgency Level
    Slow engine crankReduced cold cranking amps, internal plate degradationModerate – test within days
    Dimming lights/flickering accessoriesBattery failing under electrical loadModerate – test soon
    Swollen or bulging caseInternal gas buildup, chemical breakdownHigh – replace immediately
    Heavy terminal corrosionHydrogen venting, possible internal faultModerate – clean and test
    Battery warning light on dashVoltage regulation issue, possibly battery or alternatorHigh – diagnose immediately
    Rotten egg smell near batterySulfuric acid leak or overchargingHigh – replace immediately
    Car sits 2+ days and won’t startParasitic drain or battery can’t hold chargeModerate – test both battery and drain

    How Long Should a Battery Actually Last, and When Is a Quote Fair?

    One of the most common questions I get is simply, “How long should this have lasted?” In my experience, a quality battery in a moderate climate should reliably last 4 to 5 years. In regions with extreme summer heat, that lifespan often drops to 3 to 4 years, since heat is genuinely harder on batteries than cold—it accelerates the internal chemical reactions that eventually degrade the plates. If your battery is failing before the 3-year mark, something else is likely going on, such as a parasitic drain (something in your car continuing to pull power after you’ve turned it off and walked away) or a charging system that’s overcharging and cooking the battery prematurely.

    As for cost, a standard replacement battery for most sedans typically runs $120 to $200 for the part itself, with installation often free or under $20 at most parts stores since it’s genuinely a simple job. If you’re being quoted $300 or more for a basic battery swap on a standard vehicle without any unusual complexity, that’s worth questioning. That said, some vehicles—particularly certain European models and hybrids—use AGM batteries (Absorbent Glass Mat batteries, which are more advanced, spill-proof, and better suited for cars with heavy electrical demands like stop-start systems) that legitimately cost more, sometimes $200 to $350, and may require a battery registration process afterward so the car’s computer recognizes the new battery correctly.

    [Battery Type Cost & Lifespan Comparison]

    Battery TypeTypical LifespanAverage Cost RangeCommon Use
    Standard Flooded Lead-Acid3-5 years$100-$180Most older sedans, budget vehicles
    AGM (Absorbent Glass Mat)4-6 years$200-$350Vehicles with stop-start systems, luxury models
    Enhanced Flooded Battery (EFB)4-5 years$150-$220Newer mid-range vehicles with mild stop-start

    What I Want You to Actually Do This Weekend

    If any of what I’ve described sounds familiar, don’t wait for the morning your car simply refuses to start. Pop your hood this weekend and take two minutes to visually inspect the case for swelling and the terminals for corrosion. Most auto parts stores will run a free load test on your battery in under five minutes—there’s genuinely no reason to guess when you can get real data. Pay attention to how your car cranks over the next few starts, particularly on a warm day when temperature isn’t a factor you can blame. And if you’re someone who drives infrequently, be aware that batteries degrade faster from sitting unused than from regular driving, so a car parked for a week or more deserves an occasional check.

    A battery rarely dies without trying to tell you first. Listening to those early signals—the slow crank, the flickering dash lights, the corrosion creeping up the terminal post—is the difference between a routine $150 replacement on your own schedule and an emergency tow bill on a morning you can least afford it.

  • TPMS Sensors Explained: What That Dashboard Light Is Really Telling You (And When to Worry)

    TPMS Sensors Explained: What That Dashboard Light Is Really Telling You (And When to Worry)

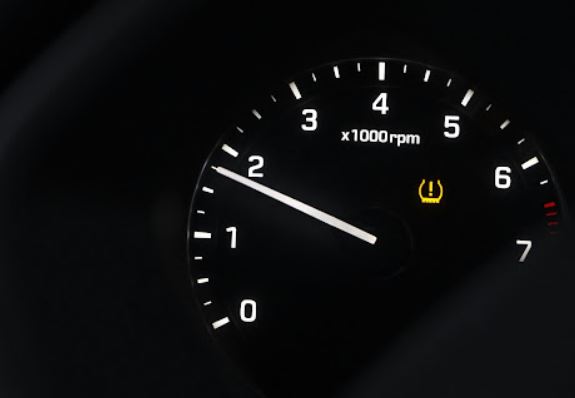
    There’s a particular moment I see play out at my counter almost every week. A customer walks in a little flustered, points at their dashboard, and says something like, “This tire light came on out of nowhere, but all my tires look fine to me.” They’ve usually already done a visual walk-around of the car, kicked each tire like that tells them anything useful, and concluded the warning must be a glitch. I get it — a lit-up icon with no obvious explanation is unsettling, and when you’re not sure whether it means “pull over immediately” or “deal with it whenever,” most people just try to ignore it and hope it goes away. So let’s clear up exactly what your TPMS sensor is doing, why it lights up when it does, and how to handle it without getting overcharged or brushed off.

    What a TPMS Sensor Actually Is and Why Your Car Has One

    TPMS stands for Tire Pressure Monitoring System, and in the U.S. it’s been a federal requirement on all new passenger vehicles since 2007, following a wave of rollover accidents linked to under-inflated tires. Inside each of your wheels — usually attached to the valve stem or mounted on the wheel itself — sits a small battery-powered sensor that continuously measures the air pressure and, in most systems, the temperature inside that specific tire. That data gets transmitted wirelessly to a receiver module in your car, which compares it against the pressure range programmed for your vehicle and lights up the dashboard icon if something falls outside that window.

    Many drivers overlook this, but from a mechanic’s perspective, the real critical point is understanding there are two fundamentally different types of TPMS systems, and knowing which one you have changes everything about how you diagnose a problem. Direct TPMS uses that physical sensor inside each wheel I just described, giving you an actual pressure reading for each individual tire. Indirect TPMS, on the other hand, doesn’t use pressure sensors at all — it uses your existing wheel speed sensors (the same ones your anti-lock braking system relies on) and detects pressure loss by noticing that an under-inflated tire has a very slightly smaller rolling diameter and therefore spins marginally faster than the others. When I hoist a car up on the lift, the first thing I check is which system I’m dealing with, because the diagnostic path and the repair cost are completely different depending on the answer.

    The Warning Light Isn’t Always What You Think

    Here’s something that trips up almost every customer who isn’t in the trade: the TPMS light illuminating doesn’t automatically mean a sensor is broken. In my experience, it’s vital to separate this into three distinct possibilities, because chasing the wrong one wastes both your time and your money.

    The most common cause, by a wide margin, is simply low tire pressure from ordinary seasonal temperature swings. Tire pressure drops roughly 1 PSI for every 10-degree drop in outside temperature, so when the first real cold snap hits in autumn, my shop gets flooded with TPMS complaints that have nothing to do with a faulty sensor and everything to do with the weather. The second possibility is a genuine sensor malfunction — the battery inside has died, the sensor housing has cracked, or the internal circuitry has failed after years of vibration and heat cycling. The third, and the one people rarely consider, is a communication or programming issue, where the sensor itself is working fine but the vehicle’s receiver module has lost its pairing with one or more sensors, often after a tire rotation or a battery replacement that wasn’t handled correctly.

    What would you do if your TPMS light came on steady rather than blinking? I’d tell you to treat that as a straightforward instruction: check your actual tire pressure with a manual gauge as soon as it’s convenient, because a steady light almost always just means one or more tires has drifted below the threshold. But if that light is flashing for about a minute every time you start the car and then stays illuminated, that’s the system telling you it can’t get a reliable reading from at least one sensor, which points toward a sensor or battery failure rather than simple air loss. That distinction alone saves my customers from paying for a diagnostic they didn’t need.

    The Anatomy of Sensor Failure and What It Actually Costs

    TPMS sensors run on small, sealed, non-replaceable lithium batteries, and that’s the single biggest thing people don’t understand about them. You can’t just swap a battery like you would in a key fob — when the battery dies, which typically happens somewhere between 5 and 10 years depending on usage and how often the sensor is transmitting, the entire sensor unit has to be replaced. I’ve pulled dead sensors out of wheels where the battery had essentially fused itself to the internal contacts after a decade of heat cycling in a tire that regularly hits 140 degrees on summer asphalt — that corrosion has a very specific chalky, greenish texture that tells me immediately I’m not dealing with a simple reprogramming issue.

    Just last week, a client brought in a Honda CR-V with all four TPMS lights cycling on and off intermittently, and she’d already been quoted a full four-sensor replacement by another shop for just under $600. When I actually tested each sensor individually with a diagnostic tool, three of the four were reading perfectly fine — the real issue was a single failed sensor on the rear passenger side, plus a rotation that had been done without reprogramming the system to recognize which sensor now lived in which wheel position. That mismatch was throwing intermittent faults across all four positions because the computer kept getting confused about which reading belonged to which tire. She left with one sensor replaced and a proper relearn procedure done, for closer to $140 total. That’s the kind of gap between a fair quote and an inflated one that I want every reader to be able to spot.

    Realistic, fair pricing for a single direct TPMS sensor replacement typically runs between $50 and $120 for the part itself, depending on your vehicle’s make and whether it’s an OEM or quality aftermarket unit, plus somewhere around $20 to $40 in labor since the tire has to be broken down from the wheel to access it in most designs. If a shop is quoting you $150 or more per sensor with labor included, it’s not unreasonable to ask for a breakdown of parts versus labor before agreeing.

    [Mechanic’s Essential TPMS Checklist]

    SituationLikely CauseRecommended ActionFair Cost Estimate
    Light comes on after a cold snapSeasonal pressure dropCheck and adjust pressure manuallyFree (DIY)
    Light flashes 60-90 sec at startup, then stays onSensor communication failureDiagnostic scan to identify faulty sensor$30-$60 for diagnostic
    Light stays on after a tire rotationSystem not relearned to new positionsRelearn/reset procedure$20-$50
    Sensor battery dead (5-10 yr old vehicle)Non-replaceable battery expiredFull sensor replacement$70-$160 per sensor, installed
    Light on despite tires visibly fullSensor corrosion or physical damageIndividual sensor testing before replacing all$30-$60 diagnostic first

    Why the Relearn Procedure Matters More Than People Realize

    This is a step I see skipped constantly, and it’s one of the biggest sources of comeback complaints in the TPMS world. Every time tires are rotated, replaced, or a sensor is swapped, the vehicle’s receiver module needs to go through what’s called a “relearn” procedure — essentially re-teaching the car’s computer which specific sensor ID corresponds to which wheel position (front-left, front-right, rear-left, rear-right). Some vehicles handle this automatically after a short drive at a certain speed, others require a stationary relearn using a specific button sequence with the ignition on, and some genuinely need a dedicated TPMS tool to trigger and confirm the process.

    Back when I was an apprentice mechanic, one of the biggest trial-and-error mistakes I made was assuming every vehicle used the same relearn method. I once sent a customer home after a routine rotation, confident the system would auto-relearn within a few miles like the last several cars I’d worked on, only to have her call two days later confused about why her TPMS light was showing the wrong tire as low. That particular vehicle needed a manual stationary relearn that I’d simply skipped. It was a humbling lesson, and now checking the specific relearn procedure for the exact make and model is a non-negotiable step in my process, every single time, regardless of how many times I’ve done that particular job before.

    If you’ve recently had tires rotated or replaced at a shop and your TPMS light is behaving strangely, don’t assume you need a new sensor before confirming the relearn was actually performed. It’s a five-to-fifteen-minute procedure that costs you nothing if it’s done properly the first time, and I’d encourage you to specifically ask whoever services your tires whether they completed it.

    My Final Verdict and What You Should Do Right Now

    A TPMS light isn’t something to dismiss, but it also isn’t automatically a sign you need an expensive repair. Before you assume the worst, grab a manual tire gauge — the small pencil-style ones cost about five dollars and are more reliable long-term than trusting the dashboard alone — and check all four tires plus your spare if it’s equipped with a sensor. Compare those numbers against the recommended PSI listed on the sticker inside your driver’s door jamb, not the number stamped on the tire’s sidewall. If everything checks out at the correct pressure and the light is still on, that’s your genuine signal to get a proper diagnostic scan rather than authorizing a blind sensor replacement.

    Treat your TPMS system the way you’d treat any other early-warning system in your car: it exists to catch small problems before they become dangerous ones, particularly given how directly tire pressure affects your vehicle’s handling and stopping distance. Don’t let a shop replace parts you don’t need, and don’t ignore a light that’s trying to tell you something real. A five-minute pressure check today can save you both a breakdown on the highway and a repair bill you never should have paid.

  • How to Save Gas While You’re Driving: A Mechanic’s Real-World Guide to Squeezing More Miles Out of Every Gallon

    How to Save Gas While You’re Driving: A Mechanic’s Real-World Guide to Squeezing More Miles Out of Every Gallon

    Every week I get some version of the same conversation at the counter. A customer drops off their keys, and while I’m writing up the ticket they mention, almost as an afterthought, “Gas prices are killing me lately. Is there anything actually wrong with my car, or am I just a bad driver?” Nine times out of ten, the answer isn’t about their driving habits at all — it’s about a handful of mechanical and behavioral factors that most people have never been told about because nobody in the auto industry makes money explaining them to you. So let’s fix that. I’ve spent ten years with my hands inside engine bays, and what I’m about to walk you through isn’t recycled internet advice. It’s what I actually see on the lift, what actually moves the needle on your fuel economy, and what’s frankly a waste of your time.

    The Tire Pressure Mistake That’s Quietly Draining Your Wallet

    If there’s one thing I check first when a customer complains about poor gas mileage, it’s tire pressure — and I’d say seven or eight out of ten cars that roll into my bay are running under-inflated. Here’s the part most drivers don’t understand: under-inflated tires increase what’s called rolling resistance (basically, the amount of energy your engine has to burn just to keep the tire’s contact patch rolling smoothly across the pavement). When a tire is soft, more of its surface area flattens out against the road, and your engine has to work harder to push through that extra drag. A tire that’s even 6 to 8 PSI below the manufacturer’s recommended pressure can cost you close to 3% in fuel economy, and in my experience it’s usually worse than that because most people don’t check their tires until one looks visibly flat.

    When I hoist a car up on the lift, this is usually what I see: tires that are inflated to “whatever felt right” rather than the number posted on the door jamb sticker — not the number molded into the tire’s sidewall, which is the maximum pressure, not the recommended one. That’s a mix-up I see constantly, even among drivers who think they’re being diligent. I always tell my customers the same thing: check your tires cold, meaning before you’ve driven more than a mile or two, because heat from driving artificially inflates the reading and gives you a false sense of security.

    Just last month, a client brought in a Kia Sorento complaining that her mileage had dropped noticeably over the past few months, and she was convinced something was mechanically failing. I checked all four tires and found them sitting at 26 PSI against a recommended 35 PSI. That’s it. That was the whole problem. No repair, no parts, just air — and she left the shop stunned that something so simple had been costing her real money every single time she filled up.

    Your Air Filter and Spark Plugs Are Working Against You More Than You Think

    Many drivers overlook this, but from a mechanic’s perspective, the real critical point isn’t just whether your air filter is dirty — it’s how restricted the airflow has become without you noticing any dramatic symptoms. Your engine needs a precise ratio of air to fuel to burn efficiently. When that filter gets clogged with dust, pollen, and debris, the engine compensates by pulling in less air relative to fuel, which throws off that ratio and forces the engine control unit to richen the fuel mixture just to keep things running smoothly. The result is more gas burned to produce the same amount of power.

    I always tell people to pull their air filter out and hold it up to a light source. If you can’t see daylight clearly through it, it’s time for a replacement, and that’s a job most drivers can absolutely do themselves in under ten minutes with a basic screwdriver — no need to pay a shop $40 in labor for what amounts to unclipping a housing and swapping a filter.

    Spark plugs are a similar story, though the deterioration is slower and sneakier. Worn spark plugs don’t just risk a rough idle or a check engine light — they cause incomplete combustion, meaning some of the fuel entering the cylinder never fully ignites and gets wasted. What would you do if you noticed your car hesitating slightly during acceleration, almost like a tiny stumble before it catches power? Most drivers just adjust to it and stop noticing. I’d tell you that’s very likely your spark plugs signaling they’re past their prime, and depending on your vehicle, that could be costing you anywhere from 5% to 10% in efficiency. The texture tells the story here too — when I pull a badly worn plug, the electrode tip is rounded off and pitted instead of sharp and clean, and that rounded edge means the spark is weaker and less precise than it should be.

    The Driving Habits Mechanics Wish More People Understood

    Here’s where I’ll ruffle a few feathers, because I know everyone thinks they’re already an efficient driver. Rapid acceleration from a stop is one of the single biggest fuel-economy killers, and it’s not because “gas pedal equals gas usage” in some vague sense — it’s because your engine burns disproportionately more fuel accelerating hard than it does maintaining speed. Smooth, gradual acceleration lets your transmission shift through gears at optimal engine speeds rather than forcing it to hold a lower gear longer while revs climb rapidly.

    Back when I was an apprentice mechanic, one of the biggest trial-and-error mistakes I made wasn’t even about fixing cars — it was about how I drove my own truck to work every day. I used to floor it away from every stoplight because, frankly, it felt satisfying. It wasn’t until an older mechanic I worked under had me track my own fuel receipts for a month, then switch to gentler acceleration for the next month, that I saw the difference in black and white. My mileage improved by roughly 12%, and that was without touching a single bolt on the vehicle. That experience changed how I talk to customers about this topic, because it’s not theoretical to me — I lived the math.

    Idling is another one people underestimate. Sitting with the engine running for more than about 30 seconds burns more fuel than simply restarting the engine, contrary to the old myth that restarting “uses more gas” than idling. That myth made sense decades ago with carbureted engines, but modern fuel-injected engines don’t have that problem. If you’re waiting to pick someone up or sitting in a parking lot checking your phone, turning the engine off is almost always the more efficient move.

    Highway speed matters more than most people realize too. Aerodynamic drag increases exponentially, not linearly, as speed increases — meaning the jump from 65 to 75 mph costs you a lot more fuel efficiency than the jump from 55 to 65 does. I’m not telling you to drive dangerously slow on the highway, but understanding that relationship helps explain why that “quick trip” at 80 mph felt like it drained your tank faster than usual.

    [Mechanic’s Essential Fuel-Saving Checklist]

    Item to CheckHow OftenWhat It’s Costing You If Ignored
    Tire pressureMonthly, when coldUp to 3% fuel loss per 6-8 PSI under-inflation
    Air filterEvery 12,000–15,000 milesRichened fuel mixture, reduced combustion efficiency
    Spark plugsEvery 30,000–100,000 miles (varies by plug type)5–10% loss from incomplete combustion
    Engine oil viscosityEvery oil changeWrong viscosity increases internal friction
    Wheel alignmentEvery 1-2 years or after hitting a potholeUneven tire wear increases rolling resistance
    Excess cargo weightBefore long tripsEvery 100 lbs can reduce mileage by roughly 1%
    Oxygen sensorEvery 60,000–90,000 milesFaulty readings cause overly rich fuel mixture

    The Overlooked Culprits: Oxygen Sensors, Oil Grade, and Extra Weight

    I want to touch on a few things that don’t get nearly enough attention in the typical “how to save gas” article, because these are the ones that separate a shade-tree tip list from something a professional would actually tell you. Your oxygen sensor constantly measures the ratio of unburned oxygen in your exhaust and reports back to the engine computer so it can fine-tune the air-fuel mixture in real time. When that sensor starts failing — and they do wear out gradually rather than failing all at once — the engine computer starts making decisions based on inaccurate data, almost always erring toward a richer, more fuel-heavy mixture as a safety buffer. I’ve seen failing oxygen sensors quietly cost customers 10% to 15% in fuel efficiency without triggering a check engine light for months.

    Motor oil viscosity is another detail that gets glossed over. Using a heavier viscosity oil than your manufacturer recommends — say, running 10W-40 when your car calls for 5W-20 — increases internal friction throughout the engine because the oil doesn’t flow as easily through tight tolerances, especially during cold starts. That added friction is energy your engine has to overcome, energy that ultimately comes from burned fuel. It sounds like a minor detail, but over the life of your car it adds up to real dollars.

    And then there’s the trunk. I can’t tell you how many vehicles I’ve worked on that are hauling around 100, 200, sometimes 300 pounds of stuff that has no business being there — old golf clubs, bags of forgotten tools, cases of water bottles from a road trip three months ago. Extra weight means your engine burns more fuel to move that mass, plain and simple. It’s not a huge factor on its own, but combined with underinflated tires and a dirty air filter, it compounds into a real difference at the pump.

    My Final Verdict and What You Should Do Today

    If you take one thing away from this, let it be that fuel efficiency isn’t about some secret driving technique or an expensive gadget you plug into your dashboard — it’s about basic mechanical maintenance that most drivers unintentionally neglect, paired with a few small adjustments to driving habits that cost you nothing to implement. You don’t need a new car or an expensive tune-up to see real improvement. You need fifteen minutes with a tire gauge, a look at your air filter, an honest assessment of how hard you accelerate from stoplights, and a check of what’s sitting unused in your trunk.

    Start today with the tires — it’s free, it takes five minutes, and in my professional experience it’s the single most common source of wasted fuel I encounter. From there, work through the checklist above over the next few weeks. None of this requires a mechanic’s toolbox or a shop visit, and that’s exactly the point. The car you’re driving right now is very likely capable of significantly better mileage than what you’re currently getting, and the fix has probably been sitting in your driveway the whole time.

  • The Oxygen Sensor: The Tiny Part Quietly Draining Your Fuel Budget

    The Oxygen Sensor: The Tiny Part Quietly Draining Your Fuel Budget

    Every week I get at least one customer standing next to their car with a printed sheet from the auto parts store’s free code scan, squinting at the words “O2 Sensor Circuit Malfunction” like it’s written in another language. Most drivers have never heard of this part until it fails, and by the time it does, they’ve usually already been burning extra fuel for weeks or months without realizing it. It’s one of the least glamorous components in your engine bay, but I’d argue it’s one of the most quietly expensive ones to ignore, because unlike a squealing brake or a rattling heat shield, a failing oxygen sensor doesn’t announce itself loudly. It just slowly bleeds money out of your wallet every time you fill up.

    What an Oxygen Sensor Actually Does Under the Hood

    Your engine’s computer, officially called the ECU (Engine Control Unit, essentially the car’s onboard brain that constantly adjusts engine settings in real time), needs to know exactly how much unburned oxygen is left in your exhaust after combustion happens. That’s the oxygen sensor’s entire job. It’s a small, spark-plug-sized component threaded directly into your exhaust pipe, usually with one positioned before the catalytic converter and another after it on most vehicles built in the last two decades. The upstream sensor measures the raw exhaust coming straight out of the engine and reports back so the ECU can fine-tune the air-fuel mixture in real time, hundreds of times per minute. The downstream sensor, positioned after the catalytic converter, monitors how efficiently that converter is doing its job of cleaning up emissions.

    When I hoist a car up on the lift and pull an old oxygen sensor for inspection, the visual difference between a healthy one and a failing one is honestly pretty dramatic once you know what you’re looking at. A healthy sensor tip has a light grayish-tan coating. A failing one is often caked in either a thick black sooty buildup, which tells me the engine has been running rich for a while, or a white, chalky, almost crusty deposit, which is a classic sign of coolant or oil contamination leaking into the combustion chamber and coating the sensor tip. Many drivers overlook this, but from a mechanic’s perspective, the real critical point is that the sensor itself doesn’t usually fail instantly—it degrades gradually, and its response time slows down years before it throws an outright fault code. A slow sensor is arguably worse than a dead one because the car keeps running, keeps passing basic checks, and keeps quietly wasting fuel without ever triggering a warning light until things get considerably worse.

    The Fuel Economy Drain Nobody Notices Until the Tank Runs Out Faster

    Here’s where this part becomes a genuine financial issue rather than just a technical curiosity. When your upstream oxygen sensor starts responding slowly or reporting inaccurate readings, the ECU can’t fine-tune your air-fuel ratio properly. In most failure cases, the sensor reports a falsely lean signal (meaning it’s telling the computer there’s more unburned oxygen present than there actually is), and the ECU compensates by dumping in extra fuel to correct for a problem that isn’t really there. That’s a rich-running condition caused entirely by bad sensor data, and it can quietly cost you anywhere from ten to twenty percent of your fuel economy without a single dashboard warning light coming on, especially in the early stages of sensor degradation before it’s bad enough to trigger a code.

    Just last week, a client brought in a Toyota Camry that had gone from averaging around 32 miles per gallon on the highway down to what she estimated was closer to 26, but she had no check engine light and assumed it was just “getting older” or maybe her driving habits had changed. When I ran live data with my scan tool while the engine was running, I watched the upstream oxygen sensor’s voltage signal switch sluggishly, taking nearly two full seconds to swing between rich and lean readings when a healthy sensor on that engine should be cycling multiple times per second. That sluggish switching pattern is something you genuinely cannot see with a basic code reader — you need live data streaming to catch it, which is exactly why so many of these problems go undiagnosed at quick-scan chain stores that just pull codes and hand you a printout. We replaced both upstream sensors for right around $180 in parts plus labor, and she called me two weeks later just to tell me her fuel economy was back where it used to be.

    What would you do if you noticed your car needing gas visits more frequently than it used to, but nothing else seemed obviously wrong? Most drivers chalk it up to gas prices or a change in their commute. In my experience, it’s vital to actually pay attention to your miles-per-tank trend over a couple of months, because a gradual, unexplained drop is one of the earliest and most reliable warning signs of oxygen sensor degradation, often showing up well before any warning light does.

    Why a Failing O2 Sensor Eventually Threatens Your Catalytic Converter Too

    This is the escalation risk that turns a $90 sensor replacement into a $1,500 repair bill, and it’s the part I stress hardest to customers who try to put this off. When the upstream sensor keeps feeding bad data and the ECU keeps overcompensating with extra fuel, that unburned excess fuel eventually makes its way downstream into the catalytic converter, the same emissions component I mentioned briefly in an earlier column, which uses precious metals to chemically treat exhaust gases. Catalytic converters are built to handle properly combusted exhaust, not raw gasoline. Repeated exposure to that unburned fuel causes the converter’s internal honeycomb structure to overheat and eventually break down internally, sometimes to the point where you can literally hear loose ceramic fragments rattling inside the converter when you rev the engine.

    Back when I was an apprentice mechanic, one of the biggest trial-and-error mistakes I made was replacing a catalytic converter on an older Honda Civic without addressing the upstream oxygen sensor that had actually caused the converter failure in the first place. Within about four months, the customer was back with reduced power and the exact same symptoms, and the brand-new converter I’d installed was already contaminated because the root cause was never fixed. My shop manager at the time made it very clear that from then on, any converter replacement had to come with a full upstream sensor inspection first, and that policy has saved plenty of comeback repairs over the years. The lesson is simple: an oxygen sensor is cheap insurance for a converter that absolutely is not cheap.

    [O2 Sensor & Related Component Cost Comparison]

    ComponentTypical LifespanApprox. Repair CostConsequence of Delay
    Oxygen Sensor (each)60,000–100,000 miles$80–$250 (parts + labor)Reduced fuel economy, rough idle
    Catalytic Converter100,000+ miles (if not damaged)$1,200–$2,500Loss of power, failed emissions test
    Spark Plugs (related strain)Varies by type$80–$250Compounds misfire and rich-running symptoms
    Air Filter (contributing factor)15,000–30,000 miles$20–$50Can mimic or worsen O2 sensor symptoms

    Reading the Warning Signs Before the Check Engine Light Comes On

    A functioning check engine light system is genuinely one of the more delayed warning tools on your dashboard, because codes for oxygen sensor circuits often require the fault to be present consistently across multiple drive cycles before the light actually illuminates. That means you’re frequently driving around with a degrading sensor for weeks before the computer officially flags it. The earlier signs are more subjective, but once you know what to watch for, they’re pretty recognizable. A rougher idle than usual, especially a slight surging feeling where the RPMs seem to hunt up and down at a stoplight, is one of the more common early symptoms. A faint sulfur or rotten-egg smell from the exhaust, particularly noticeable at idle in an enclosed space like a garage, often points to a rich condition overloading the catalytic converter’s ability to process fuel. And as mentioned, a gradual, unexplained decline in fuel economy over a couple of months without any change in your driving habits is one of the most reliable indicators available to you as a driver, long before a code gets triggered.

    [Mechanic’s Essential O2 Sensor Checklist]

    What to CheckHow to Check ItWhat It May Indicate
    Fuel economy trendTrack miles-per-tank over 2–3 fill-upsGradual drop suggests sensor degradation
    Idle smoothnessFeel for surging or hunting RPMs at a stopPossible inaccurate air-fuel data
    Exhaust smellNotice sulfur/rotten-egg odor at idleRich condition overloading converter
    Check engine light + codesFree scan at most auto parts storesCodes starting with P013X–P015X relate to O2 sensors
    Live sensor data (shop visit)Ask your mechanic to check sensor switching speedSluggish switching means aging sensor even without a code

    My honest professional take on oxygen sensors is that they’re one of the best examples of preventative maintenance actually paying for itself. Replacing a worn sensor for under $200 in most cases is a fraction of what you’ll spend chasing worse fuel economy for a year or dealing with a contaminated catalytic converter down the line. If your fuel economy has quietly crept downward, if your idle feels a little rougher than it used to, or if you’re simply approaching the 80,000 to 100,000-mile range without ever having these sensors checked, don’t wait for a check engine light to make the decision for you. Ask your mechanic to pull live sensor data during your next oil change, not just a basic code scan, because that’s the only way to catch this problem while it’s still a cheap fix rather than an expensive lesson.

  • Getting a Louder Muffler? Here’s Why You Can’t Afford to Ignore It

    Getting a Louder Muffler? Here’s Why You Can’t Afford to Ignore It

    Somewhere around the third week of a car getting noticeably louder, I start seeing the same customer walk through my bay doors with the same sheepish look on their face. “It just kind of happened gradually,” they’ll say, “and honestly it sounds kind of cool now.” I get it—there’s something almost satisfying about a car with a little more growl to it. But here’s the uncomfortable truth I have to deliver almost every single time: that “cool” sound is very rarely an upgrade. It’s decay. And depending on where that decay is happening in your exhaust system, you could be looking at anything from a minor annoyance to a genuine carbon monoxide risk sitting a few feet from your passenger cabin.

    Why Your Muffler Gets Louder Over Time (It’s Not Just “Wear and Tear”)

    To understand why a muffler gets loud, you have to understand what it’s actually doing when it’s working correctly. Your exhaust system channels hot, high-pressure gases away from the engine through a series of pipes, and the muffler’s job is to use internal baffles and chambers (essentially a maze of metal walls and sometimes packed fiberglass material) to cancel out sound waves before they exit the tailpipe. When I cut open a dead muffler on the bench, what I usually find is either a rusted-through outer shell with a hole punched clean through the metal, or baffles that have physically rattled loose and broken apart from the inside, turning what should be a controlled sound chamber into basically an empty tin can.

    Rust is the number one killer, and here’s the detail most drivers don’t think about—your muffler doesn’t just rust from road salt and moisture hitting it from underneath. It actually rots from the inside out just as often, sometimes more aggressively. Every time your engine runs, combustion produces water vapor as a byproduct, and that moisture condenses inside the muffler, especially if you’re someone who does a lot of short trips where the exhaust never gets hot enough for long enough to fully evaporate that condensation. Over years of short commutes, that trapped moisture eats away at the metal from the inside, and by the time you can see rust on the outside, the inside is often significantly worse. When I hoist a car up on the lift and give an old muffler a firm tap with a wrench, a healthy one gives a solid, dull thud. A rotted one gives this hollow, crumbly rattle, and honestly, sometimes rust flakes just fall out of the seams right there on the lift.

    Many drivers overlook this, but from a mechanic’s perspective, the real critical point is that the loudness itself is only a symptom—the actual failure is a breach in a pressurized, sealed system that was never supposed to have gaps in it. And that breach is exactly what makes this more than a noise complaint.

    The Real Danger: Carbon Monoxide, Not Just Decibels

    This is the part of the conversation where I stop being casual and get very direct with customers, because a loud muffler is genuinely a safety issue, not just an inconvenience. Your exhaust system is designed as a fully sealed path that carries combustion gases, including carbon monoxide, away from the engine and out past the rear of the vehicle. When there’s a hole, crack, or separated joint anywhere along that path, exhaust gas can escape before it reaches the tailpipe. Depending on your vehicle’s undercarriage design and where exactly that leak is located, those gases can potentially find their way into the cabin through the floorboards, the trunk seal, or the ventilation system, especially at highway speeds when air pressure changes around the vehicle create a slight vacuum effect that can pull outside air—and exhaust—into the cabin.

    Just last week, a client brought in a Hyundai Elantra with exactly this issue. She mentioned almost as an afterthought that she’d been getting mild headaches on her commute and just assumed it was stress from work. When I got the car on the lift, I found a completely separated joint right where the mid-pipe met the muffler, with a gap you could fit two fingers through. That’s not a small leak—that’s exhaust gas venting almost directly underneath the passenger floor pan. I told her flat out that she needed to stop driving that car with the windows up until it was fixed, and I moved her to the front of the queue that day. Carbon monoxide poisoning is genuinely one of the more insidious dangers in vehicle maintenance because you can’t see it, you often can’t smell it in low concentrations, and the early symptoms—headache, drowsiness, mild nausea—get written off as being tired or stressed. What would you do if you started noticing recurring headaches specifically during your commute and nowhere else in your day? That pattern is exactly the kind of thing that should send you straight to a shop for an exhaust inspection, not an aspirin bottle.

    Diagnosing the Location: Front Pipe, Mid-Pipe, or Muffler Itself

    Not every loud exhaust problem is the muffler specifically, and this is where a lot of well-meaning DIYers waste money by replacing the wrong part. When I’m diagnosing a noise complaint, I listen for where the tone changes as I move a mechanic’s stethoscope or even just my ear along the length of the exhaust with the engine running and the car safely supported. A leak right off the exhaust manifold (the metal component bolted directly to the engine that collects exhaust from each cylinder) produces a sharp, tinny, almost popping sound that’s loudest right under the hood or right at the firewall. A leak further back, at a flex pipe or mid-pipe joint, tends to sound more like a steady drone that gets louder under acceleration and quiets slightly at idle. And a fully rotted muffler produces that classic deep, rumbling roar that’s fairly consistent regardless of throttle position, because the sound-cancelling chambers themselves have failed rather than there being one discrete hole.

    Back when I was an apprentice mechanic, one of the biggest trial-and-error mistakes I made was quoting a customer for a full muffler replacement based on sound alone, without actually getting the car in the air first. Turned out the muffler was fine—it was a cracked flex pipe just ahead of it, a much cheaper fix. My mentor caught it before we ordered parts, but it taught me that you diagnose with your eyes and hands, not just your ears from outside the car. That lesson has saved plenty of my customers unnecessary expense over the years, because a full exhaust system replacement and a single flex pipe repair can be a $600 difference.

    Cost Reality Check: What a Fair Repair Quote Actually Looks Like

    This is where I see a lot of drivers get taken advantage of, particularly at chain shops that push whole-system replacements when a targeted repair would do the job. If the muffler itself is rotted through, replacing just the muffler with a quality aftermarket unit typically runs $150 to $350 in parts depending on your vehicle, plus one to two hours of labor. If it’s isolated to a joint or a small section of pipe, a patch weld or a partial pipe section replacement can sometimes be done for under $200 total, and it’s a completely legitimate repair when the rest of the system is still structurally sound. Where I get skeptical is when a shop insists on replacing the entire exhaust system, from manifold to tailpipe, when only the rear section has failed. Sometimes that’s genuinely necessary—if the pipes are all similarly aged and rusted, doing it piecemeal means you’re back in the shop again in eight months for the next section. But it’s worth asking directly: “Is the rest of my exhaust system structurally sound, or are we replacing all of it preventatively?” A shop that can’t give you a clear, specific answer to that question is one I’d get a second opinion from.

    [Exhaust Noise Diagnosis & Repair Cost Comparison]

    Symptom / SoundLikely LocationTypical Repair CostUrgency Level
    Sharp, popping tick near the engineExhaust manifold gasket/leak$120–$300Moderate–High
    Steady drone, worsens on accelerationMid-pipe or flex pipe joint$150–$400High
    Deep rumble, consistent at all speedsMuffler rotted internally$200–$500High
    Rattling metallic noise over bumpsLoose heat shield (thin metal cover protecting nearby components from exhaust heat)$50–$150Low–Moderate
    Full system deeply corroded throughoutEntire exhaust system$600–$1,200+High

    What You Should Actually Do This Week

    If your car has gotten noticeably louder over the past several weeks, don’t wait for it to get dramatically worse before addressing it, and don’t assume it’s purely cosmetic. In my experience, it’s vital to get the vehicle physically inspected on a lift rather than trying to diagnose exhaust issues from the driver’s seat, because sound alone can be genuinely misleading even to people who’ve been doing this a long time. If you’re mechanically inclined, you can do a basic visual check yourself—park on level ground, let the car cool completely, and slide underneath with a flashlight looking for reddish-brown flaking rust, visible daylight through any section of pipe, or black soot staining around joints, which indicates gas is actively escaping at that seam.

    [Mechanic’s Essential Exhaust Checklist]

    What to CheckHow to Check ItWarning Sign
    Visible rust or holesFlashlight inspection under a cooled vehicleReddish flaking or visible daylight through pipe
    Joint connectionsLook for soot staining around pipe seamsBlack sooty residue means active gas leak
    Cabin symptomsNote headaches, drowsiness, or nausea during drivesPossible cabin exhaust intrusion
    Sound timingNote if noise changes with acceleration vs. idleHelps pinpoint leak location before shop visit
    Heat shield rattleListen for metallic buzzing over bumps at low speedOften a cheap fix, but ignored can worsen

    Whatever you do, don’t drive around for months telling yourself it’s just an aesthetic issue you’ll get to eventually. A loud exhaust is your car directly telling you that a sealed, pressurized system has failed somewhere, and until you get underneath it and see exactly where, you genuinely don’t know whether you’re dealing with a $150 fix or a legitimate health hazard sitting inches from where you and your passengers are breathing. Get it on a lift this week, ask for specifics on exactly where the failure is, and don’t accept a full-system quote without a clear explanation of why anything less won’t do the job.